Peter Smith

Active Member
If anyone produces more realistic brick papers than this I'd like to see them:

BRICK.jpg

As for the printing Paul, you save the artwork onto a memory stick and take it to your local print shop. They can put the stick into their colour copier and print as many sheets as you want on thin good quality paper and with fade proof spirit based ink. It's also cheaper than doing it yourself at home.

I don't want to advertise my business here, it's not what I joined for, but you may want to have a look at www.kirtleymodels.co.uk for building papers.

Peter
 

LarryG

Western Thunderer
Peter Smith had it right as far as I'm concerned. Glue your embossed sheet to thick Plasticard and then glue that to plywood with Evostik contact adhesive. I did this when building a station platform. A made a rough plywood former then built a Plastikard skin job on top of it.
 

Focalplane

Western Thunderer
Yes, I am convinced. I have to persevere with the embossed bricks to some of the platform support walls because I don’t have the room for the 1mm thick backing and leave enough overhang. By the time I have the platform surface fixed the problem should be OK. When it comes to the platform surface I will definitely be using the “skin job”. And the station building will be using custom printed papers. The same will apply to the viaduct parapet walls.

Also, Larry, I like your station building for Corwen. I see the company makes a signal box kit based on Bearley West which was down the North Warwickshire line. It’s not as large as Moor Street’s was but has the right window layout and similar architectural style and period. Some modification can be justified to make it look more like the prototype.

Edited in red
 
Last edited:

Focalplane

Western Thunderer
To explain my next steps on the platform area.

The card(s) on the last two photos above are the start of a temporary fitting to gauge the maximum width, particularly on the curves of Platforms 1 and 2. They will be then used to cut hardboard for the base of the platform. This will then be fixed to the upright walls after I have completed fitting brick veneer and painted it dirty Staffordshire Blue.

The platforms were paved (and the renovation looks the same) so Slaters paving slabs will be used with an appropriate platform edge for the 1950s. I won't be able to complete this until the second traverser is built.

At the same time I have made the base for the station building and concourse. Maps and plans show that the building was skew to the tracks, no doubt following the line of the original Moor Street. I have included this skew and the footprint of the station and concourse is to scale with no compression. This area is iconic and will not be compromised.

There remains the roof over platforms 2 and 3. This will extend about half way down the island platform as in the prototype. Platform 1 only had a very short canopy.

There is quite a lot of space adjacent to the release road but I am inclined not to fill it up, just leave as a cobbled area with wooden walkways as seen in some photos of the Goods Station. Much use was made of setts in the area, the Bull Ring itself was cobbled so that horses could get a grip on what was quite a steep incline for an inner city thoroughfare. Granite sets are still present in some streets in Digbeth:

165803495_9006b89037_o.jpg

165806038_ff9636ebf5_o.jpg

Taken a few years ago when on a photo walk.

More research on a possible signal box has resulted in a possibility for Rail Model to modify the Bearley West kit. They will let me know if this can be done in a few days time.
 

simond

Western Thunderer
Those setts are just crying out to be laser cut. I like the photographic stuff, but I feel that some texture is vital, particularly in brickwork.

Regarding flagstones, I made a load for my previous layout using plasticard cut to size, painted with multiple spray cans and dusted with talc, then shuffled and stuck down.

This is the only photo I can put my hand on, sorry about the poor quality, I’m not convinced by my attempt at cobbles, used embossed card for them. Stippled paint on with firm closed cell foam. Almost worked, I feel.


2732FE8D-1F57-4CB7-AB09-F5A5FB9C7A06.jpeg


Atb
Simon
 

Andy P

Western Thunderer
Hi Paul, Yes, I'm afraid I'm here now, and must say, I am impressed with your progress mate.

Well done.
Andy.
 

Focalplane

Western Thunderer
I have a small device made by Giles of this parish which I am planning to use to make cobble setts. The website is bygiles.com. He also sell gutter brackets, manholes and drain covers. I agree about texture being more noticeable in 7mm scale but Peter’s brick paper certainly maximises the look.
 

Focalplane

Western Thunderer
Sunday morning and I really should take a break and do something else, but the urge to continue is greater. Tomorrow I have a contractor coming in to fit a new air conditioner (just in time for the seasonal heatwave?) so I will have to be around and can also work in the railway room then as long as there is lighting available.

First, more on the platforms and station building. The extremely valuable book on the renovation of Moor Street includes a plan of the station building which I doubt is copyrighted (if not true I will remove it, but it helps to show what I have in mind):

MoorStreetStationPlan.jpg

I have printed this to scale and the next photo shows pieces laid out on the station/concourse footprint:

IMG_0711.JPG

You can see that there has been some shrinkage, but not much. The hidden loops behind will have a scenic "wall" of building fronts.

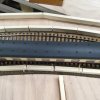
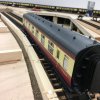
Next, how to finish off the curved platform edges. First take a ~60ft coach, then some wood HO sleepers bought in Calgary years ago, and some white tack. Fix the sleepers at the correct distance from the centre of the coach, then scale off the ends of the sleepers and transfer to the hardboard platform bases:
IMG_0712.JPG

IMG_0713.JPG

Final thought before I disappear into the rabbit hole and a question for followers.

Yesterday I did finally receive the additional 6 point levers and here are all 25 levers needed to control points and signals. I have laid them out on the edge of the layout surface at the station throat, opposite where the real signal box stood (represented by the Dremel box). I plan to have an indicator track plan with LED lights below the levers. My baseboard is higher than most because in 7mm scale you need more of what I call an eye level view than for the smaller scales. Here is the possible control panel location:

IMG_0710.JPG

Any comments? The levers do obstruct the view but as operations are going to be important I feel the levers should be prominent. I had thought of the track plan being above board level but that really would be "in the way".

I am also thinking of adding WiThrottle so that the locos can be controlled from my iPad which would mean that two people would be able to run the layout, one the train driver(s), the other the bobby. And not get in each other's way.
 

simond

Western Thunderer
Levers on a shelf just below baseboard height, and track diagram hanging on the wall above the backscene ?

I use Touchcab on my iphone or iPad with my Lenz kit. Works fine. It means I have five throttles on a locoshed, which is beyond overkill, but I’m planning ahea...

Atb
Simon
 

Yorkshire Dave

Western Thunderer
Next, how to finish off the curved platform edges. First take a ~60ft coach, then some wood HO sleepers bought in Calgary years ago, and some white tack. Fix the sleepers at the correct distance from the centre of the coach, then scale off the ends of the sleepers and transfer to the hardboard platform bases:

I'd be inclined to use one of your 64' Mk1 coaches to use a a gauge so if you have 'visitors' to play then there is less room for damage to be caused if they 'accidentally' shunt a 64' carriage into a platform designed to take 60' or less vehicles.

I would also use a loco with the widest cylinders i.e. GW prototypes to check the platform clearances.
 

Focalplane

Western Thunderer
Levers on a shelf just below baseboard height, and track diagram hanging on the wall above the backscene ?

I use Touchcab on my iphone or iPad with my Lenz kit. Works fine. It means I have five throttles on a locoshed, which is beyond overkill, but I’m planning ahea...

Atb
Simon
Yes, Simon, both suggestions are on my valid list, though the track diagram on the wall would take a lot wiring and could spoil the view. I have used WiThrottle before and have the necessary components which work with my kit.

A bobby’s point of view as the Ivatt trundles by on a Down freight, off to LMR territory:

795CB0FE-E514-4806-8638-8A0480FB6D63.jpeg
 

Focalplane

Western Thunderer
I'd be inclined to use one of your 64' Mk1 coaches to use a a gauge so if you have 'visitors' to play then there is less room for damage to be caused if they 'accidentally' shunt a 64' carriage into a platform designed to take 60' or less vehicles.

I would also use a loco with the widest cylinders i.e. GW prototypes to check the platform clearances.
Dave, the Large Prairie was used as a check as well. I am allowing a little leeway but you are correct to suggest running a Mark 1 through before fitting the tops of the platforms to the base.
 

simond

Western Thunderer
Paul

The wiring for the diagram might not be as difficult as you imagine...

Let’s get the traversers working, and then discuss...

Atb
Simon
 

Focalplane

Western Thunderer
Paul

The wiring for the diagram might not be as difficult as you imagine...

Let’s get the traversers working, and then discuss...

Atb
Simon
I really need to get some point levers operational in the next ten days so that Susie gets to understand basic switching, etc. she’s a bright young thing so I need to get her in the loop. The traversers won’t be operational until after Telford but I do want both clashing priorities to work in the end!

The track diagram, by the way, would be angled at 45° below the levers.

I really must wire up the tortoises, I will wear them out otherwise, moving the points by hand.

Of course there are about 20 other priorities. . . .
 

Peter Smith

Active Member
I may be jumping ahead and you may already be doing it this way, but when you come to do the platform surface, especially the curved parts, use clear plastic (I use 3mm thick Aerial bought from B&Q). This can be laid over the platform side walls and because it's clear they can be seen, allowing the shape of the surface to be drawn on using a marker pen. Cut along the lines with a Stanley knife and you get a perfectly shaped surface ready to stick in place.

Peter
 

Focalplane

Western Thunderer
It's ironic that on the hottest, most humid day of the year so far the air-conditioning engineer is installing a new unit. I have mostly retreated to the railway room this morning and have been quite busy. First I have decided to go with the signal box levers on the layout. I may cover them with a replica of the Goods Station building eventually. I have also been working on the track diagram which will be below the levers and canted at 45º.

I have printed off the station building plan and attached it to the cardboard base (which will be used for building, the actual structure will be on hardboard. I have one elevation diagram to assist in working out heights of both the brick building itself and the structure holding up the concourse roof. This means I can probably start on a mock up of the building though I must first go to the site and take a lot of photos and measurements.

IMG_0717.JPG

If you have visited the renovated station you will soon realize that the accommodation has changed since the building was closed. I imagine that the interior structural walls have not been modified but this will be checked. I have been able to get a bit more room between station building and tracks by shrinking the plan by about 3%.

In addition to the brick structure shown there is also a wall along the far side of the concourse which supports that end of the roof. Against this wall is shown a newsagents kiosk though one was not installed until after WWI, and then as a Wymans. I expect it was similar to the one on Platform 7 at Snow Hill.
 

Peter Smith

Active Member
The one I modelled or Snowe Hill was guesswork as far as the colours are concerned; if you can find out the true colours I'd be very interested.

Peter
 
Top