On My Virtual Workbench...

Simon

Flying Squad
And presumably easily scale-able to 1/32 in the world of 3d printing.

Your sprung option is what I do in G1. One thought if you are going down that route is to create a recess in the top surface of the axle box in which to partly "lose" a spring, possibly combined with a slightly lower top surface, this enables a functional coil spring to operate "out of sight" when viewed from normal angles.

Certainly in the G1 world, some stunning models are badly let down by not thinking this bit through and having visible non prototypical coil springs on view, I think the otherwise fabulous "Golden Age" coaches suffer from this problem.

All that said, if one were really clever then the leaf springs would actually work - I don't attempt it myself!

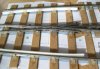
Don't you chaps need a few LSWR and MR axle boxes.......

Simon
 

Stevesopwith

Western Thunderer
Brilliant job Dave :thumbs: ..... will be placing order today!

Colin....... I got a comfortable sliding fit using .022" material for the W-Irons, with a gap of 5mm. ( Full size were 8 5/8" )

Cheers.... Steve.
 

S-Club-7

Western Thunderer
Latest addition to the Off The Rails shop:
GWR_BC7_Assembly_Top_Right.jpg

GWR_BC7_Assembly_Front.jpg
It's a non-functional GWR "slab & bracket" BC7 chair kit (that's a 7A chair for the rest of us). The slab is in two parts which can be trimmed back to suit flangeways from 1.75mm downwards; the holding down saddle (spares included!) may also need some fettling to clear overscale flanges.
GWR_BC7_sprue.jpg
The jaws can also be filed to suit other angles of crossing, just like the no-longer-available whitemetal product from C&L.

Available 3d-printed in acrylic, brass or platinum...
 

S-Club-7

Western Thunderer
They look fantastic Dave I like the idea of using different materials :thumbs:so can you use them for 1:8 crossings then?
Len
You obviously haven't seen the price of the platinum variant...
They won't be an exact fit for 1in8 but a little adjustment of the jaws with a file should get them close enough for a non-functioning cosmetic chair.
 

S-Club-7

Western Thunderer
All my own work...
xing2 unpainted overhead view.jpg
...except I didn't grow the trees to make the plywood or boil down horses to make the wood-glue; neither did I mine the iron ore and coke for the steel rail; neither did I make my own 3D printers nor the nylon and acrylic chemicals for them to print. But apart from that (and Templot and a sheet of flattened bleached wood pulp) it's all my own work; made with tools and software obtained from elsewhere. There's not much of my input to this scratch-build is there? :(
Xing2 unpainted close up.jpg
The black marks on the end of the separate tapered keys indicate the narrow end; the red and green marks indicate left and right components (red = left = port [a red wine] and green = starboard = right -- well that's just exhausted my nautical knowledge...). A couple of pieces were launched into outer space by the tweezers so required plastic rod and strip replacements. The one solder joint looks worse in the photo than in reality, but should really be better; I'll try harder next time.

Technical stuff: a 1 in 6 left-hand common crossing using post-1924 castings based upon the LNER drawings of the time modelled in ScaleSeven. Chairs and keys are 3D printed in acrylic by Shapeways but will require some minor changes before they become available from the Off The Rails online shop. Chairs shown include S1, S1-J, L1, CCL, CC, CCR, 6X, 6B and 6C all with separate keys; 6A with separate spacing blocks; knuckle block and wing blocks; plus 8 bolt and washer assemblies to hold it all together. The check rails are printed in sintered nylon resulting in a textured surface which is fantastic for representing rust; these are a few thou less high than the running rails which reduces collateral damage whilst track cleaning and represents worn rail seconded from other duties. 108 components in less than 6 inches of track.

Available for inspection tomorrow at the East Anglian Area Group of the ScaleSeven Group's monthly meeting at Sudbury, Suffolk. All welcome: you just require an interest in railways (or cars or aircraft or ships or architecture or just about anything else provided it's pre-1960).
 

Attachments

  • Xing2 unpainted angled view.jpg
    Xing2 unpainted angled view.jpg
    367.1 KB · Views: 12

S-Club-7

Western Thunderer
Colin,

As discussed yesterday; a GER crank axle. I'll try and get a couple printed for the next meeting. How about a plastic one for split axles as well as a stainless steel one?
GER Crank Axle v01.jpg
According to the GERS Gardner drawings the webs and axles get thicker the further away from the frames they are. If this is going to cause problems during assembly then I can re-draw; it's quicker than turning one from solid steel!
 

Compton castle

Western Thunderer
Slab & bracket chairs are lovely, very crisp and plenty of detail as with the ATC chairs.
Looking forward to the buffer stops
Steve
 

Eastsidepilot

Western Thunderer
Colin,

As discussed yesterday; a GER crank axle. I'll try and get a couple printed for the next meeting. How about a plastic one for split axles as well as a stainless steel one?
View attachment 43353
According to the GERS Gardner drawings the webs and axles get thicker the further away from the frames they are. If this is going to cause problems during assembly then I can re-draw; it's quicker than turning one from solid steel!

Looks good Dave, with regards to dimensions, in the past, I have stuck to a standard set of dimensions for 2 cylinder GER cranks with 2.5mm thickness for webs and 2mm for the journals and eccentrics giving an o/a of 22mm. This gives an easy fit between the horn blocks usually about 22.3-22.5mm for S7 frames of 0.6mm ( 0.024") thickness.

Col.
 

S-Club-7

Western Thunderer
Another inspiration from the last S7 meeting in Sudbury; LNER J67-8-9 brake blocks and hangers 3D-printed; but ready assembled. And, if I've got the clearances correct, then it'll all move where it should. Not intended for servo-powered working brake gear but will leave enough wiggle room so that wheels can be dropped during construction.
GER Brake Hangers v08a.jpg
Typical GER design - each hanger is different from front to back; and from left to right!
The mounting stud at the top is sized have a 10BA die run along it so that it can be bolted to the frames. Argh, the frames. Even S7 modellers have trouble getting frames scale width apart so a number of spacers are provided so that the top brackets can be positioned correctly with respect to the wheel treads.

GER Brake Hangers v08b.jpg
The final sprue. The different colours indicate the (hopefully) separate parts.

Colin,
I've found some more details re. GER crank axles so will have another go at this soon. It looks as if it will be possible to print a nearly 3/16" hole right through the webs and eccentrics. All I have to do is draw it...
 
Last edited:

Scale7JB

Western Thunderer
Oooh! I'm building a J68 at the moment, and the brake hanger and shoe etches are sitting on the workbench about to be mounted...!

When might they be available Dave?

JB.
 
Top