Wishyouwerehere
Member
Hi folks,
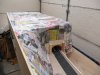
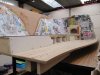
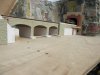
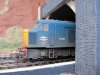
its my first attempt to show you a layout that i have been building.I don't really know how this works but here goes.It is the section of sea wall between Teignmouth station and Parsons tunnel.It is 28 feet long.
If i can manage it,pictures will follow.
Any responses that i get may not been replied to for several days.I don't live on my computer.


.jpg")


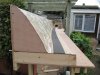
") I never did work out why they built Sprey Point, such an odd and very large piece of infrastructure to build and with a boat slip too.
I never did work out why they built Sprey Point, such an odd and very large piece of infrastructure to build and with a boat slip too.