7mm Martin Finney 7mm LSWR M7

7mmMick

Western Thunderer
As per Richards build I'll repeat to myself, " I must not start the V2's.. I must not start the V2's..!"

JB.

How can you resist it mate?? I wasn't lucky enough to get hold of one of these before Martin retired but you never know what will turn up second hand? Hopefully one day I will have a crack at one......

Mick.R
 

7mmMick

Western Thunderer
So I've pushed on a little further today, moving onto the cab front, back and interior section in the instructions. The coal hole door is made up in the flat and like the front folds up nicely to form the lockers;
IMG_2876.jpg
To complete the upper part of the cab rear you get a full length piece and then an overlay to form the interior with a pretty curve finishing above the top of the coal hole. This is relatively straight forward but has to be formed with out any former as a guide, however the instructions give you the side profile. To assist me in forming this I marked where the curve should start and finish on the back. the overlay is then formed and sweated on;
IMG_2878.jpg
This part then tabs in and once fixed the floor is fixed followed by the locker lids;
DSCF3842.jpg
DSCF3843.jpg
You can see here the two holes on the lower cab rear, this is a neat way of allowing room to solder the curved overlay from behind so the front joint is nice and neat.

Theres still some cleaning to do around the cab space but i'll not bother with the other bits as the tanks and bunker will hide it. There's a reasonable amount of work to get here, more than it looks. One top tip to finish is to constantly offer up the side sheets so you know all will fit as there's no going back as the next step is to fix the boiler assembly.

Mick
 
Last edited:

S7BcSR

Western Thunderer
Beautiful build Mick. One word of warning about the injectors though, the drawings and comments are not exactly clear and I made the error of cutting off part of the firebox for my model (30476). This was wrong but having looked at many photographs and studied/read the instructions many times I was convinced and so did it but as soon as I had done the deed I found the photograph that told me I shouldn't have done it. Oh well.

I have some 40 - 50 detail photos of 53 taken in 2010 including cab and you are welcome to have copies if they should help but they may be too recent for your model.

Rob
 

7mmMick

Western Thunderer
:thumbs:
Beautiful build Mick. One word of warning about the injectors though, the drawings and comments are not exactly clear and I made the error of cutting off part of the firebox for my model (30476). This was wrong but having looked at many photographs and studied/read the instructions many times I was convinced and so did it but as soon as I had done the deed I found the photograph that told me I shouldn't have done it. Oh well.

I have some 40 - 50 detail photos of 53 taken in 2010 including cab and you are welcome to have copies if they should help but they may be too recent for your model.

Rob

Thanks Rob:thumbs: I shall keep an eye on the injectors, I had in my mind that I would leave them off initially to assist painting but that's yet to be confirmed.

And yes please, any detail photos you could provide would be a great help. At the minute the sanding controls at the front splasher are difficult to see with the photos I have. Any detail shots here would be ideal and do you know what position they should be in when shut?

I can PM my email if that helps with photos etc,

Thanks again Mick
 

7mmMick

Western Thunderer
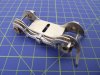
Some more progress on the M7. The boiler/smoke box assembly are fixed permanently at this stage, but it's a good idea beforehand to make the openings in the footplate to accommodate the coupling rod oil pot on the driving axle (pictured later)

I then moved onto the tanks/cab/bunker. The loco i'm building was fitted with water heating apparatus from new, which lead to the tanks obviously containing hot water for efficiency purposes. To guard against this blistering the paint on the tanks and members of the public potentially burning themselves they were fitted with cladding plates. These are provided in the kit and Martin offers a neat way of attaching them seamlessly. The rear of the tank is marked out for a 3/16 drill and you have to turn the thing to swiss cheese first. Next you tack the cladding plate in place and then flood solder in from the rear, which makes for a nice tidy job. A good job really as otherwise all the water will run out:D
DSCF3846.jpg
The fireman's side assembled, the hole in the tank front is to accept the heating pipe from the smoke box
DSCF3849.jpg
DSCF3852.jpg
Martin then advises to detail the boiler and smoke box prior to fitting the tank assemblies. The piano front took a little time forming but better to take your time and get this spot on as it's forms the face. Once this was fitted the sanding controls and riveted sandbox angle followed, then some lovely lost wax castings. I particularly like the piano front handles, although I pinged one off the bench and it took me about twenty minutes to find it:rant:
Finally here I fitted the handrails. a blower valve casting is provided, which again is spot on;
DSCF3865.jpg
DSCF3862.jpg
The first picture shows the only section of handrail that is permanently fixed at the moment, the remainder is removable to assist lining. I made the front section in three parts to make it easier to form. Next job here will be lamp irons but i've yet to decide whether to replace the kit ones with LG castings, as they do look very nice. I've also tacked the driver's side tank on but i'll post more up when i'm further on with this part of the build,

Mick.R
 

FiftyFourA

Western Thunderer
Mick,

Very nice modelling. Will you be bringing it along to the next meeting at Locomotion, whenever Simon organises it?

I want to know how you keep such tidy workbench? Even though I still can't do anything after my hand op, my bench still looks like it has been 'bitz'd'.

Peter
 

7mmMick

Western Thunderer
Mick,

Very nice modelling. Will you be bringing it along to the next meeting at Locomotion, whenever Simon organises it?

I want to know how you keep such tidy workbench? Even though I still can't do anything after my hand op, my bench still looks like it has been 'bitz'd'.

Peter

:))Hi Peter,

Yes, i'll bring it along, although I'm not sure when the next meeting will be. Oh don't worry my bench looks something similar to yours. For these pictures I cheat and use a spare brand new cutting mat and a large sheet of 60thou plasticard behind. Makes for nice pictures that way:thumbs:

ATB Mick
 

S7BcSR

Western Thunderer
:thumbs:

Thanks Rob:thumbs: I shall keep an eye on the injectors, I had in my mind that I would leave them off initially to assist painting but that's yet to be confirmed.

And yes please, any detail photos you could provide would be a great help. At the minute the sanding controls at the front splasher are difficult to see with the photos I have. Any detail shots here would be ideal and do you know what position they should be in when shut?

I can PM my email if that helps with photos etc,

Thanks again Mick

Mick, sorry I have been off this line this week. I will look out some photos after I get back from the ALSRM mtg in Reading tomorrow. I have your email anyway - provided S7 membership list is up-to-date.

Rob
 

7mmMick

Western Thunderer
I've had the re profiled wheels sets back from Colin for a while now and have reached a natural pause on the body (photos to follow this week). So with that in mind I turned my attention to the frames. The kit provides several options on building the frames, solid brass, sprung horn blocks or compensated. I have chosen the later, as in S7 you need something wobbly to assist smooth running. The kit is designed to be built compensated and I have chosen to use the Finney etched horn guides and brass horn blocks. These are an extra but well worth it.

They fold up easily and go together without issue. Using 188degree solder here is a really good idea to prevent them from falling apart on fitting to the frames. So they can accept the compensation beam an etched slot is cut out in the guide. This is half etched to make the job straight forward. Horn guides prepared;

DSCF3868.jpg
Next I moved onto the frames and as I always prefer, I tacked them together and cleaned the etch cusp off as a pair as it's imperative everything stays nice and true here. Following the instructions one horn guide was attached and then the frames were soldered together, making sure I checked regularly that all was square. The kit provides option fro different width frame spacers. I used the widest spacers and opted for tapered rear frames as advised. The rear frames can be built parallel if preferred and smaller spacers used but it will all come down to personal preference and what curves your loco will have to negotiate.
DSCF3870.jpg
DSCF3872.jpg
DSCF3871.jpg
DSCF3873.jpg
There are also alternative bogie pivots to assist on tight curves but I've gone for the standard fitment. Coupling rods were then made up to set the frame jig and fit the remaining horn guides. They were fitted with no issues and I have to stay they were a joy to use. In the past I have used lost wax brass castings, which take a lot of heat for the solder to flow, which can cause issue with other bits falling off. Not the case here, which was a welcome change. Next it was onto the compensation beams. Brass tube is supplied and when fitted this allows the beams to rotate around a central pivot independent to each other;
DSCF3877.jpg
DSCF3880.jpg
DSCF3881.jpg
 

7mmMick

Western Thunderer
And the final parts fitted today were the brass frame overlays, which really bring the frames to life. The front brake hanger pivot is fitted to assist alignment and then they are tack soldered around the outer edge. The beauty of working N/S and the thin brass overlay is as long as there is plenty of flux the solder will track around and flood the two with very little heat.
DSCF3886.jpg
DSCF3887.jpg
I forgot to add that prior to fitting the overlays the frames were tested to confirm all ran true, which it did. Although I have only had little time here and there at the frames I have to say that this was a relatively quick process, made easy by the well designed nature of these frames. Next onto the bogie and then detailing work on the body.

Mick.R
 

FiftyFourA

Western Thunderer
I suppose once you have mastered the M7 its back to the NER and a class O (G5 for the uninitiated). I look forward to see one.
 

7mmMick

Western Thunderer
It's been a busy few weeks but I've been on the bench here and there when I can. I managed to pick up a few detailing bits from Doncaster and the wheel sets came back from @eastsidepilot ( cracking job as usual Col:thumbs: ), so I got cracking with the frames. First I tackled the bogie. The main body folds up and the main frames are soldered to the sides. Next the axle boxes are fitted with the aid of a jig. Be warned here, the axle boxes need to be reamed 5/32 and not drilled out. If you use a drill it can go badly wrong, guess how I know:rant:. Once fitted the axle boxes look lovely, the usual Martin Finney high standard.
DSCF3897.jpg
The tarnishing is flux not cleaned off and this has sat on the bench a while, nothing the fibre stick won't sort. Next are the equalising beams/springs. These are made up from a number of laminations and take a little while to clean up but look the part when finished. They are made separately using a basic jig as the instructions advise;
DSCF3900.jpg DSCF3898.jpg
The bogie finished with spring wires fitted for side control. You will see here I have filled the back of the main frames away 2mm, so there is a step from the rear axle box. This allows clearance on the brake pull beam, other wise it would cause a shorting issue;DSCF3908.jpg
DSCF3902.jpg

The kit supplies washers to control side play on the axles but I opted for brass tube instead. It can just be seen here;
DSCF3915.jpg
 

Attachments

  • DSCF3895.jpg
    DSCF3895.jpg
    88.3 KB · Views: 6

7mmMick

Western Thunderer
Whilst on and off with the bogie I finished off the frames. Fitting the final etched items and the main castings for my chosen loco. All that is left to do here is fit some copper pipe work to the duplex pumps but this will be done after painting. The axle boxes were chemically blackened and then fitted, kept in place permanently by the coil and leaf spring assemblies. More lovely lost wax bass castings :D
DSCF3920.jpg
DSCF3921.jpg
Wheel sets fitted with washers behind, as supplied by the kit. The only things remaining to fit here are the other crank pin nuts ( LG supplied ) and some brass wire for the oiling corks on the coupling rod. I quite the LG crankpin nuts and although not 100% right they're a million times better than what's supplied by Slaters IMHO.
DSCF3927.jpg
DSCF3930.jpg
DSCF3929.jpg
I'm awaiting parts for the gearbox so this, along with the motor and pick ups will be fitted after paint.

ATB Mick
 

Scale7JB

Western Thunderer
Really lovely work Mick, and nice to see you have some time to be able to progress a build, at a reasonable pace.

JB.
 

7mmMick

Western Thunderer
Really lovely work Mick, and nice to see you have some time to be able to progress a build, at a reasonable pace.

JB.

Thanks pal, it's nice to be back at the bench. When I have a free day I can make real headway. Another good stint today and we're not far off ready for paint:thumbs:

Mick
 

Steph Dale

Western Thunderer
Mick,

Have you deliberately not fitted the additional pivot to the rear bogie (part 53) or is it an oversight? In my experience with the one I built in P4 it does help. One other thing is the side-control springs; there should be some spring steel wire in the kit which works well and it appears you're using something else? Although Martin doesn't say so, I wouldn't solder it in place either, just leave it long and splay out the ends; it gives more flexibility.

Steph
 

oldravendale

Western Thunderer
Additional pivot - I agree. The Adams Radial works very well using the MF system.

Side control springs: yes, there should be material in the kit and Martin's advice is to fix one end only and leave the other free. I can vouch for that system working well too!

Brian
 
Top