7mm The Derby Line - Rolling Stock

richard carr

Western Thunderer
Tony,

I got about as far as you have with your model and it's been stuck in a box for a couple of years (alongside a completed split-axle tender chassis). I couldn't find the correct pattern con rods from the trade and haven't yet got round to making the ones I need, so I'll be very interested to see how you go about it!

Steph


So Steph what is wrong with the Con rods, would it be possible to etch some correct one s ?

Richard
 

Steph Dale

Western Thunderer
Richard,

It wouldn't be a problem and, indeed, they're on the list for my next test etches.

The difference to most normal inside con rods is that they're marine big ends, not adjustable for length at either big or little ends and heavily fluted.

Steph
 

dibateg

Western Thunderer
The Griffin inside con rods have the marine type big ends. I wanted to create something a little more representational, yet still practical to install and maintain. I experimented making up big ends from thick sheet brass, but my engineering skills ( I blame the equipment ) failed me. So after some hefty filing of the castings I came up with this, it's a little scrappy but most of it won't be seen. No flutes I'm afraid Steph... It can also be taken down as a 16BA bolt will hold it together. There should be two at 90 degrees of course, but this will have to do for the sake of practicality and time.
P1040213.JPG

More hefty filing produces the cranks, which are drilled and pinned to the axles. The eccentric sheaves are blackend to prevent the solder spreading. Then add 'No Nonsense flux', solder paste and a Nimrod gas torch and hey presto!
P1040215.JPG

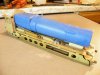
It always gets interesting going off piste, I had effectively shortened the con rods by modifying the big ends. So this temporary lash up is to check if it will all fit/work. I had to extend them by filing a spigot on the end and adding some rectangular box brass section.
P1040229.JPG

Todays job ( if I can resist having a fiddle with my Dapol 08 - yes I've rolled over and gone on trend ) is to fit the rest of the valve gear and see if it can all be made removable...
 

dibateg

Western Thunderer
Back on piste, and it doesn't take long to make progress and the cycle is cut out bits from fret, clean up, solder in place, rinse, clean up.......cut out bits from fret... I had to rework the upper motion as the lower ends of the rockers wouldn't fit between the slidebars. The forked link that links the upper and lower motion is tapped 12 BA so that the expansion links can be disconnected and crank axle and attached bits can be taken down. It will mean making the front sandboxes removable, but that's not a big problem.
P1040231.JPG
 

dibateg

Western Thunderer
The chassis is pretty well complete now, just the lubricator and a few other minor details to add. The AWS tank is made from tube, with two turned down brass buffers to make the ends! The weighshaft works, so that the loco can be put in forward or back gear. A filed down 4mm scale handrail knob soldered on the end of the indicator wire pivots on a wire pin soldered through the crank..
P1040234.JPG
 

dibateg

Western Thunderer
So - moving along nicely now adding detail to the body. The cladding is very thin and Dave advises gluing for some of the components. I prefer to solder, so handrails and other small detail is added with 100 degree solder. You can't see it from here, but the huge chimney sits on top of the smokebox with a void underneath, so I've added the petticoat to give it a bit more solidity - of course you can't see it from this angle. I've scratched up the little lateral tank in front of the cab - again a turned down screw forms the end plate. The AWS conduit is added that will join by a tiny piece of tube to the continuation on the chassis. Someone mentioned about filing off the tabs at the extreme edges of the cladding without damaging the etched rivets, basically I use the end of a file held in place to form a 'fence', then use a flat file with a safe edge to file off the remains of the tab. I was working out how to separate the pipes from the atomisers that drop down to the lubricator. They will solder in place from the body on the underside of the smokebox and the loose ends sticking up from the lubricator will just poke up behind them. Hope fully that will give an illusion of a join..

I spend a lot of time at the workbench and folks that remember my BRM articles will recall my blues music tributes. I'm a bit more Radio 4 and 4 Extra these days, and I've been enjoying GF Newmans 'The Corrupted' with Toby Jones through this build - excellent.

http://www.bbc.co.uk/programmes/b087psl5

It just remains to finish those lubricator pipes and then on to the tender...
P1040238A.jpg
 

Ian@StEnochs

Western Thunderer
I spend a lot of time at the workbench and folks that remember my BRM articles will recall my blues music tributes. I'm a bit more Radio 4 and 4 Extra these days, and I've been enjoying GF Newmans 'The Corrupted' with Toby Jones through this build - excellent.

http://www.bbc.co.uk/programmes/b087psl5

It just remains to finish those lubricator pipes and then on to the tender...
View attachment 63112


I have been listening too, great story and made my recent sessions of wheel turning more pleasant. Nice loco in an ugly sort of way!

Ian.
 

2-Bil

Western Thunderer
Now theres two words i never expected combined..Petticoat and Q1...................................I never expected the image thats now in my head either . BW aka 2-Bil
 

dibateg

Western Thunderer
A strange omission from the kit is the fire iron tunnel extension in to the rear platform, anyway that was easily scratched up. I also added the two vertical strips either side of the water treatment filler. I don't they all had this, but it adds an interesting feature. So, nearly done, just the inner chassis to make up today.
P1040243.JPG
 

dibateg

Western Thunderer
The backhead was made up in a day, I prefer to paint the main casting first, then add detail. just need to detail paint it and add dials of some sort.. It could do with a bit more tidying.
P1040244.JPG

And that's about as much as I can do until I get some decent weather for painting.
P1040246.JPG

After a workshop tidy up, its an inspection of the next project:-
P1040247.JPG
 

dibateg

Western Thunderer
Anyone know what the rods that work the sanding gear look like on top of the running plate?

I can't find any decent pics!
Thanks
Tony
 

mswjr

Western Thunderer
Have a look at THE COUNTY PROJECT, They have lots of good build pics,on the progress page,ans an archive with loco pics,if the sanding gear is not on it yet,It still will be helpful for other stuff.
 

mswjr

Western Thunderer
If you still can not find any info on it,I have the G A drawing for a county in one of the GW Jounals,I can dig that out at the
weekend and send you copys that may help,come to think of it there might even be a photo in that ,so ill have alook.
 

dibateg

Western Thunderer
Thanks mswjr ( you must have a real name! ). I also asked the same thing in questions and Paul ( Ozzyo ) kindly replied.

A copy of the GA drawing would also be really useful thanks - I can pm you my E-mail address.

I did find the County Project. There were some tantalising photos, with what I wanted just out of shot!

Regards
Tony
 
Top