Brettell Road, 1960s black country (ish)

Jim smith-wright

Western Thunderer
Hi Martin

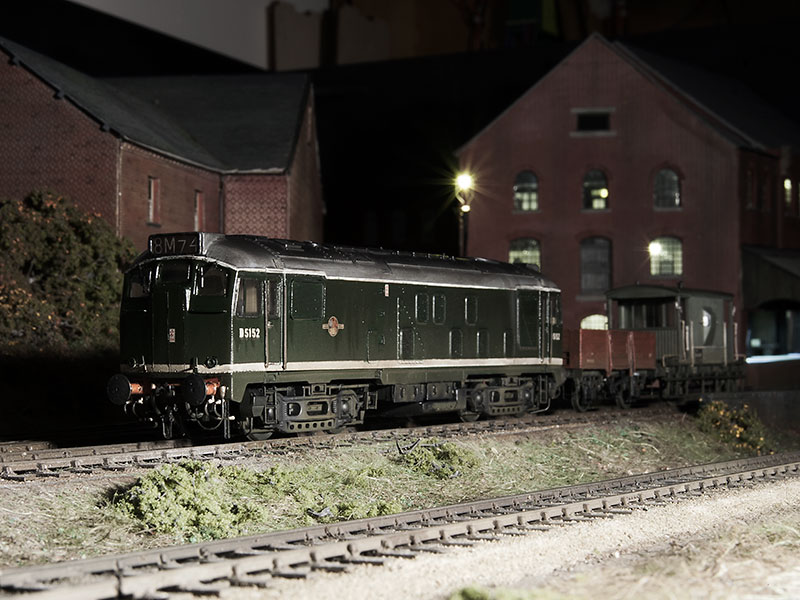
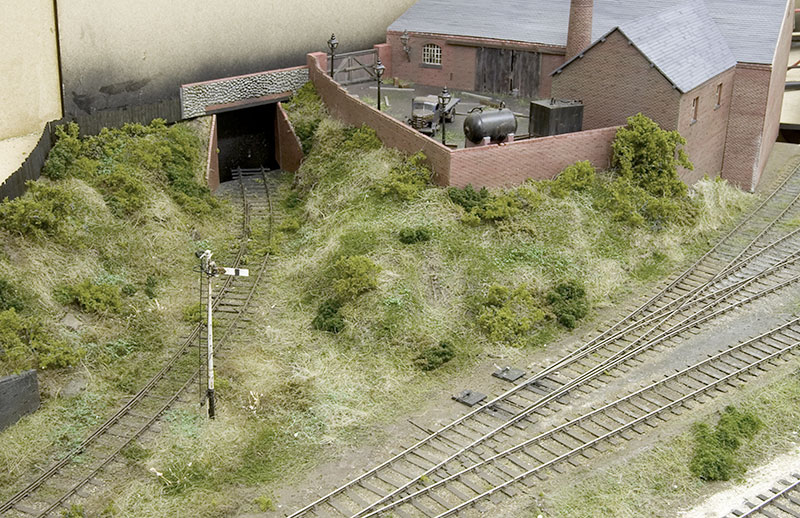
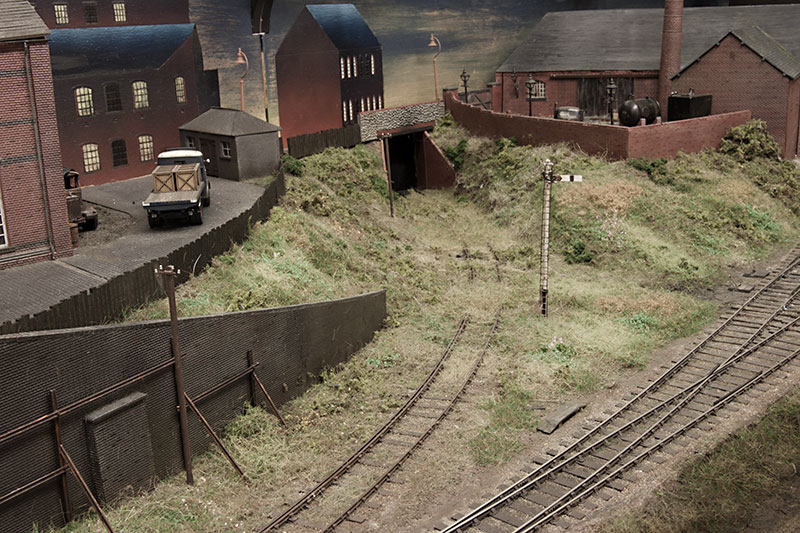
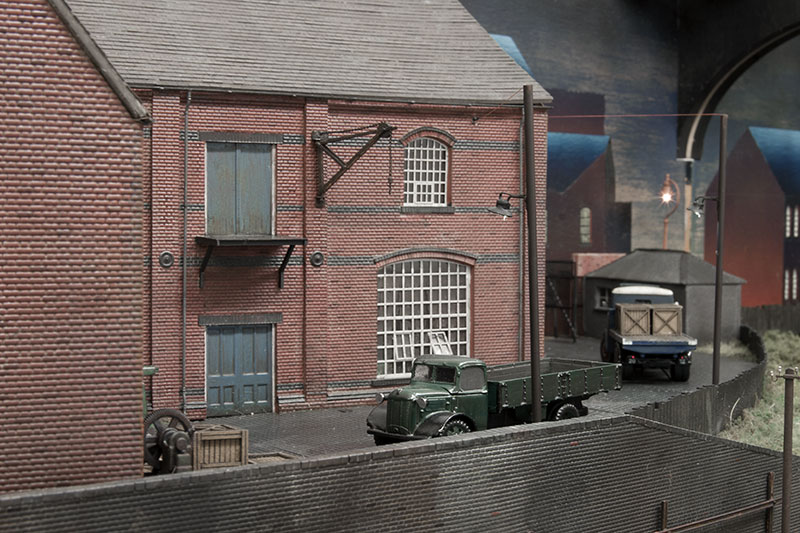
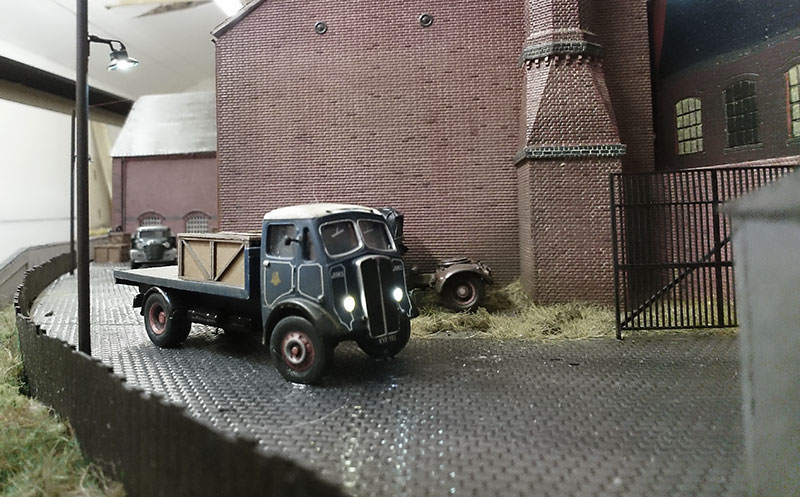
Thanks for your thoughts (stir the hornets nest? odd term to use). Interesting that you say about cutting back the 'cobblestones' as I did this more on these buildings than the lamp block on new street (the only real brick building on there so far.) I wonder if the gloss re-exagerates it?
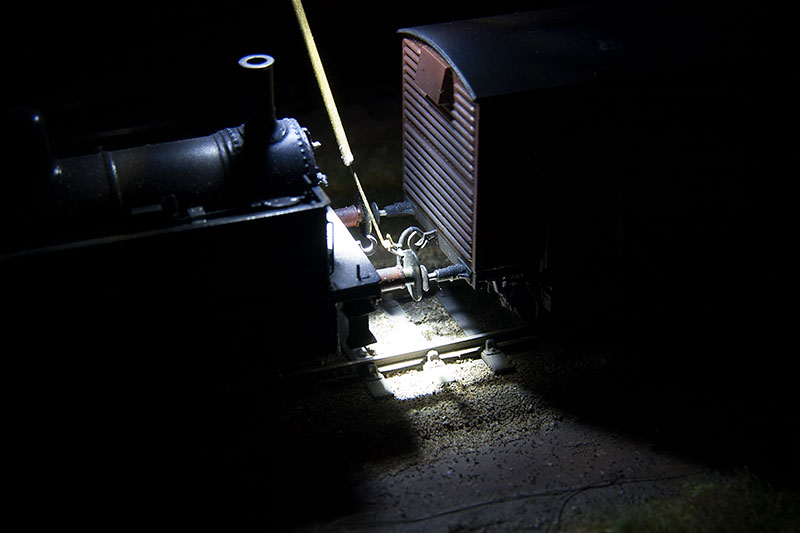
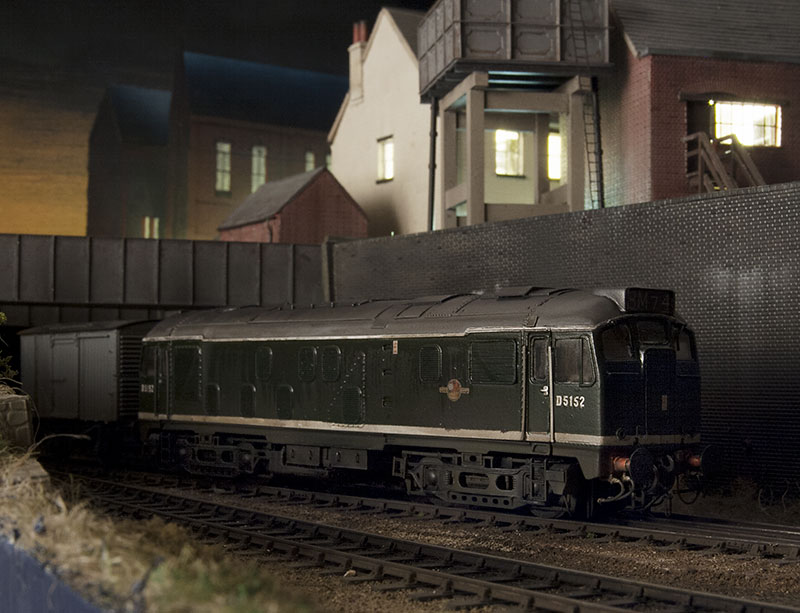
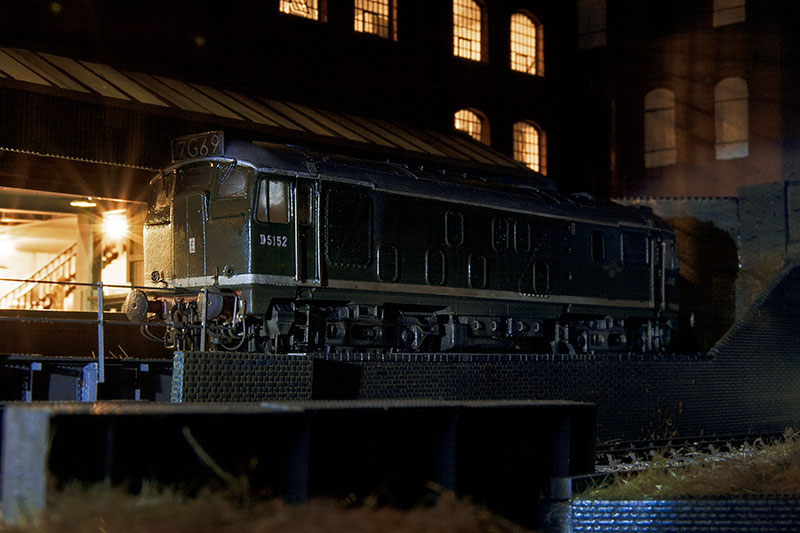
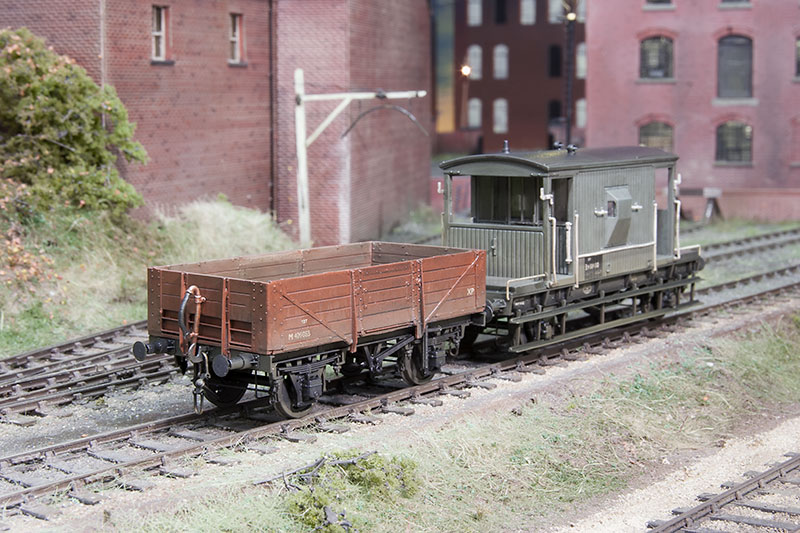
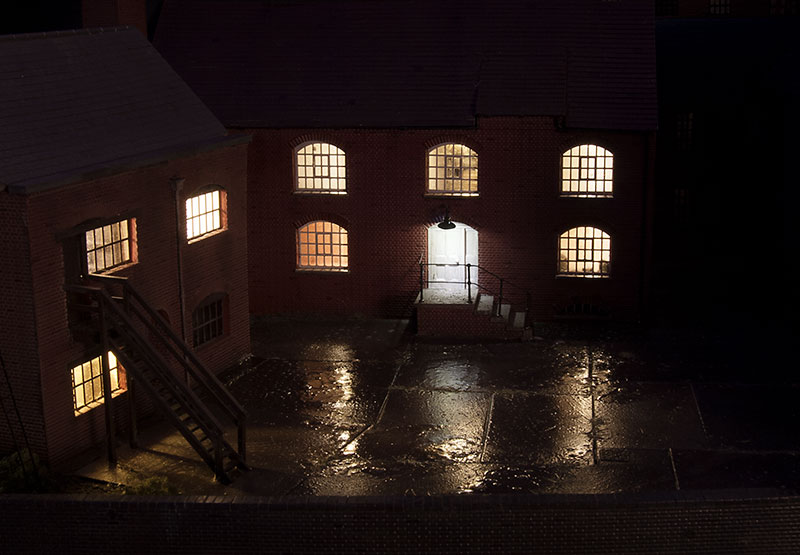
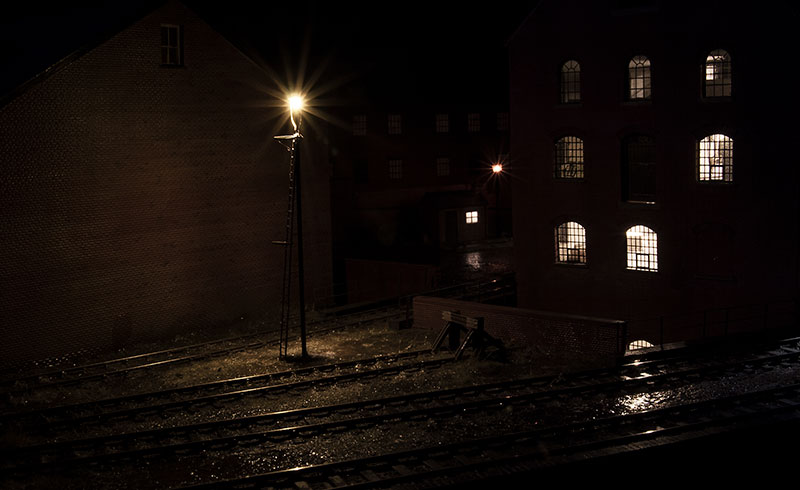
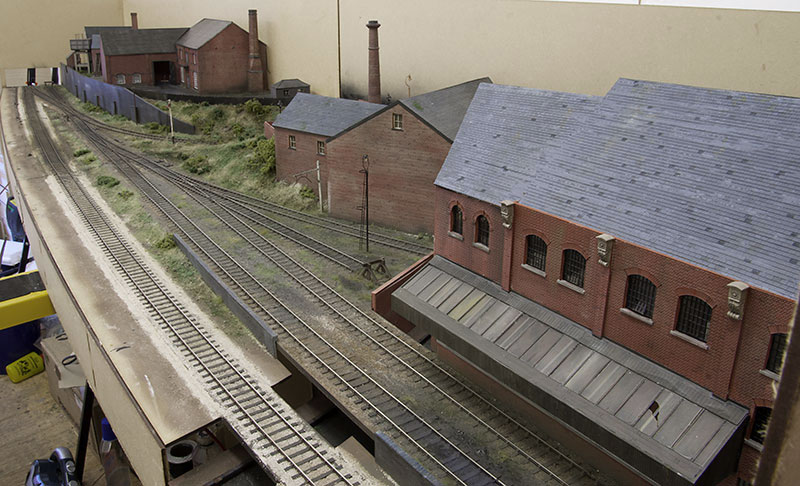
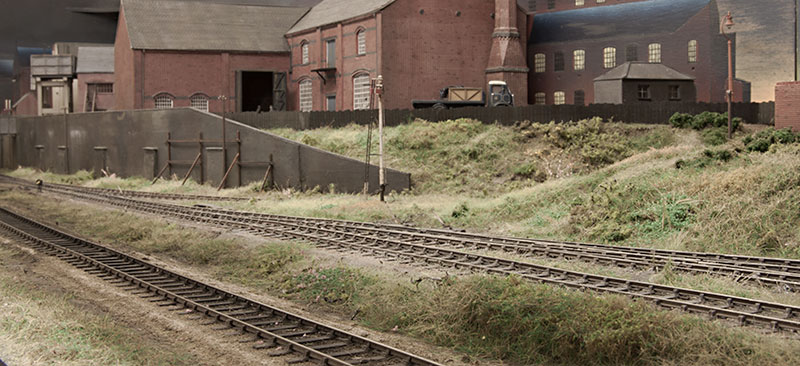
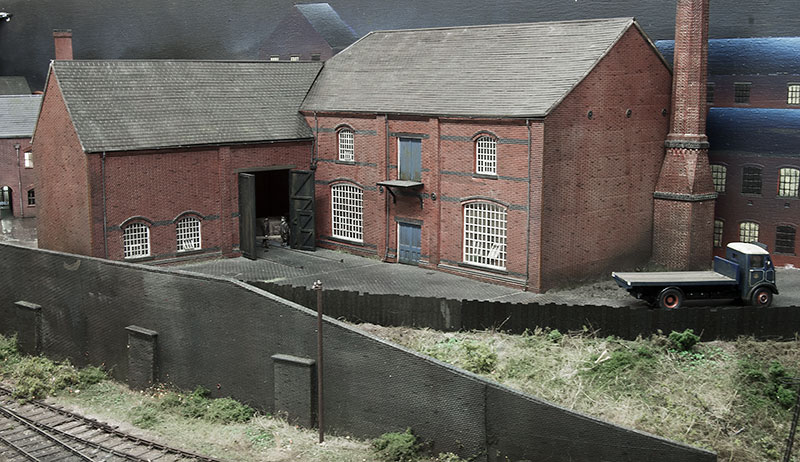
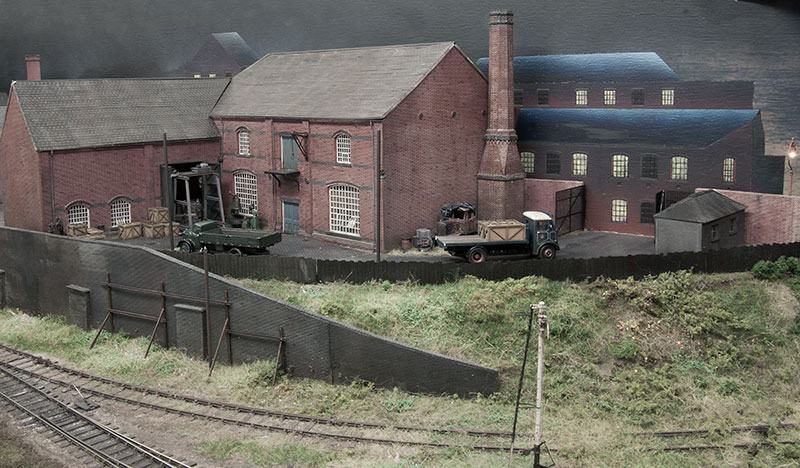
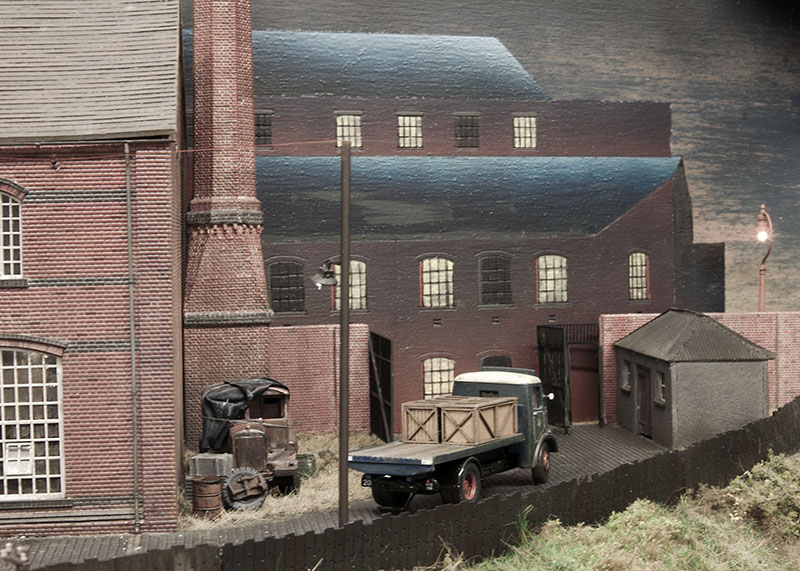
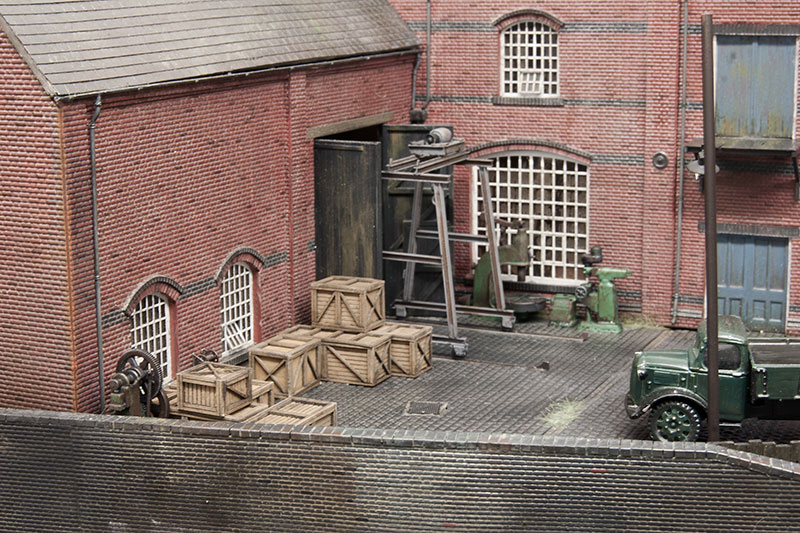
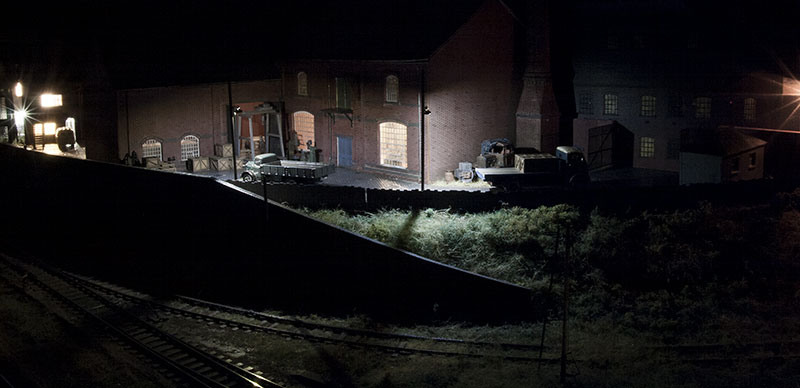
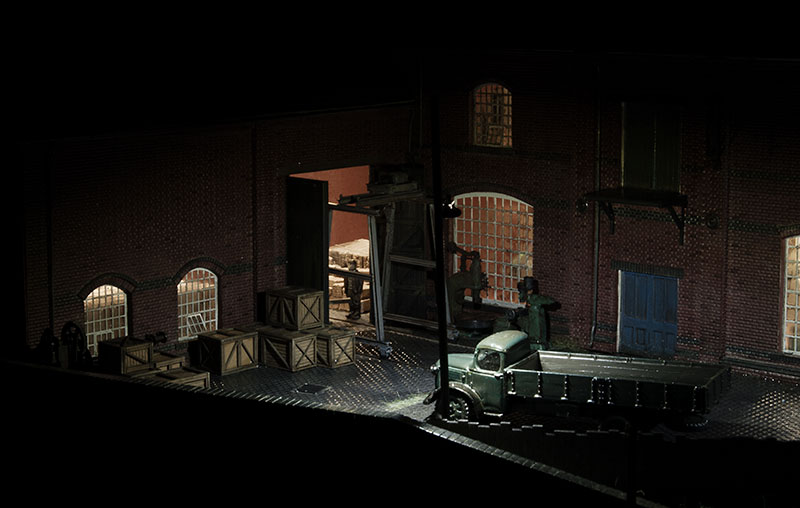
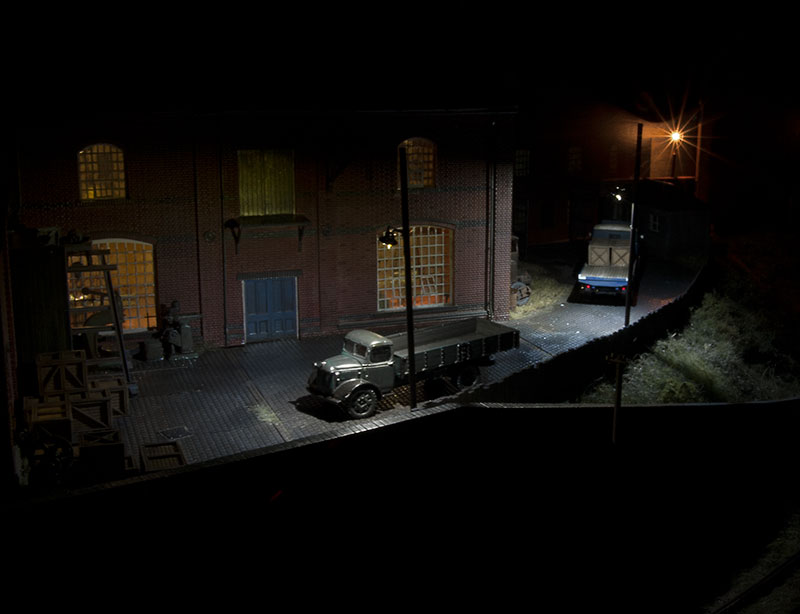
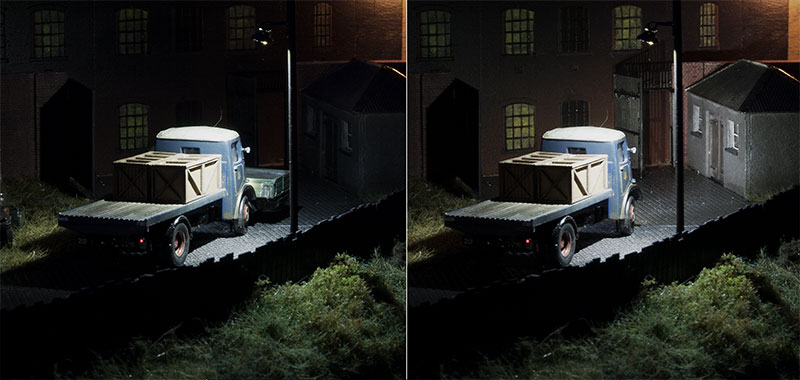
The corners of the big building are indeed less than perfect but because I had to build it in situe due to the 2 interiors I didn't have much option. There's still more ironwork to do yet so I might have a look at the main corner. I'm not happy with one of the bridge walls either so I'm going to go back to it. Things like this are harder to see when it's dark! Lol.

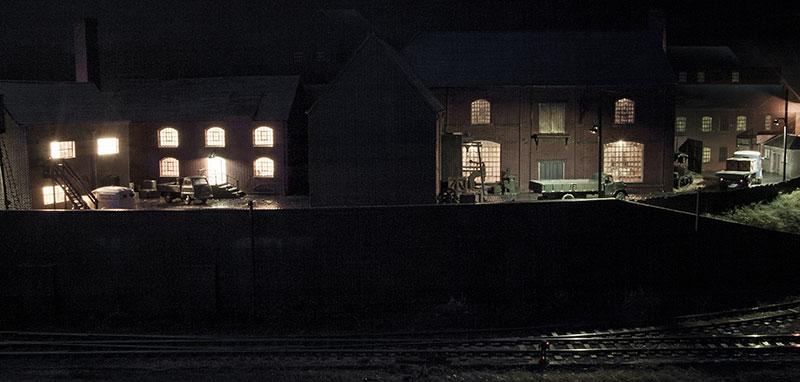
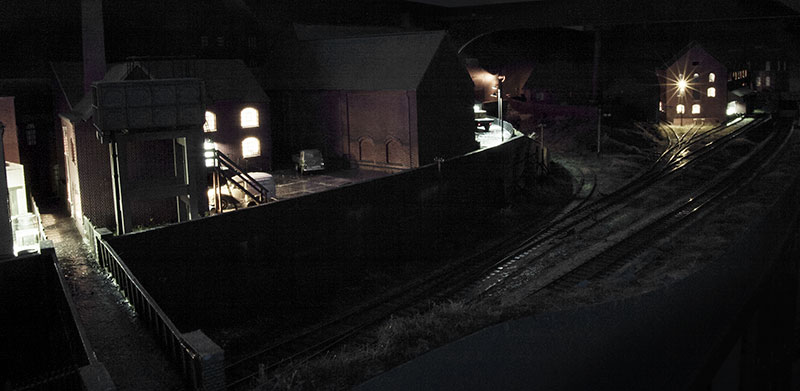
The layout was never intended to go out into the public, It was only supposed to be a plaything. I had to do quite a bit of work to replace the sides etc to make it robust enough.

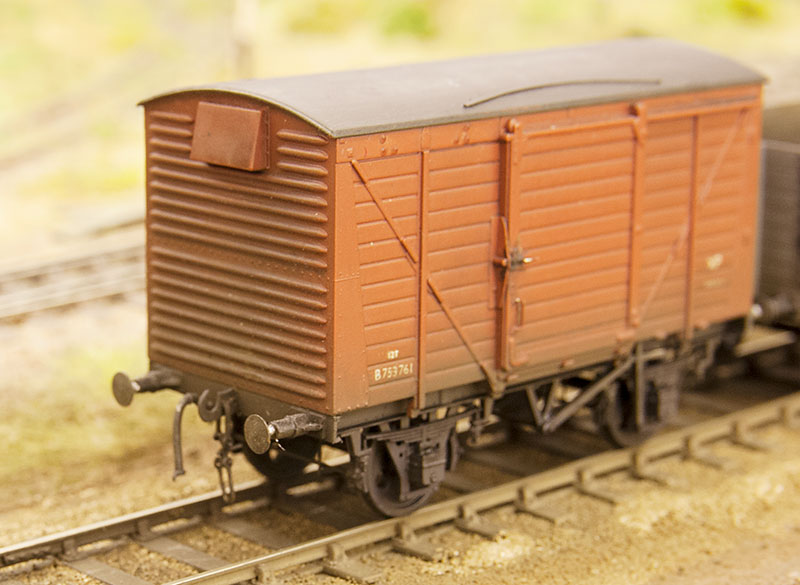
I don't think I've used any common bond brickwork. Do you mean garden wall bond? It was from south eastern finecast, I think they've discontinued it.

Cheers

Jim
 
Last edited:

Jim smith-wright

Western Thunderer
The subject of couplings tends to come up at most shows. Each have their own ideas whether manual or autocouplings are best. I'm firmly in the manual camp and within reason I like couplings to look like the thing they are supposed to represent. Yes I know the infamous 'hand of god' grates to some but, to me, I like to suspend my belief for a second or 2 while an operator couples up rather than something looking wrong 100% of the time due to some weird design of autocoupling. On Brettell Road I have kind of the best and worst case scenario at the same time for the hand of god problem. Best case because its dark and its easier to hide it. Worst case because if the operators have any hope of seeing what they are doing you need a light!
coupling-light.jpg

I can appreciate that this might well be the ultimate per peeve for some. Bit like my own of tipped from the box road vehicles or magnificently modelled signals with a flat etch for the ladder, so is there another way? Well there might be!
coupling-experiment.jpg

The couplings on this wagon have been modified do that they can be seen in the dark. in the light there are no derogatory side effects but in the dark...
coupling-experiment-2.jpg

...and under a UV light coupling hook they are clearly visible. Potentially easier to see than inter the normal pen torch. The UV torch I have does still give out visible light so the next mission is to find a truly black light source. By marking the coupling link, the wagon hook and the end of the coupling probe with a UV marker I might have a reasonably invisible manual coupling method.
 

Jim smith-wright

Western Thunderer
Of the 5 layouts I have regularly helped to exhibit 3 have used a cassette system and this always seems to generate interest at shows. Cassettes are one of those weird things in model railways that everyone seems to be aware of but no one ever really explains to anyone. I have to hold my hands up and say I am not really a fan of them but for Brettell Road I didn't really have a lot of options. This is how my cassette system works (other methods are available).
cassette-pocket.jpg

The baseboards were designed with a recess for the cassettes.
cassette-end.jpg

The connecting end of the cassette itself. this is the third revision. The track is only actually stuck to the cassette at this end via the copper clad. the rest is merely clamped between the cassette and the inner piece that runs down it's length.

I say third revision because the way it connect to the layout has been a tad problematic. initially I had extra rails outside of the running rails that transferred power to the copperclad sleepers by sitting over the top. This worked for the vertical alignment and at the test session at Phil's seemed to be fine for horizontal too. However in terms of transmitting the power it wasn't 100% and as Simon (one of the operators) pointed out - it was likely to wear through the copperclad at some point.

For Scaleforum I retained the extra rails for alignment but added phosphor bronze strips for electrical connection. these were better but fragile. Also oddly we had horizontal alignment problems that hadn't shown up before.
joining-track.jpg

This is my revised arrangement that I am happy with so far. It seems reliable in tests but until the layout goes to its next show we wont be absolutely sure. It does look a little bit more complicated than it needs to be due to 2 tracks feeding in from the layout.
cassette-connector-drawing.jpg

The basic idea is that a piece of flatbottom rail mounted sideways and into the web of the running rail does all the alignment and power transmission. you might have noticed that the rail in the cassette picture wasn't attached to the first sleeper. this is because it's slightly tweaked outwards and is held in line by the flatbottom rail. The advantage of this is that its robust but easily adjustable if needed. So far in tests the derailment problem hasn't re-occured.
long-cassette.jpg

The cassette in place. I also have some half length ones too.
short-casette.jpg
 

Jim smith-wright

Western Thunderer
I currently have 3 projects lined up that involve taking a razor saw to old Hornby models. This is the first one and to be fair there's a lot more Bachmann in it than Hornby.

Class 25/0

This has been on my to do list for years. When we used to help my friend David exhibit Amlwch we had all of the main variations of class 24 and 25 except for the 25/0. But then David sold the layout and it just went in to the abandoned project pile. With class 25's being one of my favourite classes it made sense to resurrect the project for Brettell road so...
class-25_0-in-progress-1.jpg

...following the same pattern as my late body style class 25s this is a hybrid of Hornby cabs on a Bachmann body. The Bachmann model having the correct raised bodyside grills for a 25/0 but the wrong cab roof shape while the Hornby cabs having the right shaped windows (more of that in a moment) and the headcode boxes. As I am doing an original condition loco with valances the effect of chopping up the underframe as I did on my other 25s isn't so much of a win but I did rearrange the bits of underframe you could see to better match my prototype. The original 25/0's had no steam heating so there is no water tank.

The beading on the roof was redone in the correct place and the panel Bachmann missed off was added. These panels seemed to vary a lot. The grill is from Shawplan. Moving on to the cabs the comment of the windows being correct isn't strictly accurate. The important thing is that the top of them is right but the center window is too small and the main windows, although right for a later 25 are too big for a 25/0. The side window is also a bit high and a bit too far forward. Filing and microstrip sorted them out. I re-used the bottom section of the Bachmann cab and but the buffer beams off and mounted them to the body.
class-25_0-in-progress-2.jpg

After a blast of primer to check that the joins were good I set to work adding in panel lines, the tail lights, cab front handrails and the row of rivets around the base of the base of the cab (archers transfers). The cab vents and exhaust are from the Brassmasters etch. Next stage will be paint.
 

PMP

Western Thunderer
I've got one that is in the nearly done pile too. I've used the basic Bachmann product and changed the cab roof and tanks with the Brassmasters bits, Shawplan windows and roof fan, roof panels corrected with microstrip and k&s 10thou aluminium sheet. Mr Sutton will likely have his out before I finish mine
IMG_1459.JPG
 

Jim smith-wright

Western Thunderer
My class 25/0 is now done. Here are some pictures.
25_0-finished-1.jpg

25_0-finished-2.jpg

class-25_0-in-progress-pre-weathering.jpg

I don't normally like a pre-weathering shot as its not finished yet. But some people do. Below some now customary moody shots.
class-25_0-arriving-@-BR.jpg

class-25_0-short-train.jpg

class-25_0-parked.jpg

(well you kind of expected the last one didn't you?)

Wagon News

As I mentioned in one of the post scaleforum posts I found i had more wagons than really necessary. So I'm planing to just finish off those in the to do pile and try to resist adding any more.
woooden-ended-open.jpg

Nearest is a diagram 2049 wooden ended open with steel reinforcement. this uses the Parkside sides and underframe with a Rumney Models kit for the ends. Behind is another standard 20 ton brakevan, this time from Bachmann.
 

AJC

Western Thunderer
Hello Jim, I do like the Type 2 sans yellow panels, particularly effective, especially with the rain streaks. Shouldn't the five-plank have a pair of door springs below the door, however?

Adam
 

Jim smith-wright

Western Thunderer
If you remember I was toying with the idea of using a UV torch for my coupling pole but the one I had gave out a lot of visible light. I've upgraded to a much better UV laser torch and since photographing it is quite difficult I did a video instead. I did try adding a filter to block the visible light completely but it made it extremely hard to use.

Brettell Road coupling test - YouTube

On the subject of videos, may I invite you to get a comfy chair and a mince-pie and spend a while line side watching a bit of shunting. (this one is all diesel)

Brettell Road november 2017 - YouTube
 

Jim smith-wright

Western Thunderer
Up until now I have been using various gloss varnishes to attempt to make Brettell Road look wet. The results have been somewhat mixed especially on the ground itself. So I've given a few AK interactive products a try, still water and wet effect. Here are a few pictures of the results so far (Yes it is dry)

little-courtyard-AK.jpg


yard-AK.jpg


The Still water is a self levelling resin and it's quite thick. The wet effects is an enamel. What you see in the pictures is a mixture of both products.

Homepage 3
 

Jim smith-wright

Western Thunderer
With 2017 drawing to a close I have also (nearly) finished off the road vehicles I will need for Brettell Road. Despite having 5 bridges over the railway I've resisted the urge to do any buses to put on them and I also haven't done any cars either.
brettell-road-lorries.jpg

Above is the latest and last batch.

green-lorries.jpg

Starting with some kits. On the left a resin Ford Thames 400E from Road Transport Images and on the right a white metal ex military Austin 3 ton dropside from MMS. Unfortunately MMS have now closed so this kit is no longer available.

langley-scammell.jpg

I found this part built Langley models kit on eBay for next to no money. Its a 45cD tractor unit from the very late 30's and once disassembling the more sketchily assembled bits I decided that it once belonged to one of the business owners. Some sort of engine fire meant it got dumped but with the intention to restore it to its former glory. However it ended up forgotten and is now rotting away. The tarp is from a black latex glove and I attacked the inside of the front mud guard with a burr in a minidrill to depict the rust working its way through. The rear mud guard is hanging on for dear life as well and some parts have now long gone.

leyland-steer.jpg

Finally a Leyland Steer from a combination of base toys bits. I find these lorries quite intriguing with their (to my mind) odd wheel arrangement. The base toys Steer has a different cab to this so I swapped it from an '8 legger' box van. If you look at the inset picture you can see that I've widened the wheel arches and reprofiled the front windows to get something looking more like the pictures I found of the real vehicles. I could have done more with the chassis but where its going you wont see it. Wheels are from Road transport images.
 

Jim smith-wright

Western Thunderer
3-hoppers.jpg

Ive been building 3 hoppers via 3 different routes. On the left a coke hopper from the old Three Aitch kit. I've already done one of these and this follows the same pattern of using Bill Bedford W irons.

In the center also a kit but a brass one from Dave Bradwell for the BR 13 ton hopper. A fun if not sometimes tricky kit to build.

On the right a mackerel ballast hopper converted from a Hornby trout, again with Bill Bedford w irons. I make no claims for the idea behind this as I first saw this on Kier Hardy's EM 70s website.
 
Last edited:

Jim smith-wright

Western Thunderer
After Scaleforum i became aware that the vegetation on Brettell Road probably was a bit to green and lush for a late October setting. To remind you roughly what it looked like back then here are a few images from earlier in the layout build.
overview-RH-end.jpg

warehouse-bedded-in.jpg

OK so it wasn't exactly late spring or anything but armed with some scenic sheets from Martin Welberg (Martin Welberg Scenery'nStuff) and some more muted static grass from WWS supplies (Home | Scenic Manufacture | WW Scenics) I set to work making it all look a bit more, well, dead!
revised-grenery.jpg

As you can see I've made he disused line look a lot more overgrown. The eagle eyed will spot a bit of extra iron work supporting the wall. I always intended to add this from the early days of the layout.
revised-grenery-2.jpg

I'm happier with it now.
 

Jim smith-wright

Western Thunderer
coke-hoppers.jpg

I've finished off the hoppers I was working on. Here's the coke hopper in the company of the previous one I had already done. As the older one is an LMS version I revisited the weathering to make it look a little more used.
13-ton-hopper-final.jpg

The 13ton hopper
mackeral-final.jpg

Mackerel with a gannet and herring.
ED-wagon.jpg

A few I haven't mentioned before. The M. E. Evans one is a Bachmann collectors club model in memory of Merl Evans. I spent a very enjoyable day at Tysley with Merl surveying a couple of class 150's so this little wagon seemed a no brainer to me. Straight wheel and coupling swap with a bit of weathering. The ED wagon is a Powsides kit for one of the Earl of Dudley's fleet. Another no brainer. Whether either wagon would have lasted to the late 50's I dont know.
 

Jim smith-wright

Western Thunderer
factory-before.jpg

Although the factory was essentially finished for Scaleforum it lacked the clutter that gives it an 'in use' look. Unless the workers were meticulously tidy I suppose. So I have gone back to make a bit of a mess. The image above is the before shot...
factory-after.jpg

...and the after.
gate.jpg

I've added a wall and gate to the entrance. The old lorry was featured earlier.
travelling-crane.jpg

The wooden boxes are from 4Ground models. I knocked up a rudimentary travelling crane from bits of brass and plastic. The discarded machine tools were 3 d prints and originally intended to go inside the building but I thought they were a bit too nice to hide away so I weathered them up an dumped them outside.
small-crane.jpg

Another crane from bits of brass and some basic yard lights. Below are a few images of the factory at night. The yard lights do provide a bit more light to the centre of the layout.
factory-dark.jpg

factory-dark-3.jpg

factory-dark-2.jpg
 

Jim smith-wright

Western Thunderer
I wasn't all that happy with the positioning of the yard lamps shown last time. The one on the right masked the tail lights on the lorry (as several people didn't notice them) and it didn't do enough to light up the entrance to the yard. Leading a couple of people to enquire how the lorries actually got in. So I've had a bit of a fiddle.
revised-lighting.jpg

I've moved the light further along so that the back of the lorry is in shade. This on its own didn't do enough to illuminate the gate area so...
lorry-headlights.jpg

I've added headlights to the lorry. (this picture was taken on a phone). They are much to bright really but you can't see them from the front of the layout anyway.
headlight-effect.jpg

Here is what I was aiming for. Again its too bright for a lorry of that era but I'm happy with a bit of artistic licence for effect. You can see the difference when the headlights are blocked (on the left).

I have also been busy with more AK interactive wet effects fluid. Below are a few overviews that give a better hint of the rain.
wet-yard.jpg

commercial-area.jpg

layout-overview-april-2017.jpg


Finally another video, time for another cuppa and a biscuit!
 
Top