David Varley
Western Thunderer
60 for £1 in Poundland.
I think they were £2.50 for 20 in Sainsbury’s when I got them....but they did come in a nice jar60 for £1 in Poundland.


") Hopefully once re-sprayed and the sheeting joints highlighted it should look fine.
Hopefully once re-sprayed and the sheeting joints highlighted it should look fine.


...like these??!!Looking forward to this build, I fancy one for in a Parcels train

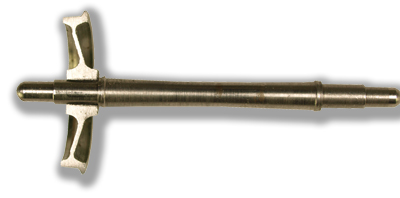
Hi Dave,It's not obvious from the photo but do the new Slaters wheels have the correct dish profile similar to the cross section of the P48 US wheels below? (this image is from the Protocraft web site)


