7mm Hadlow Road MPD

Ressaldar

Western Thunderer
I have at last sorted out a new layout plan for the workshop and one that I hopefully get further than all previous attempts, especially in 7mm.

Location is 'somewhere in the South West' with the period set in the early/middle sixties so that I can run steam and diesel, but will, as is the case with most of us, see later period rolling stock - supposedly on test, once constructed/bought. A large logo 37 is waiting patiently in pieces in it's white box as well as expected, a couple of Inspection Saloons from further afield.

Hatcham final plan 14.10.2015.jpg

I am using the existing boards and where possible the recovered track from the last effort. The only new track requirements are - one left hand point and the track for the traverser. I am changing form Cobalt point motors (they have proved too troublesome in the past) and going back to basics and using the standard Peco PL-10 via a capacitor discharge unit. I had thought of a 3 way point in lieu of R3/R4 but it would have rsulted in pushing the ' radius track to the traverser too close to the righthand edge of the layout - moving the 3 way to the left would have resulted in the line into the bay being affected or even drastic shortening of the bay road itself.

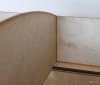
The main buildings are the Helston 'set' from Lasercraft Devon and the service shed is from Intentio (all yet to be built) and the Portacabins (huts) are from Greenwood Products. The 'retaining wall' is 5mm foamboard covered with SEFinecast English bond brick with a plain plasticard balancing veneer with buttresses and copings again from Intentio. The platform is in place and awaiting the final board surface once the electrics are complete. Wiring, for Digitrax controlled DCC, is the next step followed by full testing and then the traverser will go in.

More to follow including photos as and when progress is made.

All comments welcome.

cheers

Mike
 

Ressaldar

Western Thunderer
A year is a very long time in modelling terms as I notice that it is a year to the day tomorrow that I started and made the only post regarding Hatcham BLT. After much trying and experimentation I could not get the curve onto the traverser to look convincing enough without bringing point R4 much further to the left (on the above plan) and thus spoiling the overall effect -

so having also decided to concentrate on steam, I came up with this:

Hadlow Road 4 Road low relief MPD 08.10.14.jpg

20' x 2' - DCC powered - fingers crossed that I can get stuck into fixing track (Peco reclaimed from Hatcham + two additional left hand points) down in the not too distant future! Slow progress photos will appear follow shortly. Hatcham trackwork is already a thing of the past and Hadlow Road is 'loose laid' to see if it is achievable. All things being equal, the kit for the coaling stage and associated ramps should arrive today, but due to external forces and a Club Open Day on Sunday, the boxes will only be opened today for inspection! The turntable kit will be ordered next week, once funds have cleared from the sale of the Hatcham buildings kits. The low relief shed will probably be scratch built.

cheers

Mike
 

Ressaldar

Western Thunderer
A start has been made with the track laying in as much as the points are down with the exception of L1 & L4 - (in the post on Friday, so should have them tomorrow)

P1000573.JPG

Point R1 in the foreground and with the 'straight' track just loose laid - Point L4 location at top centre

P1000574.JPG

Point R1 again 'centre stage' looking the other way,with crossed track roughly where the turntable will be located.

The coal stage and ramps duly arrived and with the rest of the trackwork to do - let alone the electrics so there is plenty to get my teeth into while I decide which way to 'turn' :oops::oops::oops: regarding choice of turntable.

cheers

Mike
 

Ressaldar

Western Thunderer
Modelling over the past few weeks has been restricted to my den and therefore under strict household rules - only 'Glue 'n' Glaze allowed as far as adhesive and solvent use:eek: so I decided to assemble the Timber Tracks laser cut coal stage, ramp and ramp extension. The ramp extension went together quite quickly and without any tears (save for one piece missing, quick phone call and delivered next day) - definitely the calm before the storm though.

I then started the ramp, which at 1800mm long is quite a handful to have on the desk, so I went for the next best thing - the window cill! I will come back to the build of this in a later post if I may:'(

The construction of the coal stage itself was straight forward, but had its moments. Outer walls were glued together to form the rebated areas of brickwork and then formed into a box. Inner lower walls are then added and the instructions make great play on making sure that they are fully pressed down to be level at the bottom - to ensure that the tops are level to receive the suspended floor. All good so far. The floor was offered up in a dry run - perfect, so removed and glue applied to the top of the lower wall and the floor replaced and firmed down. Next come the upper inner walls which have brickwork detail on, as well as the window frames and door linings, these were added in the same manner as the lower floors and the box was then laid aside to let the glue do its work.

We now come to the tank, two sides and two ends which dovetail together - end and side, other end and other side as L shapes then joined together at the 'open' corner and formed around a rectangular ringbeam - except that the ringbeam was smaller than the tank wall rectangle by 1.5mm in both dimensions:eek: I then made a mitre cut across opposing corners of the ringbeam and glued the two pieces in nsuring that there was full contact between the tank sides and the ringbeam - save for the gaps in the opposing corners, which were subsequently 'covered' with some corner plates.

P1000575.JPG

This structure was then put aside to cure and I went back to the main structure only to discover that by ensuring that the upper walls were pushed down as were the lower walls, it not only created a 1mm gap at the top, but also meant that the heads of the window and door frames were 1mm deeper than they should have been - suggesting that the suspended floor thickness is 1mm less than originally designed:eek:

The inner spacers for the tank were then placed in position only to find that the top edges sat 3mm proud of the tank sides - strangely the thickness of the ringbeam. So the ends were notched to bring them down to sit correctly and the spacers glued in.

P1000577.JPG

I also took the opportunity of inserting a piece of 20x10 plastic angle at each end to assist with locating the tank onto the top of the wall and allowing the tank to be removed for painting and future maintenance.

The staircase and hatch area went together well, except that the counterweight on the chutes was shown on the opposite side as to where it should be, fortunately I spottedit before the glue had fully set and rectified the situation.

P1000582.JPG

P1000583.JPG

P1000584.JPG

The roof is formed of a layer of 1mm ply overlaid with a thin corrugated layer that has been lasered to represent corrugated steel panels. The ply was glued on and held in place with masking tape and when the glue had gone off a slightly diluted PVA sealing coat applied all aover which was allowed togo off then a further coat applied and the corrugated layer carefully applied and again held down with long pieces of masking tape until the glue had set.

The steps are loosely placed against the side for the photo. All that remains to do is the roof hatch and its associated platform and ladder, which will all be fitted when the building is in place on the layout and has itself been painted.

I will now get back to the ramp and its intricacies and report back - shortly I hope. I will paint all three pieces at the same time to hopefully get some consistency with the main brick colouring to try to give the impression that all three structures were built at the same time:rolleyes:

cheers

Mike
 

Attachments

  • P1000576.JPG
    P1000576.JPG
    214.8 KB · Views: 3

Ressaldar

Western Thunderer
Hi Heather,

yes it is - footprint 310w x 255d x 310h or 12 1/4" x 10" x 12 1/4" in old money - quite a lump.!

cheers

Mike
 

Ressaldar

Western Thunderer
Before I go any further with the coaling area build I thought it might be beneficial to see how things were shaping up generally. I'm glad I did...............................................

P1000586.JPG

from this angle all seems fine, but

P1000592.JPG

from here you can clearly see that with the staircase hard against the ramp brickwork, the flight leading to the side door is way off target!:rant::headbang::headbang: there is not much in the way of wriggle room for adjusting the location of the ramp itself, so the staircase needs to be amended such that the top landing sits on the ramp brickwork (fortunately the brickwork height seems to be almost perfect) and the supporting timbers moved in towards the staircase.

Clearance trials with my largest loco also seemed in order, so...........................

P1000593.JPG

P1000595.JPG

looks to be just right:drool:

P1000597.JPG

so the staircase amendments are next up, to be followed by the fence posts on the ramp, and as I said earlier, the ramp is another saga waiting to be wrote!

cheers

Mike
 

daifly

Western Thunderer
Mike

Reference to the to the Timbertracks photo shows one solution - maybe not what you are hoping for!
CS3-500x500.jpg
The 'plank' on the side of the lower flight of steps on the TT photo is not parallel to the handrail which catches the eye. The corner tower appears to be rather smaller than yours too. The steps in your kit seem to have 'grown'. Very odd.
Cheers
Dave
 

Ressaldar

Western Thunderer
Hi Dave,

many thanks for pointing that out. There is another reason (3mm of it anyway:headbang::headbang::headbang::headbang::headbang:) why the steps do not align with the doorway which will be explained when I do the write up for the ramp. One answer to the staircase problem may be to just chop off the ongoing flight and end up with the version as in the TT photo but I would rather try to end up using the version that I have put together - perhaps for no other reason than perversity!

cheers

Mike
 

Dog Star

Western Thunderer
... I would rather try to end up using the version that I have put together - perhaps for no other reason than perversity!
And because that is JLTRT ;) ;) . The "ongoing" flight is there to enable servants to move safely from ground level to the track where the fulls stand.
 

Ressaldar

Western Thunderer
Now that 'Management' is on the mend I slipped out into the workshop to decide on the ramp stanchion situation and went with the 'as supplied' option - really for no other reason than the brass stanchion alternative, which looked very nice, would have added £120 onto the cost:eek:

So first up we come to the major error in the kit - the stepped spacers, insufficient supplied, hence the ply 'infill' at the far end, were cut to the same width as the 'roadway' instead of the radway less the thickness of the two inner skins which form the outer walls.
P1000599.JPG

unfortunately, it is not until the glue has gone off having put the second side on top of the spacers (position as in the photo above) and you are able to put the ramp 'right way up' and offer the roadway to the ramp, is the problem seen - as usual much too late to take any useful remedial steps

P1000600.JPG

P1000601.JPG

the resultant error - albeit that it creates a drainage channel - a reasonable reason not to try and rectify the situation. An alternative would be to put a coping stone along the top of the wall (I think that one should have been included in the kit anyway).

So the fun begins - fitting 170 odd fence posts, all of which have to have 5 strokes of a fairly rough file to form a taper to the bottom 'leading face' to compensate for the angle of the slope

P1000603.JPG

I decided to loose fit all of the posts first , then go back with the Glue 'n' Glaze to hold them in place

P1000604.JPG

I used a 3' level to maintain the vertical alignment 'up the ramp' and the good old No 1 eyeball across the ramp. No doubt there will be final adjustments made as the brass rod is threaded through. The last picture shows the omission of the post that would have otherwise fouled the exit at the top of the staircase - in its revised configuration.

More to follow next week.

regards

Mike
 

Ressaldar

Western Thunderer
I had not intended to do any work today but my curiosity got the better of me and I ventured out - just to see how the stanchions had 'set'. All was ok so I reached for the packet of 1.2mm brass rod supplied for the railing - all went well until I realised that, bearing in mind that the stanchions have two holes in them, there is only sufficient rod in the kit for a single rail on both sides -just the small amount of 12' of rod not supplied!!!!!!!!!!!!!!!!!!!!! Not good enough when the kit costs so much. I had sufficient in stock to complete the runs, but that should not have been the case.

P1000605.JPG


Thankfully, I shall not need any further of Mr Lewis's kits to go on this layout.


regards


Mike
 
Last edited:

Ressaldar

Western Thunderer
Feeling somewhat under the weather this week and confined myself to the house, which gave me the opportunity to start painting the coal stage and ramps. I have use a mixture of Winsor&Newton and Railmatch acrylics, initially as a wash - raw sienna, followed by

P1000607.JPG

a very thin slate/sienna mix which has now been followed up with individual bricks being picked out in cadmium yellow mixed with varying amounts of sienna and the header string course above and below the recessed panel picked out in slate to represent Staffs Blue Engineering bricks. More individual bricks (in differing colours) will be done tomorrow - as well as a start on a similar exercise on the ramp.

P1000608.JPG

The building itself presented a problem in as much as the ply veneer used for the brickwork overlay is of a very dark colour, quite the opposite to the recessed panels and the ramps which have the bricks cut into MDF. Here, the recessed panels have had the same treatment as the ramps but the 'outer panels' have had two further washes of a varying cadmium yellow/sienna mix to try and balance up the colour, followed by a very very thin slate/sienna coat, looking for the overall grubbiness feel. The arches, cills and decorative bands have been covered with a straight slate colour - again for the Staffs Blue Engineering look.

I will address the overall colour situation again tomorrow, once things have dried out overnight.

regards

Mike
 

Ressaldar

Western Thunderer
Still under the weather, but painting on between coughing bouts. Individual bricks and string courses seem to have been the order of the day

P1000610.JPG

followed by a 'mucky wash' that was the brush cleaning jar

P1000611.JPG

it is unfortunate that the brick courses around the windows and door are not sufficiently 'in line' to allow a representation of Staffs Blue Engineering bricks to be painted - just about got away with it around the wagon archway though.

and a close up of the latest acquisition - ordered sooo long ago as a blue TOPS version, I could not resist the black version

P1000612.JPG

as it will be the only diesel in the fleet - Zimo MX644 sound decoder to be fitted over the weekend when I have satisfied myself that it has run in sufficiently on the rolling road.

cheers

Mike
 

Cliff Williams

Western Thunderer
Brian Lewis is one of the most helpful suppliers for me Mike, he has been busy doing a few bespoke items.
Remember he puts on the top of the instructions the panic line, should you need anything at all or need to discuss his kits just get in touch.
 

Yorkshire Dave

Western Thunderer
Remember he puts on the top of the instructions the panic line, should you need anything at all or need to discuss his kits just get in touch.

“I like the cover," he said. "Don't Panic. It's the first helpful or intelligible thing anybody's said to me all day.” (Arthur Dent in Douglas Adams Hitchhiker's Guide to the Galaxy)
 

Ressaldar

Western Thunderer
Remember he puts on the top of the instructions the panic line, should you need anything at all or need to discuss his kits just get in touch.

Hi Cliff,

it helps even more if the telephone number quoted is the correct one - on the instructions for both the ramp and the extension, it states 01 275 852 207, which I called regarding the missing piece in the extension kit - only to find that it should have been 01 275 852 027!

regards

Mike
 

Ressaldar

Western Thunderer
Back in the land of the living again after three weeks of flue!


Time was not entirely lost as I was able to make slow progress with the painting of the ramp and extension, especially in respect of the near 300 fence posts.


post-6951-0-33480000-1480250918.jpg


having now put the items back out into the workshop, I can see what jobs remain.


post-6951-0-91537800-1480250918.jpg


the fitting of the extension to the coal hole entrance, the ladder from the hatch platform


post-6951-0-60805000-1480250919.jpg


the adjustments to the staircase once the ramp is fitted correctly to the coal hole


post-6951-0-48304700-1480250920.jpg


then the three items will be removed while the trackwork is fixed in place - only five of the seven points are fixed at present, so this will give me something to aim for during the week.


My latest acquisition seems to fit in well with its new surroundings, I'm impressed with the sound decoder (why shouldn't I be - it is a Zimo MX645, as fitted by Lionheart) it had a good run at the Club last Thursday and I just need to bring the maximum speed down and adjust the acceleration/deceleration to suit and I'll be a happy bunny. The lamps do light but I shall replace them with a more in scale non lighting variety. Crew are supplied and will be fitted, if only to arouse comment regarding the seated fireman.


regards


Mike
 
Top