2mm John’s workbench

John57sharp

Western Thunderer
B7568E12-5333-484F-9874-66E06DB02A97.jpeg Recording progress as it occurs...

Currently building an Association Presflo kit. This is a nice kit, complex but well thought out. Tiny of course. It has progressed a bit and been cleaned up a bit since this photo, but progress is at a standstill until either the carpet gives back one of vacuum tanks or I order a new one. The carpet is quite forgiving, often retaining parts for a day or two before allowing them to resurface, but not this one.

A few of the delicate bits have broken off too, my fault, but are safely held in the appropriate compartment in my projects box.

Cheers

John

Ps first WT post.
 

garethashenden

Western Thunderer
It’s a good kit, you’re right that it’s fiddly, but it can be built! Here’s mine, I’ve got another one to do at some point.
I4AtOTu.jpg
 

John57sharp

Western Thunderer
B808C47C-96D0-4B6A-9A34-5002830DCC06.jpeg Thanks Gareth, nice to see one finished.

Started on a 57’ Mk1 underframe and had fun bending the log solebars. I used double sided sellotape to hold the part in place on 2 square bars held in the vice. Seemed to work, but the gum took some cleaning off.

Cheers

John
 

John57sharp

Western Thunderer
8C1824AB-F79F-4A54-9D52-CC5078B54484.jpeg This update is real warts and all.

An important lesson (in all scales) is that there should be no tension in your assemblies when soldering. I had some in the mk1 underframe and I now have a curious, though possibly prototypical sag in mine.

E204BBAA-38F0-44FE-9491-0FBCE2CB9D38.jpeg


The 08 has also progressed, following some further advice from Mick Simpson (thanks again), the spacers have been turned up, I ended up making 4 as the first 2 disappeared into low earth orbit. The axlettes are now all fitted and I am working on making sure that the mechanism all turns freely under power. Note the all expenses spared test stand.

60252295-38A8-4304-A900-3A925C4393B8.jpeg 7BD8AF5C-E2F2-4105-8FE6-84282337289D.jpeg

Cheers

John
 

John57sharp

Western Thunderer
D8A83BD8-23DD-4F1E-92D8-6BAC346EB9D3.jpeg 5DE7A8A1-1952-4505-B0FA-B8E774CDD5E2.jpeg 61288520-1E35-4484-BBF7-3F21B94F997D.jpeg More progress on the mk1 underframe. Battery boxes installed nd the trusses are all in. Things are looking better and flatter.
I have seen a great improvement in my soldering since I started using solder balls, just because you use so little. I’m using copalux flux cream and washing often, and as you can see, it’s very clean and shiny still. Usually by now there would be solder everywhere.

Things are not so good on the 08, more news on that story later, but don’t worry, it will survive.

Cheers

John
 

John57sharp

Western Thunderer
AE7D6D73-30AF-41C9-B810-3333123C785A.jpeg 
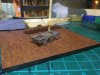
It’s time for an update. First on Gronk One, the 08: silly me thought the chassis was coming along nicely, but when test power was applied it became clear that something was amiss, and the harder I looked, the more amiss things became. I stripped the whole lot out and I soon saw that the gearbox was twisted, the motor shaft was pointing diagonally across the length, and when I took the driven wheels out, one of the bearings come out too. So I ordered up some new bearings, straightened everything out and soldered some scrap etch onto the back of the gearbox part of the frames to stiffen it up a little. The new bearings went on and the gears and wheels reassembled. Now another issue appeared, the worm gear was occasionally catching the underside of the overhanging gearbox frame, so everything came back out and some filing saw off the offending metal. So as of now, I have a free running and square mechanism ready for quartering, putting the motor back on, Simpson spring renewal where needed and then we’ll be back where this update started....

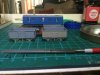
I have also progressed with the Presflo wagon, slowly, the best news here being that the carpet monster today gave back the vacuum cylinders that were recently lost. Tip of the day, when vital components vanish into the pile, lift the edge up and give it a good beating, it soon coughs then back out! Only works on rugs of course, don’t try pulling up the fitted Axminster. Thanks to Gilly for her persistent searching that revealed the partstoday.

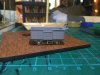
There is also a BR brake van progressing nicely which is also benefiting from improved soldering with the tiny balls of solder.

The mk1 is on hold for now until I sort out the remaining parts for the underframe.

Cheers for now.

John
 

John57sharp

Western Thunderer
72E42C3D-2EBD-416D-8A21-C1E70BDA0AD5.jpeg A50B8002-4999-4213-B238-48B4577E63DA.jpeg Amongst other progress, my workstation has been both elevated and taken to the next level. Basically I have added a rough hewn sheet of ply below the work surface with enough room to take 3 of the plastic organiser trays that fit in the main module which lives upstairs. This gives me more secure storage without having the trays pile up aro7nd me and reducing the risk of spillage. This has happened. There is also room for the parallel jaw pliers which are so useful.

Wagon wise the brake van is slowly progressing although the sole bar and step assembly on one side delaminated while I was putting the wheels in. This appears to be due to the solder paste that I had been using not getting enough heat, so I have hopefully resolved this using solder balls to sweat the parts back together. The brakes are on too, but them are sooooo very thin that they were bending badly while I was reinserting the wheels, so they came out and had small lengths of thin wire soldered to the backs of the etches. Only 1 snapped completely and I will glue this back on.

I have started a Grampus wagon. There are no instructions for the underframe but I think I have it sorted, reference to photographs helped. I fell foul of the axle box layers having too small a hole for the top hats, but hope to have this dealt with soon, and I broke the curved brake lever support, so a new one is needed which have to be fettled up from scrap etch.

I broke a crankpin on the 08 and the last spare is currently a hazard to any craft in low earth orbit over our house.... new ones are on order. I have been tempted by an 03, but managed to resist for now. I really need to get some track down soon, so I should save up for that.

Cheers for reading
John
 

John57sharp

Western Thunderer
5637EED3-0B16-464C-A84B-656BD16239D1.jpeg That dreadful moment when you realise that although this Grampus represents the best and neatest work you have achieved so far, the £&(#@g solebars are on upside down.....
 

John57sharp

Western Thunderer
Feeling a little better about things following some recent sharing of my 08 woes elsewhere and having managed to get to the point where I can progress forwards from. But not until Shop 3 opens again.

On the C&W front, the CCT is now in basic blue and underframe murk. There are a few things to do, but I’m happy enough with it, and its a great kit. The wagons are now striding forward, with a 16T mineral, a BR van and assorted other steps in the forward direction.

I even have a plan for a photo booth a la MRJ but in 2mm.

Cheers
John
 

Attachments

  • D81C03A6-BC0A-4F83-ACF1-A32A172CA80A.jpeg
    D81C03A6-BC0A-4F83-ACF1-A32A172CA80A.jpeg
    217.6 KB · Views: 13
  • C9BEDF29-713D-499C-9452-B7124DD4E8D5.jpeg
    C9BEDF29-713D-499C-9452-B7124DD4E8D5.jpeg
    176 KB · Views: 13
  • 1119253F-F96B-4DB7-A15C-8418617F182A.jpeg
    1119253F-F96B-4DB7-A15C-8418617F182A.jpeg
    203.7 KB · Views: 12

John57sharp

Western Thunderer
31DC9B6E-EE82-4082-9780-ED5F3A8FD702.jpeg I have finally managed to get some 3 layered axle boxes together AND on the wagons. Many thanks to 2mm Andy from the Other Place who gave freely of his spare etches to replace the lost and mangled ones from the kits I had under way. The secret for me is use higher temp solder to assemble the parts and then fix them with my usual solder balls.
Pictured are the workspace with one of the drawers to the fore, and a selection of minerals and The CCT.

More progress soon, and a parts order going in soon.

Bestest
John
 

Attachments

  • 3C90E31C-FC3A-4E93-8B6D-F1E6B437E0CC.jpeg
    3C90E31C-FC3A-4E93-8B6D-F1E6B437E0CC.jpeg
    208.1 KB · Views: 3

John57sharp

Western Thunderer
CD33E01A-6B50-42A7-A854-777019A4960E.jpeg A delivery of assorted wheels has given us a boost and resulted in this motley crew of minerals, and a few other things. Bodies only placed on at present, but a lick of paint and some buffers will follow my getting to know DGs, which is going ok. The short length of track will form my gauging base.

Cheers

John
 
Top