28ten
Guv'nor
Ok as long as its not getting boring.
Anyway having looked at the window area i think i will remove the rear of the moulding but leave the front part intact hopefully this will give the relief that is missing in the kit window but will retain some of the strength of the original, as i think it might be vulnerable to handling damage
This pic shows what Dan has done replacing both windows
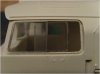

 The glazing will be added to the front part of the window later.
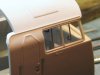
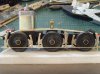
 & I thought this pic might be useful
 ")
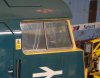
")
 :lol: :lol: :lol:
  :lol:
:lol: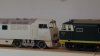
 coming on a treat
  I still wish Heljan would produce one though
 :lol:
:lol: