7mm On Heather's Workbench - 37 Varieties

richard carr

Western Thunderer
Heather

I can only find one photo on Flickr of this loco from the 70's it is dated August 1978. The number one end steam heat pipe seems to be missing.
The headcodes may not have been blanked by 1975 they were more likely to be showing 0O00 .

It certainly looks like all the side access steps are still there in this photo

37106 at Derby on August 5th 1978.

Richard
 

BrushType4

Western Thunderer
Richard beat me to it. The 1978 picture is pretty much what I'm looking for. I quite like the dominos, so I will keep digging for information for when they were added.

37106 Barrow Hill 22-09-1974

6829122887_ccbd40f4fe_o.jpg
 
Last edited:

Heather Kay

Western Thunderer
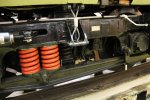
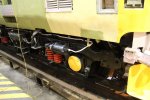
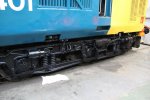
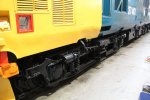
Interesting. I've got the Barrow Hill picture, and you might notice the radiator grille has the fine mesh cover, which seems to be missing from the one in the previous post.

Richard's link, from 1978, shows all steps intact, and no grille. More grist to the mill.

It seems engine picking diseasels is harder than kettles!
 

richard carr

Western Thunderer
Heather

Heljan provided the grills in the box, these are frost grills and were often seen on 37s and 40s up until the early 70s, they then seem to have gone out of fashion. I suspect I have spares somewhere if they are required.

Richard
 

Heather Kay

Western Thunderer
They are indeed in the box, Richard. Thanks for the offer, though. I'll consult with Philip on the exact configuration he'd like before I commit to anything.
 

mickoo

Western Thunderer
Frost grills vary, some depots kept them longer than others and once removed didn't seem to be refitted, unlike class 40 which had them on and off as they changed depots and regions. I did used to know which areas kept them but have since forgotten.

I've three photos of 106 dated 78,80,88 and none have frost grills. The 1978 image does have dominoes but by 1980 the headcodes were plated over.
 

Heather Kay

Western Thunderer
Holy thread resurrection, Batman!

With most of the backlog of stalled jobs now cleared from the bench, I find this reworking is grinding into action.

I have made a start by reacquainting myself with (a) this thread (*gulp* almost four years ago: sorry, Phil :(), and (b) all the sundry parts I've acquired for the job. What I find is I appear not to have any instructions for the Pete Harvey etch (I've emailed him to see if that can be remedied) and I didn't actually get very far last time I looked at this job!

So, pending updates from PHD, I shall set to adding some details here and there to the bogie frames, rethinking the head code boxes, and getting to know more about Class 37s in the mid-1970s in general. Oh, I'll also need to buy some more warning yellow paint. My old tin has dried up.

Right. Watch this space, as they say.
 

richard carr

Western Thunderer
Hi Heather

I don't recall that the Pete Harvey etch had any instructions, but with a little thought I'm sure you won't need any.

To me the things with the biggest impact are thinning the fuel/water tanks and fitting the CPL couplings, I would love to add the couplings to all my diesels but it would take far too long, and the etched steps from Pete Harvey.

Adding dominoes is also worthwhile if they are what is required, the rest of the body is more than good enough if you ask me.

Richard, far too many 37's in the collection now !
 

Heather Kay

Western Thunderer
I don't recall that the Pete Harvey etch had any instructions, but with a little thought I'm sure you won't need any.

It’s so long now I can’t recall if there was any documentation with it. Most of it is fairly self-explanatory, but some parts like the steps could do with a simple exploded drawing to show how the parts fit together. I’ll figure it out, I’m sure.

I spent a few minutes disassembling the body shell earlier. While it won’t need much work, aside from the windscreen etches, I felt there may be enough work done to warrant a full repaint rather than patch painting. Looking at the body shell on the bench and comparing it with the photos of the loco, I think the double-arrow logo is in the wrong place anyway.
 

Heather Kay

Western Thunderer
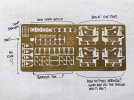
CD94B068-BEE4-4F32-9B12-DBB3ACA2AAA4.jpeg

I have tried, honest I have. This image sums up my understanding of the detail etch. I mean, it’s lovely, but how is anyone supposed to work out how the bogie steps are assembled without any instructions or diagrams? Where are the angle brackets supposed to be used? What are those two rectangular things? And those shapes bottom left?

And why are there no parts to make the steps you can see hanging at the corners of each nose?

Any help from the WT Massive would be most welcome.

I must admit I keep looking at the pile of parts I’ve now got and wondering what the heck I’m doing with this! So far, all I’ve managed to do is disassemble everything and narrow the belly tanks. I’ve got some reference material, but even that’s not inspiring me much at the moment.

Apologies. I’m having "one of those days".
 

Dog Star

Western Thunderer
Heather,

I cannot find any trace of instructions on the 'net, however, this topic on the other place is about using the detailing pack on a HJ 7mm Cl.37. The second photo ought to give you a clue about the bogie steps... try cutting the pieces for one step, make the half etch folds and then juggle the pieces on the assumption that the largest piece is the vertical plate at the back of the steps.

Still confused? Try this link and then run the "origami-decode" memory cells until you experience a "light bulb moment".

regards, Graham
 
Last edited:
Top