Spitfire's G3 Workbench

Spitfire2865

Western Thunderer
Wow.
So some good progress.
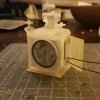
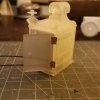
Last night I began one of the final major components, the headlight.
119 7-29-18.png
Ive designed it to open, slide out, and light up! Idealy, those grooves on the back will hold copperclad with some sprung wire contacts that will transmit power between the loco and the lamp.
Speaking of which...
20180729_172853.jpg
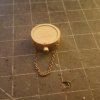
The lamp is a 12V grain of wheat stuffed into the shell of a fairy light bulb and stuck into a shortened flashlight reflector.
20180729_173056.jpg
On about 9V its pretty bright. I was powering it here from my Neilsons batterypack. The American will have a similar arrangement of batteries, however in the tender due to space constraints.

But the design is slowly finalizing. 119 (2) 7-29-18.png 119 (3) 7-29-18.png
Ive since changed the internal structure of the tender tank to really beef it up. Ive lightened the internal framework, but I could probably go further and cut down as much weight as possible. Dont want to be carrying around too much unnecessary weight.

The cab is going to be quite impressive when finished, with opening doors, sliding windows, opening firebox door, and functional Johnson-bar. Shame the throttle wont work!
119 (4) 7-29-18.png
(And I just realized that backhead bracket collides with the reverser....Have to check clearances on that....

And Ive ordered assorted parts from Ozark Miniatures and Trackside Details which will hopefully be useful, the parts from RCS I need, some new taps and dies for the wheels and all the extra long bolts I need to make from rod, hornblocks, and Ive put in an order with Walsall for the pilot and tender wheels.

And I still have to buy all the lasercuts, the etch, $700 US of 3D prints, AND the Drivers.
Goodbye modelling budget...
At least I still have another Mike Williams wagon to build and a handful of 1/72nd aircraft...
 

Jon Nazareth

Western Thunderer
Trevor
The problem is the lack of a drawing or a decent photo. I posed the question for a drawing or a picture of a brake lamp in 'Questions and Answers' but nothing concrete. This is a picture of a Southern lamp but, obviously, only one elevation. I'm not very positive about finding material to copy but, not given up quite yet.

Jon

index-1.jpg
And a tail lamp
index-2.jpg
 

Spitfire2865

Western Thunderer
Well that tail lamp wouldnt be too hard if I had a scale to go with it. Is that from a book?
I could probably even stuff an LED into it with a small button cell!
I wonder if there are any drawings for L&Y lamps for my D21...
 

Spitfire2865

Western Thunderer
save some money to have yourself 3D printed dressed as Buster Keaton sitting on the coupling rods.
Have you SEEN the prices for 3D scanning? Makes my 3D printed parts look reasonable!
In seriousness, I went to an attraction in New York City over the winter that was our answer to Miniatur Wunderland and they offered 3D scanning and printing full colour. It was quite expensive.
But that does give me ideas.
 

Spitfire2865

Western Thunderer
So Ive made a discovery tonight while drawing up the tender filler cover. I messed up the tender flare. While the overall height was correct, the line of rivets was actually higher and the tender top was flush with the front wrapper. Which changes the angle of the flare, height, and thus corner geometry. Much fun ensued. So Ive had to update approx 20 drawings, 3 files, and redrawn my etch pattern.

But I have today ordered all the 3D printed parts sans boiler and its fittings. So Ive got that going for me.
 

Jon Nazareth

Western Thunderer
Trevor
Not trying to pirate your 'Workbench' but, If we said that the brake van/side lamp had a base of 6" x 6" that should give us something to go on. Wouldn't it? The reason for putting this post here is so that others may comment should they so wish.

Jon
 

Spitfire2865

Western Thunderer
Trevor
Not trying to pirate your 'Workbench' but, If we said that the brake van/side lamp had a base of 6" x 6" that should give us something to go on. Wouldn't it? The reason for putting this post here is so that others may comment should they so wish.

Jon
No worries, itll be my work afterall, so it should be featured here.
 

Spitfire2865

Western Thunderer
A little update.
Received the other order of detail castings today, which most importantly included a brass bell kit.
20180803_011643.jpg

And just in case any of you think Ive gone soft from my month of CAD work...
20180803_011803.jpg
The first of many I will need for both the engine and tender trucks. As no one makes longer than 1/2" 14BA bolts, Ill have to do it myself. By my estimate, Ill need to make 50ish for the tender trucks alone. Ill also need to make eyebolts, so stay tuned for me figuring that one out.
 

Spitfire2865

Western Thunderer
Well a Friday off from work has given me 12 20mm bolts and 20 15mm bolts.
20180803_175505.jpg
Cut 1mm rod to length, file ends flat, mount in vice 1-2mm proud, thread, remove, torque hex nut on, measure length of other thread, mark, mount in vice with line proud, thread, remove, solder nut on top, file flat.
Repeat 70 times.

And onto Jon's earlier request,
Two flavours of LBSCR Brake lamps now available on my shapeways shop for anyone who wants.
lbscr tail lamp.png LBSCR side lamp.png
 

Spitfire2865

Western Thunderer
Well. Saturday is going well.
Ive finished all the bolts needed to put the tender trucks together. 20180804_150411.jpg
All 42 of them.

And Ive started on the brake beams. Ozark Miniatures brake mouldings, some spare maple, brass rod, some 14ba nuts, and my newfound obssession with threading stupidly tiny threads.
20180804_150507.jpg
I had completely forgotten to draw up the brake hanger brackets, so thats another 3D print to order on my next paycheck.
 

Spitfire2865

Western Thunderer
While I continue to wait for my 3D prints and assorted orders, Ive gotten back to designing.
A boxcar of approx 1870s design.
Boxcar 8-12-18.png
This one should actually be an "easy" build considering only the framing and floor would be milled wood. The roof structure would be lasercut and all the sheathing and roof would be coffee stirrers, so relatively cheap for the amount needed. Plus almost no ironwork!
Though Ill definitely need plenty of .5mm nails.
 

Spitfire2865

Western Thunderer
Well, Ive managed to make up a basic Solidworks assembly for the boxcar.
Boxcar 8-13-18.png
Still have to draw up the end framing.

The trucks are quite nifty little things. Based on a New York Central truck design from 1876, its an archbar truck but the truck bolster is floating in the truck frame sprung on a swinging plank below which is linked to the truck frame. Thus you have springing and slight swinging. Unfortunately, a massive disadvantage of this design is it is NOT self compensating. Both axles will be fixed in relation to eachother, though Im sure the 5' wheelbase wouldnt cause too much issue.

Im thinking if I get around to building this, Ill make it worth my while and build 2 of them at the same time.
 

Spitfire2865

Western Thunderer
Well, Wednesday I received my first 3D print order.
$400 USD worth of plastic and brass.
20180817_000045-1.jpg

But what I was most looking forward to...
20180817_000336-1.jpg
And me being me, Ive got some good use out of my miniature hinges. Those hinge pockets will be filled after priming when I can actually see it!
20180817_000352-1.jpg

Other than that, there isnt much I can do until I get the etches, metal, wood, and 3D printed boiler parts.

Oh well. More CAD until I get more parts.
Im thinking a late civil war era flatcar. Just have to figure out how the trucks go together.
 

Spitfire2865

Western Thunderer
I bought some figures from Pat Maslin, and am quite happy with what I got.
Decided to begin painting a few up, starting with the new guard for my L&Y D21.
20180825_115549.jpg
That is Matt Black paint, so Im not sure how that dazzling iridesence came about around the collar.

Ive also finally got the lasercut steel parts in production, so possibly a week or two until those are ready. Then I can begin the tender construction.

But earlier in the week I received the etch sheet.
Mostly it contains tender parts including all the tank cladding.
20180825_120255.jpg
But I started putting the flares together and bent to the right angle.
20180825_123108.jpg
And tender steps.

Now to go back to waiting.
 

Spitfire2865

Western Thunderer
In my boredom, I made a candle with real dripping wax. 20180826_103435.jpg
I doubt open flame would be much appreciated in a moving brake van.
So speaking of which, does anyone know how the inside of a brake van would be lighted in use? I know theres the stove, but that wouldnt throw out much light.
Would they have a small oil lantern?

Id love to populate my D21 with prototypical assortments inside, so what else would you expect inside an on duty brake van?
 

mswjr

Western Thunderer
This may help,This is a model of a caboose in 7 1/4 inch gauge ,It is on a model engineering site,and it is a stunning model,I expect the period is the same,so may help, The oil lamp is above the desk,I expect that is all they had
 

Attachments

  • Interior.jpg
    Interior.jpg
    130.9 KB · Views: 29

Spitfire2865

Western Thunderer
Wow, quite luxurious in comparison to UK practice.
Also some impresive modelling.

But Ive done some more this afternoon.
20180826_185249-1.jpg
A couple varieties of broom and a wooden canteen.
I would assume a guard would need some source of clean water. A bit outdated by the 20th century but as my guard appears to be in his 60s, his formative years would be about the right time period.
20180826_185309-1.jpg

I also have some 1/24 tools and a kettle on the way, so Ill have a few more appropriate things for the van.

Next I think Ill try making an oil lantern from a fairy bulb.
 

Spitfire2865

Western Thunderer
Well I did some good work today.
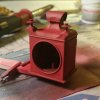
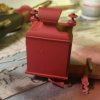
I painted the headlamp box a deep red over a black basecoat.
20180831_221436-1.jpg 20180831_221445-1.jpg

And Ive begun the cab section.
The lower walls are made up from a sidesheet and 4 bent brackets which were pinned and soldered in place with the last of my brass nails. Ive already placed an order for 600 more.
These were then bolted to the rear brackets which forms the lower rear side of the cab and supports the running boards/upper cab floor. 20180831_221328-1.jpg 20180831_221408-1.jpg

Unfortunately until I get the steel parts, theres not much I can progress with for the cab.
But once theyre in, I think Ill start on the tender before going to the loco as I still have a while to wait on the drivers.
 
Top