Jordan
Mid-Western Thunderer
Aww shucks...Purple-haze said:Reminds me of a Jordan and a SB kit

I did like the look of the Captain's one, though.
 mindyou, given the price of Silver Fox it might've cost nearly as much as mine...
  :lol: :wave:
Aww shucks...Purple-haze said:Reminds me of a Jordan and a SB kit
mindyou, given the price of Silver Fox it might've cost nearly as much as mine... :lol: :wave:


")
Captain Kernow said:.... I would add that it took over half an hour just to get the ballast reasonably neat on that 9 inch section, plus a fair bit of time faffing around wetting it, applying the glue and clearing up! ....

It depends on the degree of vibration I suppose :laugh: :laugh:Captain Kernow said:How much more exciting can this get?!
It depends on the degree of vibration I suppose :laugh: :laugh:28ten said:[quote=""Captain Kernow"":xi0wt6mn]
How much more exciting can this get?!

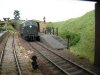
The bit of vertical white plasticard is a temporary representation of the brick face of the old disused platform, which will be installed once the ballasting etc. has been completed. I would add that it took over half an hour just to get the ballast reasonably neat on that 9 inch section, plus a fair bit of time faffing around wetting it, applying the glue and clearing up!
 (paint brush and tweezers still required to poke errant bits of ballast back where they belong...)
Yes it does. Perhaps does not dry quite as hard as the usual PVA method28ten said:Does kleer actually 'glue' the ballast? ......
28ten said:....... And I guess it needs a coat of matt after?
Captain Kernow said:......it is still apt to form 'bubbles' in the ballast, displacing carefully laid and tamped material...

Probably a stupid questionRe6/6 said:I'm still new to the technique but I find that instead of trying to drip from the dropper precicely into each ballast gap, I flood it in quickly.
, but could you describe how you flood it in without disturbing the ballast ? :scratch: ")
Probably a stupid questionPhill Dyson said:[quote=""Re6/6"":1oihhuhh] I'm still new to the technique but I find that instead of trying to drip from the dropper precicely into each ballast gap, I flood it in quickly.
, but could you describe how you flood it in without disturbing the ballast ? :scratch: [/quote:1oihhuhh]Probably a stupid questionRe6/6 said:[quote=""Phill Dyson"":292vjtu4][quote=""Re6/6"":292vjtu4] I'm still new to the technique but I find that instead of trying to drip from the dropper precicely into each ballast gap, I flood it in quickly.
, but could you describe how you flood it in without disturbing the ballast ? :scratch: [/quote:292vjtu4] , I will hopefully have quite a lot of ballasting to do soon