4mm An EM Workbench: n shades of grey

Cambrian Railways Brake (to Sodor)
  • AJC

    Western Thunderer
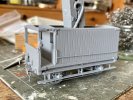
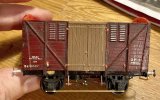
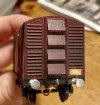
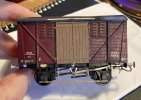
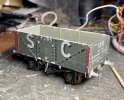
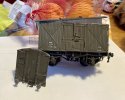
    Back home (having discovered an excellent model shop in Cromer which stocked a great range of kits and bits including Railmatch colours). Anyway, activities here involve clearing the living room for a carpet fitter and running repairs to my workbench revealed the miscellaneous bits including this Cambrian Railways brake van. I suspect I bought the kit, many years ago, for some half formed industrial scheme.

    As much as a decade and a half later, I’ve dusted it, laminated and reinforced the footsteps, added lamps and most of the castings. I dare say it’ll make a nice companion for Thomas

    72D62BDC-B9E6-4C82-B58B-CDA4F66C9F94.jpeg

    Adam
     
    Last edited:
    BR Shocvan
  • AJC

    Western Thunderer
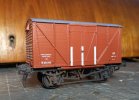
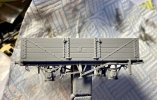
    Now it's cooled down and paint doesn't dry while you turn your back, another complete, if not fully finished wagon project of BR diagram 1/209, this being one of those with Morton brakes and strangely, GWR style lever guides. Why strange? This variation came out of Ashford... This one features lots of Rumney Models bits (levers, vees, lever guides, axleboxes), buffers from @Dave F. and the original kit by Parkside.

    Shocvan_Plank_001.jpg

    The lettering and white lines are by Cambridge Custom Transfers. Weathering will wait until I'm in the mood again - in the meantime, I'm finally adding droppers to the layout so it may be operable soonish.

    Adam
     
    Jinty
  • AJC

    Western Thunderer
    Here's a very long term shelf queen, which is really a sign of weakness of will and a lot of 'good ideas at the time'. I don't need a Jinty, though I quite like them as engines (the one now at the Spa Valley over the hill from me - in bits - used to be at Cranmore when I was a kid).

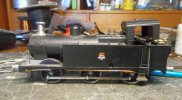
    So this Jinty started out as a discard from when Bob Alderman moved completely to 7mm. It had a scratchbuilt chassis, whose frames were, I think, hand fretted from brass with etched rods under a Cotswold(?) whitemetal body which wasn't a lot of cop to be honest. With a set of early Gibson wheels. and Perseverance bearings on the front and with plunger pickups it was very '80s finescale. It had never worked that well but perhaps I could rebuild it?

    It languished. Anyhow, I bought a very cheap Hornby body, started detailing that and then came upon a slightly more expensive Bachmann body and some etched bits and pieces with the intention of marrying Bob's chassis, suitably reworked, to that. I decided, following a small windfall, to replace Bob's work with a High Level chassis and to build that instead which takes us to where we are here. Even the original wheels were discarded as it turns out that they were actually GW drivers. They're a problem in search of a pannier, I suppose, but that's for another day. The frames live on under Thomas, so what seems like quite an expensive exercise is perhaps not *quite* as bad as it first appears?


    Radstock_001.jpg


    Here's the state of play - a rolling chassis which, through my incompetence, proved harder to make workable than it should have been (anyone can broach out a coupling rod on the skew, but one really shouldn't). The rogue P4 axle that snuck is something I have no excuse for! Anyhow, I've almost succeeded in achieving running clearances, though the front steps have had to come off for a second pass.

    This will at least be modelled on a Somerset-based example, one of those shedded at Radstock (47496), but that's the far side of the Mendip from my nascent branchline so remains absolutely implausible despite being in the same county. Still, it would be at home on the LMR environs of South Junction, so all it not quite in the realms of fancy.

    Onward, slowly.

    Adam
     
    Last edited:
    Vac' Pipes from scratch
  • AJC

    Western Thunderer
    A small project for projects: a batch of vac’ pipes.

    C492D828-EA3D-4342-81A3-D5386E1FFBC2.jpeg

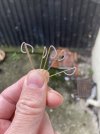
    Yes, you can buy these but for some applications I like to make my own. They're simply 0.7mm brass wire with very fine filament wire (from a dead phone charger) wound around it. The end fitting is from a Rumney Models wagon detailing etch, but a wind of thicker gauge wire would be just as good to most viewers. Two pairs here for the B4 and Thomas respectively, and a pair for stock. Hopefully I’ll be able to find them again when I need them!

    Adam
     
    Last edited:
    Unfitted Project: LNWR open
  • AJC

    Western Thunderer
    And now, something completely different (well, for me), but continuing the theme of unfitted opens. This, from @Bill Bedford's Mousa Models is an LNWR dia. 84, quite a common form of open high that lasted into the '50s in reasonable numbers. Below is shown what turns up in the box:

    LNWR_Dia_84_001.jpg

    A complete body and underframe (there's a separate floor), all square and nicely defined. The resin is extremely robust so I've no concerns about the brakegear or levers lasting in traffic. Among the innovative features are 3D printed springing units which work very well, on trials. The principle is exactly that used in Bill's etched W irons: a bearing carrier slides inside the W-iron on a guitar wire spring. The only difference is that the spring (an 'L' shape) is mounted into a hole and a bracket rather than fixed the the bearing carrier which has a groove in it which rests on the spring.

    LNWR_Dia_84_003.jpg

    There are also printed sprung buffers, and couplings. I did trial assemble a buffer, and the concept works, but since I had some metal heads and springs in stock and the printed heads are a little chunky, I have substituted these. The couplings are workable - I've seen versions on Bill's stand over the years, but they are scale and my standard is a bit bigger to make them workable for my hands and eyes so I used these instead (no slight is intended, I'm fairly sure that they'd survive well in use).

    LNWR_Dia_84_002.jpg

    Note the buffer assembly jig - very clever, and it works. Anyway, here it is after a bit of cleaning up and a waft of primer (note that I had to replace the door spring plate on one side so that it lined up with the spring - I suspect a copying error here - a scrape with the scalpel and scrap of 5 thou' tacked on with cyano'. I was surprised how the striations visible before hand are not too apparent.

    LNWR_Dia_84_004.jpg

    All in all quite promising, if disconcertingly quick to build. There are a few, LMS-applied, details to add (label clips, horse loops, RCH-type owner’s plates), but that’s barely 10 minutes work.

    Adam
     
    Last edited:
    Airfix Meat (BR dia. 1/250)
  • AJC

    Western Thunderer
    Perhaps not? Given the existence of the Airfix kit and that BR only ever had 150 ventilated meat vans, it's was not a vehicle I've ever had a hankering to build, (though I have eliminated a grounded body of one from a club layout with rather a lot of gusto) but here it is, among the batch of broken wagons, so nothing ventured, and possibly nothing gained. Being Airfix, it’s quite solid and that’s allowed salvage to begin.

    Airfix_Meat_002.jpg


    Adam
     
    Last edited:
    Airfix Meat (BR dia. /1/250)
  • AJC

    Western Thunderer
    I think this might just work. Let the solvent go off for a day or so and I can put the wheels in.

    Airfix_Meat_003.jpg

    Something a bit more straightforward: a Parkside Vanwide. The absence of springs is because I want to change the axleboxes and the set I have in hand *turns out to have too many leaves* has better efforts than the Parkside ones (which aren't bad at all).

    Vanwide.jpg

    You probably won't see much more of this one, as I've built a couple before and it's an excellent kit needing not much work: I'll even use the brakeshoes.

    Adam
     
    Last edited:
    Airfix Meat (BR dia. /1/250)
  • AJC

    Western Thunderer
    From the wreckage a complete wagon. Not that it's warm enough to paint it.

    Airfix_Meat_006.jpg

    I've pinched the roof from the Vanwide as that's a longer term job and I'm all out of 20 thou' sheet for the minute. Nice not to have to add vent holes in the floor as the vents are open on the moulding (which I'd not noticed before).

    Adam
     
    Stephenson, Clarke RCH Mineral
  • AJC

    Western Thunderer
    A bit of patch painting and job done. :)

    Exactly so!

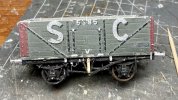
    Here's another, one of the better wagons from the same batch (though with a distinctly wonky body, since straightened out) was this one, which has a compensated inner chassis, quite unnecessarily from a running point of view, and I'm not at all sure of the origin, but a deal more durable than the Cambrian mouldings from bitter experience.

    RCH_Stephenson_Clarke_002.jpg


    RCH_Stephenson_Clarke_003.jpg

    Another patch painting, BR numbering, weathering, and release to traffic job. Quite satisfying.

    Adam
     
    Milk Tank
  • AJC

    Western Thunderer
    Podimore - in my imagination, anyway - had a dairy and that means milk tanks. I enter into this subject with significant trepidation as the things are complicated, massively varied in minor details and *in the same wagon* split between different owners. Added to that, the different pre-Nationalisation railways did their own versions. Kits are few, complex, and expensive (and not in production) and the two RTR versions in 4mm are a bit naff (though the LIMA one has a good, scale, tank and decent fittings, it turns out).

    I made a start on the chassis for one some time ago and it stalled, wanting for enthusiasm. A chance purchase of a complete vehicle (which seems to include etched bits from David Geen, but the castings look a bit crude for that - didn't Keyser do one?) for next to nothing recently - and dad admitting defeat with his Geen kit - means the project has woken from its slumbers and I have bits sufficient for three, and a LIMA donor tank for a fourth, if willpower allows.
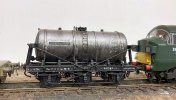
    Milk_007.jpg

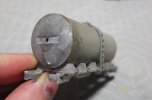
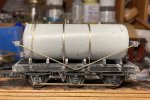
    Here's the tank 'as found'. It's a bit of a state, missing a buffer at one end, but came near complete, and in EM (a bonus!) and, despite the solebar's bold proclamations, it's actually a GWR type which had been... modified to make it LMS-ish. Why 'ish'? The LMS gave their milk tanks coach wheels while the other three railways went for wagon wheels and, yes, the brake levers were in roughly this position, but... no. That said, it's square, it doesn't fall off dad's test track, and cost me just over a tenner.

    A dunk in IPA removed the 'weathering', the LMS lettering, and the silver paint. I was actually a bit peeved about the latter as it'll be a swine to mask up when the time comes. One strap came off, as did the ladders, brake and steam pipes, and, unfortunately, some of the end ironwork. The turned brass buffers were removed, taking the buffer beam with it as the epoxy gave way.
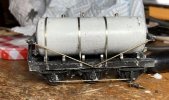
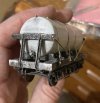
    Milk_009.jpg

    Milk_008.jpg

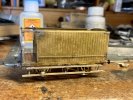
    Anyway, after a protracted clean up I soldered the displaced buffer beam back on and patched the damaged one with a scrap of whitemetal which should make it a bit more durable. The thing will end up as a diagram O.39 with Dean Churchward brakegear as delivered to United Dairies with one of those attractive (and, thanks to Rumney Models, modellable), access platforms some Unigate vehicles had. The other two vehicles in the branch milk train will have more sophisticated (sprung!) underpinnings, but more of those in 2023. Probably.

    Adam
     
    Last edited:
    Milk Tank
  • AJC

    Western Thunderer
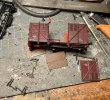
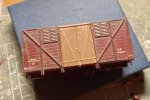
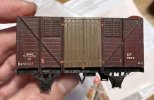
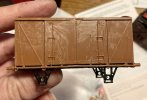
    It looks like the K's kit to me - Photos from a hulk in my 'I'll get round to it one day' pile attached.

    View attachment 177134View attachment 177135

    Cheers - I’d say that’s conclusive. The etched bits between the frames on mine certainly aren’t, and I think the tank has been replaced with something that isn’t whitemetal. No matter, I think it’s worth the effort and should be relatively quick to sort out.

    Thanks again,

    Adam
     
    Milk Tank
  • AJC

    Western Thunderer
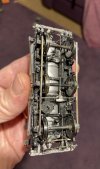
    Reconstruction continues apace (using bits from the Geen etches that came with dad's donor vehicle). The linkages are broadly representative where they can be seen rather than an accurate rendition and, of course, you can't really see them in this picture which rather justifies that approach, doesn't it? Buffers and couplings next.

    Milk_010.jpg

    219FD262-958C-43DB-9612-94D64D50EF99.jpeg

    Adam
     
    Last edited:
    David Geen NER G2 van
  • AJC

    Western Thunderer
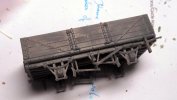
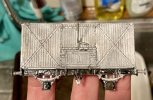
    So, what have I bought? It is EM, whitemetal, assembled with, I'm fairly certain, superglue, and yes, one end has come off, hence the incredibly low price. For some reason, it's also lined with plastic sheet. Obviously, this is another destined for the '30s freight train.

    So what is it? I *think* that it's a NER G2 (assuming that any were vacuum-fitted) and, given the all whitemetal construction, is probably by someone like David Geen (not 51L, unless it was dropped from the range for some reason), rather than D&S and I don't think Adrian Swain did one - the pattern making doesn't look like his work, though it's pretty good. I see that @Rob Pulham has made an unfitted version in 7mm: NER Vans to the fore. | Railway Models and Art Blog and that something that looks like our van survived as an internal user into the '80s: 041266 - departmentals.com

    NER_possible_G2_001.jpg

    Questions: Is that correct? If so, does anyone have the relevant volume of Tatlow and can tell me more about the real thing (numbers, build dates, etc.? Would it have had the roof opening by the mid 1930s and what colour would a fitted pre-grouping vehicle be? Bauxite I suppose?

    Any answers?

    Adam

    PS - there is an ABS vacuum cylinder though. It's mounted upside down...
     
    Last edited:
    David Geen NER G2 van
  • AJC

    Western Thunderer
    A few posts ago, a rather sorry specimen was presented: 4mm - An EM Workbench: Two Departmentals. Having looked still more sorry, and then found itself a collection of bits at the bottom of a jam jar in cellulose thinners, things are looking up:

    NER_G2_001.jpg

    The black paint on the underframe proved rather stubborn, and I'm not so worried about that: I've only taken it off as a conscious effort when it would interfere with solder. Since it is now all soldered together, I have more things to do. The headstocks need to be thickened up a bit, I haven't found an image of one of these with J hanger springs so I have replaced those with plain ones - for which I do have an image - and once that's done, I can get it on its wheels.

    Adam
     
    Mr Lycett-Smith's mogul
  • AJC

    Western Thunderer
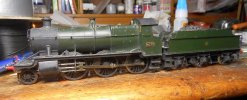
    If you can't indulge yourself for your birthday, when can you? I didn't need a Churchward mogul, but this example - already in EM, Ultrascale wheels, Portescap motor, Malcolm Mitchell kit - passed my attention at a vulnerable moment. Since it was also quite a lot cheaper than the Dapol RTR equivalent, I failed to say no. I think I know it's origins, but it's probably not for me to say without confirmation.

    It's very nicely built and runs well though it's clearly done a few miles and the paint is worn, enough that it's BR identity will see it turned out in black. That will also enable me to fit the short pattern of safety valve cover that they all seem to have had by the time Nationalisation came round and to fit Collett pattern of buffers, together with some discreet reinforcement of the steps to protect them from handling. A handsome thing, and I'm well-pleased.

    Churchward_Mogul_001.jpg


    Adam
     
    Mr Lycett-Smith's mogul
  • AJC

    Western Thunderer
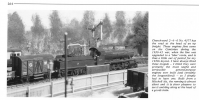
    I noted above that I had suspicions on the provenance of this loco, one of what was clearly a batch of very nice EM GWR locos with a Cambrian sort of emphasis in choice which turned up via Rails of Sheffield. And those suspicions meant that I'd seen it before, as it turns out in MRJ 154. This, I think, is 'my' 4377 (the crew look like those I have in the box, and the coal load matches) in its original surroundings, at Porthafren, Roger Lycett-Smith's Cambrian layout. From that, I assume - sadly - that the layout is no more and that Roger may have left us. This element of his work, however, will live on, albeit with a new coat of paint, and I hope to get some of the same enjoyment he evidently did from building and running her.

    1678743481323.png

    Anyway, here's Roger, leaning on the nose of a De Havilland Venom of 98 Squadron, RAF, with which he served.: https://www.coldwarshield.co.uk/downloads/volume_two/ColdWarShieldVolumeTwoPage192.pdf. Thank you, Roger.

    Adam
     
    Last edited:
    Top