jonte
Western Thunderer
Apparent as it may seem, it is not my express intention to invade every area of the forum with examples of knee-jerk modelling or half-baked ideas; more a genuine desire to contribute something not only worthwhile, but relevant to theme of The Great Western railway.
To this end, I submit this little fella for your amusement and interest, based on one that appears on page 90 of Stephen Williams' book 'Great Western Branch Line Modelling'.
I use the word 'based' as its creator - as per usual - is doing his best with only limited tools, skill and intelligence, so I trust you will bear this in mind while perusing.
Those of you who've been kind enough to express an interest in my attempt at doing a minor weathering/detailing of a Hornby Hall amongst these pages will probably be wondering why I'm fiddling with this when I already have a G.W. Themed project on the go. Well, you may also recall that I'd taken a short diversion to have a go at building a signal from bits and pieces lying around. Unfortunately, although it worked, it was difficult to 'clothe'; my idea of fabricating a removable brass jacket worked, but looked nothing like the real thing and was even chunkier than a Hornby Dublo offering. Thin slivers cut from brass sheet to imitate the lattice work of the prototype needed annealing to 'iron' them out but then had all the structural properties of thin card! Most of all, however, it was a Southern themed signal (pretty irrelevant here) so no amount dressing was ever going to disguise that. I've put it away for now with a determination to return to it in the future, as I really need to get back to the Hall, but I'm determined it's not gonna beat me!
Annoyingly, I still had the desire to produce a working signal, an itch that simply wouldn't go away, hence the example you see in these photos. I'm hoping it won't take too long to get it working - erm yes; my intention is to get it to work, I really am a glutton for punishment- so that I can get back to the real business of finishing the Hall. So, without further ado, here's where I'm up to after about a week.
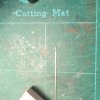
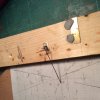
Everything has been cut from thin K&S brass sheet, and the piece of punctured rail you see is a scrap of Code 40 bullhead from which the arm will be cut, pre-drilled with holes for the spectacle plate, pivot and mechanism - a piece of brass wire. A separate piece of shaped annealed brass wire has been formed for the lower spectacle plate and another for the top of the drilled spectacle plate ( apologies, forgot to photo them) but they really are minuscule. Incidentally, I've forgotten to include the usual penny or ten penny piece in the photos to provide a sense of scale. I'll try my utmost to remember to so in future.
I hope you find it of interest.
jonte




 Still, it's a cracking piece of work. If you aren't in danger of supergluing arse to elbow, give your self a pat on the back
