Unklian's G3 workbench .

Mike W

Western Thunderer
Now that's naughty Geoff, and yes, I have risen to the bait!

At the rate we are going there will soon be more LNWR wagon types available in Gauge 3 than for the smaller scales. What we need in this scale next is more carriages. Getting back on topic, do you intend to fix crankpins to the disc wheels Ian, or maybe choose a loco with skirts?

Mike
 

geoff_nicholls

Western Thunderer
sorry, Mike, couldn't resist.
The LGB steam tram can be anglicised quite easily, by removing, the stuff from the roof, and the front windows and adding a brass strip for the the skirt. I did this with mine. However the result is a bit larger than scale.
Don't these motor blocks usually have a rubber tyre on one wheel? That might be a nuisance.
 

Mike W

Western Thunderer
You mean like this Geoff?

Mine doesn't have the traction tyre, so maybe just fallen off? But, can somebody explain the pickups to me? There are these skates which bear on the rail head, but also nice little plungers on the backs of the wheels which I assume are also pickups?

And as for the plethora of Gauge 3 LNWR wagon kits on the market - you are partly responsible for that!

Mike
 

Attachments

  • LGB motor block.JPG
    LGB motor block.JPG
    133.7 KB · Views: 18

geoff_nicholls

Western Thunderer
for motor blocks with a traction tyre (which is actually in a slot of the wheel tread) there would only be consistent pickup from one wheel on one side. Add to this the uneven track outside, probably just laid on the patio or grass, they wisely added the extra skates. the motor block included in my GRS Peckett does have a traction tyre, but as it is gauge widened, no skates. At the time I was still two-rail power, so it stayed in its box and is still there.
I believe wheels without traction tyres may be available as spares.

I've just dug an axle out of my LGB bits box and tried on Clif Barkers track and it runs through the turnout frog okay, even without reducing the flanges.
As for the wheelbase, GRS addressed this issue themselves with another G scale block: they cut the block in two, fitted two horizontal extension pieces in brass, cut the motor shaft and extended it. They used a universal joint but that may not be necessary. This was for the class 121 DMU.

The people just starting in G3, a service extending axles and modifying pickups would be very useful. You may find you've got a job for life Ian...
 

unklian

Western Thunderer
Thank you Mike and Geoff for the points raised. You are quite right about the arrangement of pickups on LGB locos and their chassis blocks. They usually have carbon plunger pickups on the backs of all driven wheels and two skates that ride directly on the rails. One wheel usually has a traction tyre fitted which rather negates the effect of the pickup on that wheel. For Gauge 3 I was going to remove all the pick ups as I assumed that most people would be using the chassis for R/C and battery power ( wrong ?? ). However it would not be impossible to replace the traction tyre wheel and extend the carbon brush pick ups for track power. Only problem is that it has become a bit more difficult to get LGB spares since they were taken over by Marklin.

Mike for disc driving wheels, as per the LNWR shunter, you could add crankpin bosses to LGB disc wheels, or fill in the holes on their Stainz shunter type wheels or even add crankpin bosses to disc wagon wheels . Could be an interesting setting up job in the 4 jaw chuck methinks .

As far as my tram goes Geoff, you are quite right about anglicising it, but mine will remain continental and gain standard buffing gear as well as wider wheels.

Finally I can think of worse jobs for life than regauging LGB to Gauge 3, bring em on I say !
 

unklian

Western Thunderer
I had a good go at the tram loco today and eventually got it running on broader rails and for the time being as 2 rail track power.

Taking the chassis out revealed some 'interesting' wiring and the reason for the ugly switch on the front. It was fitted to turn the smoke unit on and off.RIMG4253.JPG

I stripped it all apart, and then offered up my previously converted chassis, as anticipated the wheels just fitted inside the lower skirts width ways. Unfortunately they wouldn't fit right in height ways, as the narrow wheels had been tucked up into box shaped splashers which the wider wheels were too wide for.

RIMG4254.JPG

However I think I can live with the loco being 7mm taller as this will help with fitting full buffing gear at the right height .

RIMG4258.JPG

Finally I got it to go by fitting a motor and gears ( the easy bit ) and extending the pick up plungers ( not so easy ). This I did by sleeving them with some 7/32" K&S brass tube, I had to slit it length ways to get it to slide on snugly, and then had to open out the holes in the chassis for the now bigger diameter to fit. Because the holes are effectively only half holes the drill I tried wandered all over the place and so I resorted to a bit of creative Dremeling. RIMG4259.JPG

The two brass wires are effectively buss bars that connect the pickups to the motor. At first they refused to contact when the bottom plate was refitted, so the two rectangles of masking tape were added to pinch them a bit tighter . I just need to find a spare wheel without a traction tyre now. Next the buffing gear and cosmetics .:)
 

geoff_nicholls

Western Thunderer
Just browsed through the photos in my copy of Tramway lokomotiven by Walter Hefti. Although you wouldn't get away with skirts like that in Britain, it seems to have been allowed on the Continent.
I'm sure I have a spare wheel, if you can't find one in your bits box.
 

unklian

Western Thunderer
Your tram looks great Geoff, amazing what a difference just the plain black makes . The other mods all help to make it look like a British one too. Kind of seems a shame to regauge it somehow , although I will help you out with the regauging if you insist ! What would you do about the drawgear ? I might take you up on the offer of a spare wheel if my first line of enquiry doesn't work.

A bit of an update on mine in the mean time, a trial assembly with the new drawgear. I think I need to remove more of the beading detail so that there isn't a gap behind the buffer beams. I am thinking of a second shorter beam to cover the gap below the new one and to mount some sort of centre coupler/buffer, and then maybe a plough/cowcatcher/lifeguard below that. Hmmmmm...... RIMG4263.JPG
 

geoff_nicholls

Western Thunderer
Since you're interested in steam trams, Ian, have you seen this?

Tram Body Kit

A Kitson steam tram in 16mm. They look very nice, Grainge and Hodder must do the etching as they had one on their stall at Warley, though I'm more a Falcon man myself, having worked at Brush in Loughborough for a few years.
 

unklian

Western Thunderer
Thank you Geoff, I have seen the Swift Sixteen tram and very nice it looks too. However it is a bit too big and a bit too (specifically) British for my purposes. I also got my LGB tram and the bits to add to it for much less than what is just a body shell. What I would really like is the Old Originals ( I believe) French steam tram enlarged to Gauge 3 .RIMG2666.JPG
 
That's an impressive collection of completed and part built vehicles. The tram is gorgeous, not my usual taste but as an individual model it looks lovely and I would be very tempted.
I do like the GWR Toad behind it though, and ideas where that is from if it's not a scratch built example?

Thanks.
 

John D

Western Thunderer
' What I would really like is the Old Originals ( I believe) French steam tram enlarged to Gauge 3 .'

'Victoire' was not an Old Originals etch job, I scratchbuilt it in 1:32 scale from a drawing that I found in a copy of Voie Libre of a Blanc Misseron tram that ran on the Sarthe line. Shouldn't be too difficult to do similar in G3 though there' s a fair bit of rivetting on it but in the end it would be pretty damn impressive.

Cheers,

John
 

Steve Cook

Flying Squad
I do like the GWR Toad behind it though, and ideas where that is from if it's not a scratch built example?
Bar the tram (and the chassis immediately behind it), all the work in that photo Graham is the product of the talented hands of Simon of this Parish. The Toad is a scratchbuilt model and regularly appears on the Launceston Road thread. It is lovely in the flesh / plastic, a really fantastic piece of modelling.
HTH
Steve
 

unklian

Western Thunderer
John D 'Victoire' is very lovely, I hope you don't mind me putting up the picture .

Thanks everyone for your replys about the picture of the tram, I took it at Shepshed a few years ago, and at the time there was no one around to ask about the models on display. I am sure though I have seen a picture of a similar French tram model and it was captioned as having been made from a kit.
 
Last edited:

John D

Western Thunderer
There is a brass HO kit for a Belgian tram available ,or was available on t'other side of the channel ......perhaps this was the one you saw.
'Victoire' gets to have a run on Peter Smith's 1:32 scale French epic Mer les Bains at various shows these days ........

John
 

unklian

Western Thunderer
Been a bit quiet around the Gauge 3 workbench recently with all the HO scale goings on. However the G3 AGM at Biggleswade has provided some inspiration and a few bits of loot. In the shape of a Peter Korzilius underframe ( he's dipped a toe in the G3 waters bless him ) and some Midland axlebox fronts from AndyB. All I need now is the Tony Riley van body to go with them.RIMG4325.JPG
 
Last edited:

unklian

Western Thunderer
The workbench has been taken over with work for others recently, so I fear little Gauge 3 construction has been going on. However I gave some friends a brief demonstration of the big green toy and its trucks yesterday. The weather got so wet in the end we had to tip the water out of the wagons before bringing them in ! I had another go today and was able to wield the camera at the same time. The cold air gave some nice steam effects although my camera didn't capture them too well. Nine wagons seems to be the limit for the loco on the gradient and the curve of the circle. Perhaps I should try ball bearings in some of them ?RIMG4349.JPG RIMG4354.JPG RIMG4358.JPG
 

unklian

Western Thunderer
It has been a while, and mainly because I have been completely distracted by a slight change of project. Yes a ( ..nother ) micro layout ! All started by a challenge from the SNCF Society to build a layout in up to three boxfiles. Well of course doing that in Gauge 3 was going to need all three, and after looking at many other micro layouts I realised that a wagon turntable was the most compact way of getting other than straight track. I also decided that with the scale and space limitations, this was going to be more of an animated diorama than a layout. So a corner of a crowded industrial setting seemed appropriate, with some factory elevations as a back drop. The first mock up was done using some A4 size boxfiles.

RIMG4512.JPG

But after consulting with the organiser of the challenge I discovered that foolscap size folders would be allowed. This allowed a bit more space and this is what I have been working with.

RIMG4515.JPG

The turntable idea was one I had been working on for another layout, and when a friend who is an absolute CNC wizard mentioned he had some spare time on his machine, I quickly rustled up some drawings. This resulted in a massive boost to the project , the main 'castings' for the table and the pit being machined in tooling resin . I will have to make the roller assembly, pivot, drive mech, etc. The boxfiles meanwhile have had 6mm MDF tops made ( I could not find any plywood that was flat enough ! ) and linings to support them .

RIMG4560.JPG

I was then given a load of K&S brass U channel ( another little boost ), and I set to and laboriously filed down one leg of some 3/16" channel so that it could be soldered into the web of some Cliff Barker N/Silver code 200 to make a rather coarse tramway type rail section .

RIMG4562.JPG

This was then soldered to countersunk screws and bolts let into the MDF tops. The rails are now a little bit higher than the box edges so the stock can pass over from one box to the next , but the lids will still shut. A requirement of the Rules is that the boxes retain their lids and can be closed for storage .

RIMG4564.JPG

And yes, for the first board only there will be an extra rail at 45mm gauge, just so the odd bit of metre gauge stock can be 'run' .

RIMG4573.JPG

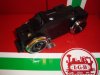
Things are now at this stage. Rails on the first board, this board and the turntable board bolted together, turntable pit 'sunk' and some development of the elevations of the building. The elevations will need some cunning planning as part of the Rules say that the layout must be packed away in the boxes when not in use. With one box full of turntable and gubbins, everything else above baseboard level must pack into the other two boxes. Fortunately rolling stock and controls are not included in this requirement . Which leads me to the fact that I might have to make some special extra short rolling stock. I already have a loco in mind and maybe some early French wagons, but research for this bit is ongoing. I have until January 2017 to get it all done anyway, loads of time .....:eek:

Ian
 
Top