Talerddig Mk ll (micro layout)

matto21

Western Thunderer
My posts are like buses: nothing, and then two in two days!

I had some unexpected time yesterday night while the baby was sleeping so pushed on with some of the outstanding jobs.

I've replaced the original wheels with Gibson's, as others before me (including Neil) have done, I've essentially left them free floating but added small blocks of plastic sheet in the recesses to retain them.

IMG_20181210_225857328.jpg

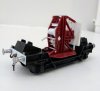
You'll also notice that I've now fitted buffers from Lanarkshire Models. There are a few small details that I'm debating whether to add to the chassis or not.
IMG_20181211_094415578.jpg

And finally a quick photo of all the component parts together.

IMG_20181211_094358502_BURST000_COVER.jpg

I'm starting to feel like it's coming together!

Matt
 

steve1

Western Thunderer
My posts are like buses: nothing, and then two in two days!

I had some unexpected time yesterday night while the baby was sleeping so pushed on with some of the outstanding jobs.

I've replaced the original wheels with Gibson's, as others before me (including Neil) have done, I've essentially left them free floating but added small blocks of plastic sheet in the recesses to retain them.

View attachment 95624

You'll also notice that I've now fitted buffers from Lanarkshire Models. There are a few small details that I'm debating whether to add to the chassis or not.

View attachment 95625

And finally a quick photo of all the component parts together.

View attachment 95626

I'm starting to feel like it's coming together!

Matt

Having seen this, I now know I was exactly right in selling my unmodified example, complete with Jonathan Hall resin detail kit, to Rippers. There was no way on earth I was ever going to even get round to starting it, let alone finish it to this standard.

steve
 

matto21

Western Thunderer
Having seen this, I now know I was exactly right in selling my unmodified example, complete with Jonathan Hall resin detail kit, to Rippers. There was no way on earth I was ever going to even get round to starting it, let alone finish it to this standard.

steve

Thank you Sir for the very kind comment. Still plenty to do though, and plenty of margin for error!

I'm particularly not looking forward to rigging the thing up. Any suggestions about how to do this, or what to use (EZ line?) would be gratefully received!

Matt
 

matto21

Western Thunderer
Merry Christmas/Nadolig Llawen to you all!

I'm always looking for cheap ways to add to my wagon fleet and recently uncovered this Red Panda Sand Tippler that I must've built 10 years ago. I actually hadn't done a bad job, and the weathering was decent but for some reason I hadn't fitted the brake shoes in line with the wheels.

So, after an extended bath in some Fairy Power Spray, and some butchering of the plastic, I'm at the point where I can begin reassembling.

IMG_20181226_220822623.jpg

Matt
 

matto21

Western Thunderer
In a random u-turn, I decided to dig this Dapol brake van kit out of the stash. The floor in my kit was badly warped and thwarted my attempts to straighten it so I resorted to plan b and cut out the middle section (the worst part) and assembled the sides around the two end pieces.

I debated whether to replace the handrails with wire but decided not to - a) they'll look ok when painted and b) I'm useless at soldering!

Work so far has been limited to adding a thin overlay of plastic sheet to the inner ends to hide the huge ejector pin marks, some strip to conceal the join between the end and floor on the outer end, safety rails from 20 thou rod, thinning the lamp brakets and converting the door window into four panes.

IMG_20181227_224154194.jpg

I'm now debating whether to rebuild the foot boards from plastic sheet or use the originals tidied up.

Matt
 
Top