Dog Star
Western Thunderer
As it seems that there is no bar to GWR enthusiasts wandering around on the dark side I thought that this would be the place to open a discussion on the details which are not provided in the familiar white box.
Rob Pulham and I have been discussing the finer (or poorer) points of this model and Rob has decided to let me find and sort the niggles. So, as there are at least two of us out here who might like to know, here are some little problems which are in need of nice and easy answers. The kit offers brake cylinders and brake cross-shafts; there are no brake pull-rods (which are common to most of the standard Gresley 61'6" carriages), there are no hand-brake pull-rod / equalising levers / slotted links (specific to the brake coaches). Prototype pull-rod diameter is 1 1/8" (29mm for those with a modern education) and I reckon that equates to some of Eileen's finest 0.7mm round rod (brass or nickel.... is there a preference?)
[1] Simplest task is the pull-rod from the forked lever on the cross-shaft to the bogie, the prototype has a plain eye / hole in the end of the pull rod. Now I could squish the end of a piece of 0.7mm rod, drill for a 0.5mm pin and bingo, done. However the prototype does not have a squished end, rather the rod ends in a circular boss with two flat faces (probably 1 1/8" apart and parallel to the axis of the rod). How would you produce the boss on the end of the rod?
[2] A coach fitted with a hand-brake and an automatic brake requires some form of slip linkage between the hand-brake and the vac-cyl. so that either can apply the brake without hinderance from the other. Generally that slip link is slotted and at the point where the hand-brake rod meets the pull-rod to the bogie(s). In the case of the Gresley design, the slotted link replaces the plain eye of the brake pull-rod in [1] and the slotted portion of the link fits inside of the forked lever on the cross-shaft. On the assumption that the forked levers are a constant, then the width of the slotted link is about 1 1/8" with a similar depth. How would you form a slotted link, of 0.7mm square cross-section, on the end of a 0.7mm diameter rod?
For those with a real sense of humour, the background to this topic can be found here:-
http://www.lner.info/forums/carriage-br ... t4438.html
thank you, Graham Beare
BTW - is this bit of the forum called the dark side because no one feeds the meter? :
Rob Pulham and I have been discussing the finer (or poorer) points of this model and Rob has decided to let me find and sort the niggles. So, as there are at least two of us out here who might like to know, here are some little problems which are in need of nice and easy answers. The kit offers brake cylinders and brake cross-shafts; there are no brake pull-rods (which are common to most of the standard Gresley 61'6" carriages), there are no hand-brake pull-rod / equalising levers / slotted links (specific to the brake coaches). Prototype pull-rod diameter is 1 1/8" (29mm for those with a modern education) and I reckon that equates to some of Eileen's finest 0.7mm round rod (brass or nickel.... is there a preference?)
[1] Simplest task is the pull-rod from the forked lever on the cross-shaft to the bogie, the prototype has a plain eye / hole in the end of the pull rod. Now I could squish the end of a piece of 0.7mm rod, drill for a 0.5mm pin and bingo, done. However the prototype does not have a squished end, rather the rod ends in a circular boss with two flat faces (probably 1 1/8" apart and parallel to the axis of the rod). How would you produce the boss on the end of the rod?
[2] A coach fitted with a hand-brake and an automatic brake requires some form of slip linkage between the hand-brake and the vac-cyl. so that either can apply the brake without hinderance from the other. Generally that slip link is
slotted and at the point where the hand-brake rod meets the pull-rod to the bogie(s). In the case of the Gresley design, the slotted link replaces the plain eye of the brake pull-rod in [1] and the slotted portion of the link fits inside of the forked lever on the cross-shaft. On the assumption that the forked levers are a constant, then the width of the slotted link is about 1 1/8" with a similar depth. How would you form a slotted link, of 0.7mm square cross-section, on the end of a 0.7mm diameter rod?For those with a real sense of humour, the background to this topic can be found here:-
http://www.lner.info/forums/carriage-br ... t4438.html
thank you, Graham Beare
BTW - is this bit of the forum called the dark side because no one feeds the meter? :

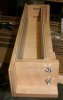
 , is that beyond the slot section the pull-rod returns to a round section and then forms a clevis for a plain eye on the next section of pull-rod (rod [1] linked to rod [2] in LNER Forum thread above).




 .
.