Breaking Ground - Finescale - of a sort

mickoo

Western Thunderer
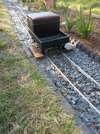
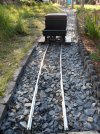
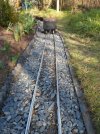
I've read through this thread several times, and I still think I'm missing something :confused: I note what appears to be a complete absence of sleepers, or, indeed, any mention of how the rails are fixed down (I can see screws, but screwed into what??) or held to gauge.
As a Connesuie conessu someone especially interested in Rickety Track, I'm interested to see what's happening here.? ;)
You're not, I looked several times and concluded it was some sort of wizardry and left it at that :D
 

Osgood

Western Thunderer
I had to look very hard - looks like the track is screwed down in places into mortar which is packed into one of the hexagonal compartments of the plastic geodetic ground mat (or whatever it is called) that holds the ballast. Quite ingenious.

Although I suspect it is a plan to create gauging issues not too far into the future, giving Peter the excuse he needs to build a breakdown crane......
 

Peter Insole

Western Thunderer
Thanks Jordan, Mickoo and Tony. You are all quite right, it is indeed a most peculiar way of going about it - but it seemed like a good idea at the time?!

The primary reason was that the loco, tender and stock under construction are based upon the original "ride-on" train, with tough plastic wheels and a portable track system that is designed specifically for indoor use. Between Richard and myself we have accumulated a considerable quantity of the surprisingly durable stuff, and as it has already proven itself for cosy operation from room to room in dark winter times, we would particularly like to retain that very useful capability!
There is always a price to pay though! The joints in that original track do rely on the rails being laid on a reasonably smooth and level floor - something that most properties benefit from. The garden is a wholly different matter though! Quite apart from the obvious level issues, the plastic is notably vulnerable to UV exposure! Being able to operate outdoors in pleasant weather - when nobody particularly wants to play inside - was absolutely essential !!

The multiple questions of available rail types and construction methods, what would be suitable with those plastic wheels, the location of the permanent way and of course, the overall cost of whichever system chosen was particularly daunting. I know that some of this was covered at the beginning of this thread, but it might now be worth clarifying.

I am very happy that one of my sons; "Mr. O" has adopted the garden, and had already set his heart on laying a slate chippings path down the entire length of same. The long. but narrow plot precluded a separate formation, so any trackage laid thereon would have to be of low enough profile not to be uncomfortable or hazardous to walk upon! Another difficulty was that the little flat shards of slate might look pretty, and even give a pleasing, Welsh quarry narrow gauge appearance, but would be quite incapable of securely holding conventionally sleepered track in place.

A successful experiment using some square, UPVC strips, continuously supported by the geodetic textile matting proved not only practical, but surprisingly cheaper overall than a similar length of metal rails on wooden sleepers, set in ballast over a weed proof membrane!!
Many boxes of matting and a mountain of chippings were delivered, and laying had already commenced when we (main collaborator Rich, originator of this thread, and self) decided to try some 16mm aluminium rail with a proper flat bottom profile instead.

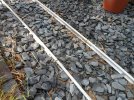
Laying the rails as direct replacements, with coarse, galvanised screws set in "postcrete" is a bit fussy, but it actually works quite well! The strange formation has passed three main tests: Significant trampling, blistering summer sun, a winters worst and a perfect balance of gentle adhesion!!

By the way, the geometry of the matting is Nature's own invention, that so ably resists compression! Containing the stuff at either side of the trackbed with brick and tile edgings prevents expansion, so maintaining gauge seems not to be too much of an issue, for the time being at least?!

Besides, who needs an excuse for a crane anyway?!!

Pete.
 

Peter Insole

Western Thunderer
I'm afraid that I didn't manage to escape - and despite all the precautionary jabs, still caught that damned Covid!! Saturday saw the last activity on the railway, but noticing how much more effort was required gave me a fairly good clue as to what was coming!

The latest variant doesn't seem to be quite so bad, but is still unpleasant enough!! Today, the fever has finally settled down and I am sitting up - albeit feeling as if I have been punched quite hard in the chest!

I will have to take it easy for a little while, but hopefully get back up to speed soon. Meanwhile, here are three belated pics showing the state of play up to the point where I threw in the towel...

hhSAM_6863.JPG

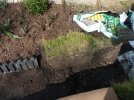
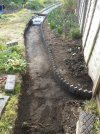
This was the last hefty clod to come out of the edge of Mr. O's flower bed, allowing the final batch of old, blue tiles to be realigned.

hhSAM_6864.JPGhhSAM_6866.JPG

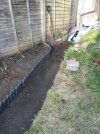
I needed an awkward half tile to close up against the fence post. I found a damaged one in the stack, and was surprised and delighted by how easy it was to cleanly cut down the middle with a chisel!

Only afterwards, I discovered that the selected tile had damage on the "wrong" side. Although it was a perfect fit, the good half was then effectively back-to-front when installed!!

Would anyone notice?!

Pete.
 

Peter Insole

Western Thunderer
Thank you so much Brian. I hope to get shot of it soon too, but we are both utterly horrible at the moment and are still waiting for some sort of indication that we have passed the worst of it?!

It has been a mystery that despite living in such close proximity to us in our little house, Mr. O's tests kept coming back negative?!

That was until this morning though!!

Pete.
 

Peter Insole

Western Thunderer
Two out of three negative tests at last, but playtime is not only restricted by a sensible bit of extra isolation, but by snowstorms too!! It therefore seems to be an opportune time to start planning the junction points while cosily ensconced in the warm.

I might well be setting us up for a fall with that plastic "Ground textile" path material, (mainly by not knowing how long it will survive) but from the moment we decided to use aluminium rail it has been our intention to lay some proper, timber sleepers for the tight curve and return loop line at the top of the garden. Conventional construction of the points was an absolute no-brainer!
With those objectives in mind, we have already acquired several bags of a hard, crushed stone ballast, carefully selected to be of a similar colour shade to blend with Mr. O's slate chippings.

Some concern about the insertion of a set of points midway along the main footpath, with their converging rails and transverse timbers being a bit of a slippy-trippy hazard remains a tad vexing! My personal preference would be something perfectly prototypical:
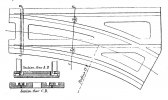
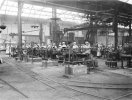
qzg4point 148.jpgqzg5_1997-7059_HOR_F_2049.jpg
(Copyright images shown for illustrative purposes only)

Throughout the entire Horwich Works, all the points and crossings were to the same standardised, cast iron, tram plate pattern, regardless of the location and type of running rail attached to them. Providing something similar would undoubtedly solve almost every issue in our situation - even if it might look a little odd?!

At far as I can see, both technical and financing difficulties somewhat outweigh any hoped for benefits though?

It would be too easy ending up worrying myself to a complete standstill, so for the time being anyway, I am proceeding along rather more practical lines...
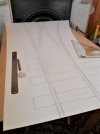
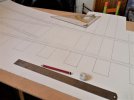
hhSAM_6880.JPGhhSAM_6882.JPGhhSAM_6883.JPG

Never mind that new fangled Templot (sorry!) - this is more like Templod ?!

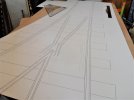
I had already started this drawing, just before my wretched confinement, by bending the two outer rails to the desired radii and then tracing out onto a very large and unwieldy sheet of mountboard. The fun since then has been stooping (sometimes slumping?!) over and trying to fill in all the rest of the jolly geometry!

Hand building P&C work in flat bottom is always a bit testing, but 16mm scale in brass - with cheating solder joints - was a walk in the park by comparison with this monster!

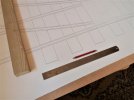
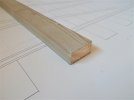
Way back then, I only needed to buy some lengths of the same hardwood strip that was used by Brandbright and Tenmille for their plain track systems in order to seamlessly match mine up! This time around, I was not at all sure what size timber would be remotely suitable for riding on?! Searching on line guarantees bewilderment for me - and am usually rather sceptical about the advice of many "experts" to be found there. Not being able to visit a shop and sample the wares, I was thus restricted. One guy on his website recommended treated roof tile batten for 5 inch gauge, so something on that order might possibly do?

I found a four foot length in our dining room, you know; just as you do?!
hhSAM_6884.JPGhhSAM_6885.JPG

The facts that that nobody knew quite where it came from, or indeed lay claim to it, I was happily able to use it!

Now here is where the strange became stranger:

As already mentioned; the curvature and leads of the point had been established first, followed later by the dimensions of the found wood, determining the precise location and spacing of timbers under the nose of the crossing and the point blades.

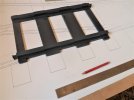
The light weight of the 16mm rail does slightly limit the bridging gap between the sleepers, so I randomly chose 60mm - on the basis that it sort of looked about right, but with an absolute certainty that there was no way that they would spread out evenly - with much fiddling required to fit?!

I was gobsmacked when discovering that the fit was exactly four !!

After completing the marking out, and then standing back for an overview... an odd thought suddenly occurred...
hhSAM_6887.JPG

Now that's not just a bit weird, that's really spooky innit??!!

Pete.
 

Simon

Flying Squad
Looks really good, that is a spooky bit of luck too!

Gawd knows how you are going to file up the crossing nose or "plane" the blades...

I'm sure you have a cunning plan, but aluminium or no I can feel my shoulder and arms aching just thinking about what's in front of you!!

Glad you are all recovering too.

Simon
 

Peter Insole

Western Thunderer
Thanks for your empathy Simon! My arms are aching already too - along with everything else - but that is probably more to do with the after effects of the Lurgi?!

I am informed that aluminium for crossing noses is not generally recommended, apparently owing to it's softness! Bearing that in mind, I have absolutely no intention of even attempting to bevel both rails to a point in the more traditional modelling fashion. I used to do that with the brass rail - and fill with a load of solder in the joint to take up any inaccuracies and make the whole thing nice and solid!

Not an option this time I'm afraid! I shall have to notch and bolt the two rails together in full prototype fashion.

I think there might be a bit more material to roughly saw off, but certainly less material to shave back - and there should even be a wee bit of wriggle room for error that way?! The trick is to ensure that there is enough of an angle bent at the ends to shape the head back to - and as a result of the short, sharp radius of these narrow gauge points, that is not very much at all!!

The blades will indeed be a bit more effort - bit then again, nothing like the long, slinky affairs of the "broad" gauge!! I am just hoping that my aggressive little cheapo linisher will actually be up for the task of finishing off?!

One really awkward job to do first however is to make another pair of dies for pressing out the ends of the check and wing rails.

The old wheeze of cutting a thin wedge out of the foot of the rail to close up inside a bend is again out of the question - especially if relying on part of a similar bend being the actual joint in the nose!!!

Some failures and tears before bedtime are anticipated...!!

Pete.
 

Peter Insole

Western Thunderer
Thanks ChrisBr! That indeed would save the worst part of the job!

Our loco and stock wheels are quite small with notably course profiles, so the gap at the crossing nose is uncomfortably large to accommodate them as well. I had even looked long and hard at adopting versions of a fully closing type.

The main problem with having a railway where youngsters must be allowed to "run loose" (as well as the occasional non enthusiast grownup at times!) means that any points have to be "trailable" - that is if we want to avoid any unscheduled journeys terminating on top of Mr. O's prize perennials - or even worse (?) submerged amongst the water lilies in his garden pond!!

Pete.
 

Richard Insole

Western Thunderer
Playing a little bit of catch-up with previous posts here...

Yes, I must take full responsibility for the Ali rail. We were looking for the most affordable (and achievable) method, and as dad says, Mr O. had already set his heart on a slate chipping path. It was us that cheekily stroked whiskers and pondered if this project could be slipped in without the main groundskeeper noticing. Much to our delight, Mr O. was the first person to break ground some two (or more) years ago pushing us forward to believe that this could be done. Although our course of action was somewhat locked into what had already been started by Mr O, call it luck or mere magic, it really does work, all-be-it very unconventional. It was at this point, where I wanted to be involved and I must admit, I wanted to push the boat out and get some metal rail, for prosperity of course. The Previous PVC rail had been down for some time and had proven that it worked but, I couldn't stand the idea that 'propa' rail would just tickle my fancy a little more. It was admittedly, not too difficult to get dad on board. After a small 'test batch' that I procured, we were both smitten... it was just too lovely. I guess, only time will tell if the geodetic mats will hold up over the long term but, for now, I think I speak for all when I say, we are really chuffed.

I have also found it tricky to name things/animals (the apple doesn't roll far, as they say) however, I will say that it is a lovely name for the station!

I am glad to see that you are on the mend! It certainly isn't the most fun thing to have (COVID!!). You have done so well with the plan/blueprints for the points as far as you have. Once the line deviates from the mainline/path, and not wanting to repeat what has already been said, the return loop will see some glorious and more prototypical sleepers. I for one, am very excited about this.

Cheers,
Rich
 

Peter Insole

Western Thunderer
There seem to be so many tasks, both major and niggling still to do before any more serious track laying can commence!

Two essential issues that had to be sorted on the existing line where the fitting of new fishplates and getting round to lowering the remaining section of edging bricks. The first was fairly easy, though admittedly a rather tedious task for a recovering Covid patient, while the latter was perhaps somewhat overly ambitious, given my hammered health conditions?!

Being aware that complaining about commercial suppliers is rightly unwelcomed here, I do still think some comment is required though, if only to explain my reasoning?

I simply won't name any names!

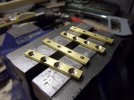
Ready made, machined and drilled stainless steel fishplates are available, complete with M3 pan head screws and nuts., designed specifically for 16mm aluminium rail. Although they appear to be quite good value at just shy of £1 each, it does start to become rather frightening when considering that four are required to join each 1.5M length of rail! We (Rich and self) agreed to order some sets with the first batch of rail, but my gripe is not particularly the price! After setting them up, I found that they didn't actually fit properly! They were all slightly too deep for the rail web, and would not therefore tighten up square. After only a handful of trips with the loco and tender, the wretched plates were working loose and the twiddly little nuts were disappearing off in the ballast, as well as the large, freed screw heads moving out and damaging the wheel flanges on occasions!

I resolved to ditch the "sodding things" (!) and damn well make our own !! How hard could that be anyway..??

hhSAM_6891.JPG

Oh fool that I am !!

We found a supply of brass bar that was a nice comfortable fit, plus large bags of sweet little countersinks for a few pence locally, so I was off...

The first set was trialled...

hhSAM_6892.JPG

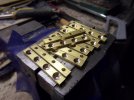
And seemed to be quite satisfactory and secure, so full production went ahead...

hhSAM_6895.JPG

Proving to myself that I am certainly completely off my trolley! There seems little point in arguing that point now?!

At least crawling around on hands and knees trying to fit them was not too bad for a wheezy fool on a nice sunny afternoon anyway?! Even a few rides up and down on the tender to thoroughly test them was not particularly tiresome either!

What that last act did reveal was the dire need to finish sorting out those shoe snagging, high bricks though.

hhSAM_6896.JPG
hhSAM_6897.JPGhhSAM_6901.JPG

I admit that the realigned ones are not so good and a bit wobbly, but I was rapidly becoming exhausted. By the end I was utterly done in! I can at least take some comfort knowing that the grass will grow and cover most of it, for most of the time anyway?!

To better aid my recovery I have decided to take a brief break away from the heavy soil shifting - and turn instead to the gentler art of dreaming...?

hhSAM_6890comp zpoint 931.jpg


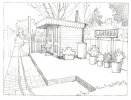
Ah, one day it would be nice to just sit here and listen to the birdsong while waiting with quiet anticipation for a train to come trundling along...?!

Pete.
 

Peter Insole

Western Thunderer
Thanks Chris - and everyone else for all your likes!

We have recently made a new friend locally, and were invited to his private seven and a quarter railway. The engine shed and yard is roughly central between two long, single lines that run around the edge of quite extensive paddocks. There are loops in woodland at either end which are some distance away and thus completely out of sight! He has two lower quadrant semaphores at the "station" acting as occupation indicators that are held in the off position by the weight of their respective train staffs hanging on the balance arms, and removal of course allows the signal blade to return to the on.

Although we might be accused of plagiarism, both Rich and self feel that something along similar lines is very tempting indeed...!!

Pete.
 

Peter Insole

Western Thunderer
Thank you Barnaby, it is certainly a challenge!!

Sorry Tony, I didn't explain properly in the earlier post! The direct Cornish link is unknown now, but "Lamorna" was the name of a house bought in 1945 for my maternal grandmother's sister and family in the beautiful Sussex Weald at Wadhurst.
I spent a lot of happy childhood holidays staying, as well as a rather more traumatic year living there in the 1960's. When my favourite aunt, the last surviving incumbent died (without issue) in 1988, the familiar and once charming house, that had by then become somewhat sad and ramshackle, was sold off. It was part of the proceeds and a transfer of equity that enabled me to narrowly avoid bankruptcy - and provide a degree of security for my own growing young family.

Such a memorial seems entirely appropriate.

Pete.
 

Osgood

Western Thunderer
Thanks Peter - I didn’t mean to be nosey.
How wonderful to preserve those memories in the station name.
 
Top