You are using an out of date browser. It may not display this or other websites correctly.
You should upgrade or use an alternative browser.
You should upgrade or use an alternative browser.
David Andrews 7mm Stanier 2 6 4 tank.
- Thread starter P A D
- Start date
Focalplane
Western Thunderer
Peter, a most enjoyable build to watch and marvel at. I agree about David's kits, they do go together well and are not too taxing for the likes of me. I have a Castle under construction (temporarily set aside) and a Patriot and a second Compound still in their kit boxes. The first Compound is waiting on DCC sound before it can pull some end-of-steam specials past Moor Street.
Thank you for the inspiration and standard you set the rest of us! Paul
Thank you for the inspiration and standard you set the rest of us! Paul
Stuart Dodd
New Member
Peter, I have one of these superb kits to put together, ( David's designs are excellent ), therefore the write up of your experience building the loco will be very helpful! I can only aspire to get close to your incredibly high standard of construction!
P A D
Western Thunderer
Following Dibateg highlighting the overlong running plateau the front end, it's been bugging me, so today I put it right before starting on the 3P. I thought it would a right PITA shortening it with the model finished, but it turned out to be quite simple. First I removed the brake pipe and then scribed a line across the front 1mm from the edge using my calipers. I then had at it with a round dental burr in the mini drill, removing metal until I could still just see the line. I then finished it off using a file (safe edge down so as not to scuff the buffers if it went astray) and finally emery paper wrapped around the field to finish off. Here it is after the brake pipe had been refitted. It could perhaps be a little shorter but I'm happy with it now.

Good job I'm a lazy git and hadn't stripped it down and sent it off for painting. There's method in my idleness!

Cheers,
Peter

Good job I'm a lazy git and hadn't stripped it down and sent it off for painting. There's method in my idleness!

Cheers,
Peter
P A D
Western Thunderer
Having completed the Stanier 3P for now, I've made the final corrections to the 4P based on observations of Dibateg's build. Here's the roof after cutting off the lower part below the rain strip on the left hand side.

A strip of 2x1mm brass L section is then soldered to the etched rain strip over hanging by about a mm to create a recess for the roof. Here the two outer parts have been soldered to the cab. I've decided to leave the rear fire iron next to the cab front as it is.

And with the roof slotted into place a nice tight fit is achieved.

A much better way to do it than the magnetic fixing which tended to get knock off and did not give a tight fit all round. Thanks to Tony Geary for sharing his idea.

Big and little "bro" together.

Cheers,
Peter

A strip of 2x1mm brass L section is then soldered to the etched rain strip over hanging by about a mm to create a recess for the roof. Here the two outer parts have been soldered to the cab. I've decided to leave the rear fire iron next to the cab front as it is.

And with the roof slotted into place a nice tight fit is achieved.

A much better way to do it than the magnetic fixing which tended to get knock off and did not give a tight fit all round. Thanks to Tony Geary for sharing his idea.
Big and little "bro" together.
Cheers,
Peter
oldravendale
Western Thunderer
I agree, Peter that the roof fitting is very effective and I also pass my thanks on to Tony for sharing.
Just one question which sounds easy but not so in the execution I suspect. How did you actually cut off the lower roof part so neatly? I can't see something that neat being done with a saw, so did you use a scrawker, in which case how did you hold the curved surface flat?
Brian
Just one question which sounds easy but not so in the execution I suspect. How did you actually cut off the lower roof part so neatly? I can't see something that neat being done with a saw, so did you use a scrawker, in which case how did you hold the curved surface flat?
Brian
P A D
Western Thunderer
Hi Brian,
I held the roof on the edge of my jeweller's anvil which has a wood insert with a V for cutting with a piercing saw. I let the roof hang off the edge then scrawked it along the inner edge of the half etch rain strip. I didn't need to use a ruler so it was easier to hold the 10mm or so of roof at the edge of the wood. Obviously it would be best to do it in the flat but needs must. It was in fact easier to do than the 3P roof which I needed to cut against a ruler.
Tony,
It would have been nice to meet at Doncaster, have a chat and compare the 4Ps, but that's not going to happen now. You'll be catching me up on the 4P and surging ahead with other builds, as once I go into lockdown I can't go to my bench at my brother's and can't build at home. Still that's the least of my worries.
Stay healthy everybody.
Cheers,
Peter
P A D
Western Thunderer
Now that the 3P and 4MT are ready to apply the lining I was going to press on with that. However, it's been 4 years since I worked on the Stanier 4P, so I've decided to get this to the same stage as the other two and then move on to the lining.
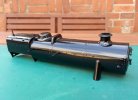
First of all I've change the slightly oval white metal DA chimney for a brass one from Laurie Griffin. To remove the WM casting I fluxed the smoke box ahead of the chimney, then applied heat from the iron. This softens the epoxy and allowed the casting to be removed by tweeking with a length of dowel inserted down the hole.
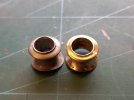
The LG casting was for the Stanier 5XP and needed shortening to suit the 4P. After cutting the chimney and sanding, I resoldered the two halves using a piece of dowel to line them up. First I applied solder around the joint with the iron, then flooded with flux and reheated with a gas flame to get maximum flow out. With that in mind I used epoxy to fit the chimney to the smoke box. Here it is after fitting. The oozed epoxy had still to be cleaned up. I scrapes most of it off then zapped it with a circular wire brush in the mini drill. This causes it to smear but it can then be easily wiped off with a little cellulose thinner on a cotton bud.
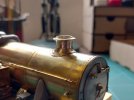
This is the original chimney.
And the replacement.
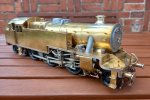
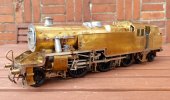
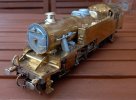
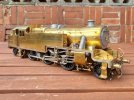
Then I dismantled the loco for degreasing and cleaning.
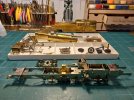
As with the 3P, the boiler is detachable to facilitate painting and lining. Unfortunately the construction method of the MOK 4MT doesn't allow for that.
Cheers,
Peter
First of all I've change the slightly oval white metal DA chimney for a brass one from Laurie Griffin. To remove the WM casting I fluxed the smoke box ahead of the chimney, then applied heat from the iron. This softens the epoxy and allowed the casting to be removed by tweeking with a length of dowel inserted down the hole.

The LG casting was for the Stanier 5XP and needed shortening to suit the 4P. After cutting the chimney and sanding, I resoldered the two halves using a piece of dowel to line them up. First I applied solder around the joint with the iron, then flooded with flux and reheated with a gas flame to get maximum flow out. With that in mind I used epoxy to fit the chimney to the smoke box. Here it is after fitting. The oozed epoxy had still to be cleaned up. I scrapes most of it off then zapped it with a circular wire brush in the mini drill. This causes it to smear but it can then be easily wiped off with a little cellulose thinner on a cotton bud.

This is the original chimney.

And the replacement.


Then I dismantled the loco for degreasing and cleaning.

As with the 3P, the boiler is detachable to facilitate painting and lining. Unfortunately the construction method of the MOK 4MT doesn't allow for that.
Cheers,
Peter
P A D
Western Thunderer
On the 4P I'm catching up with the 3P and 4MT, with the major components sprayed up, apart from the wheels. I somehow managed to get a run in the paint of the right side cab doors, so I'll leave it for another day or so and then carefully wet sand it smooth. All being well I won't cut through the top coat and can then polish it up with Tamiya rubbing compound. Rubbing compounds are used quite extensively in car modelling and they have got me out of jail in one ot two of my car projects and saved having to strip and respray. However, If that fails I'll mask up and respray the doors.
I chemically blackened the wheels some time ago, but I wasn't happy with the result, so I've cleaned them up in the lathe ready for masking and will spray them later.
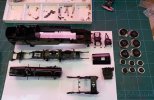
I dunked the wheels in a small tray of white spirit to degreaser them and after doing the first two, got broken off with some household chore. I then decided to leave the wheels and press on with the spraying. When I got back to the wheels later, I found that the balance weights I'd added to the back of the wheels made from black plasticard had softened and warped! I wasn't aware that white spirit attacked styrene but you live and learn. Fortunately, the 1st two wheels that had been removed after minutes were OK and one had a large and one a small weight, so I removed these and used them as a templates to make replacements. That's them in the tray of small parts above. Shouldn't be too long now before the lining fest will begin.
Cheers,
Peter

P A D
Western Thunderer
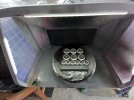
Here's my new wheel mount (more commonly know as a piece of wood) with all the spaces filled. This time I made sure to mask all the crankpins with silicone tube before I started spraying. That filter in the booth is just about ready to change now. I've got spares but I gave it an extended lease of life by removing it, putting in a bin bag and crunching and shaking it until a lot of the dried particles were removed. I then gave it a further clean with a small hand held vacuum cleaner. Worked a treat but it's on its last legs now. As I'd been spraying close to the top edge when doing the frames, there was a fair bit over overspray on the light strip. I did a quick check in an out of the way area on the clear cover and found that it was not attacked by cellulose thinners, so was able to clean it up. One thing to be aware of is that when changing the filters a lot of the fine particles fall into the booth. You need to be sure to clean them up before spraying again or you risk getting crap on the work piece. I take it to the garage door and blast it with a hair dryer to blow it all away. I've added a holder to the base on the left for when I'm using the airbrush. So far I've only been using rattle cans, but the airbrush was used to give one of the side tanks on the 4MT a wet coat of cellulose thinners to get the paint to flow out and eliminate some orange peel.
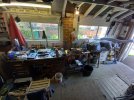
Here's my work space now. Not as comfortable as my original set up at my brothers house, but needs must. The vent from the booth hangs on a hook by the door and if it's raining I part close the door and put the vent in the gap between the door and frame.
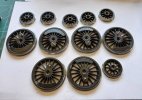
Here's the wheels in etching primer drying in the outdoor oven.

And later on ready for refitting.
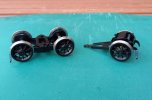
Bogie and pony truck assembled.
And the reassemble chassis.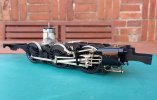
Some detail painting with the brush is still to do, but apart from that the chassis is done.
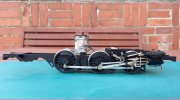
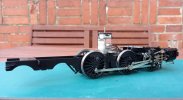
And with the bogie and pony truck placed for the photo.
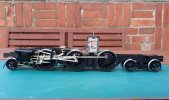
Having sprayed about 30 model cars during my break from loco building I'm starting to feel a little more confidant spraying the locos and I think the results are an improvement on my previous efforts. Not to get complacent though as captain cock up is always lurking about waiting for a lapse in concentration. For some reason, the top of the chimney has dried matt. Weird!
Speaking of captain cock up, you can see the run in the cab doors me toned previously in this image. I'll have a crack at correcting that today.

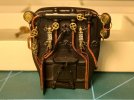
Lastly, are rather cruel close up of the back head after painting the brass and copper parts. Some touching up is still required and of course the dials need to be added.
Cheers,
Peter

Here's my work space now. Not as comfortable as my original set up at my brothers house, but needs must. The vent from the booth hangs on a hook by the door and if it's raining I part close the door and put the vent in the gap between the door and frame.

Here's the wheels in etching primer drying in the outdoor oven.

And later on ready for refitting.

Bogie and pony truck assembled.

And the reassemble chassis.

Some detail painting with the brush is still to do, but apart from that the chassis is done.


And with the bogie and pony truck placed for the photo.

Having sprayed about 30 model cars during my break from loco building I'm starting to feel a little more confidant spraying the locos and I think the results are an improvement on my previous efforts. Not to get complacent though as captain cock up is always lurking about waiting for a lapse in concentration. For some reason, the top of the chimney has dried matt. Weird!

Speaking of captain cock up, you can see the run in the cab doors me toned previously in this image. I'll have a crack at correcting that today.

Lastly, are rather cruel close up of the back head after painting the brass and copper parts. Some touching up is still required and of course the dials need to be added.

Cheers,
Peter
P A D
Western Thunderer
After touching up the backhead, it was time to apply the dials. The LMS dials I have from CPL were purchased from their stand at Telford in 2018. They had not been producing for a while and these were the latest production. They differ from earlier sheets in that the paper is much thicker. I used them as is on the 3P but decided to thin them down by slicing an edge with a scalpel and peeling the surface layer away for the 4P.
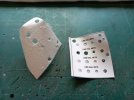
And after punching out and applying. Unfortunately the diameter of the dials is larger than the gauges. Still it should pass uster when inside the cab.
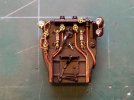
I have now started the lining fest on the three tanks, beginning with the boiler bands on the 4P. With those done the boiler could be added to the body and screwed in place. I've also done the detail painting inside the cab so the backhead is now fitted. However, I may need to removed it to glaze the front windows in the cab, but that's no bother. The exterior detail painting is also dome apart from the buffer beams which need a second coat of red, hence the masking tape is still in position on the front one.
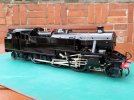
Looking not too shabby methinks.
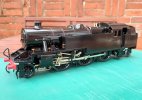
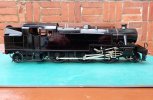

I've picked out all the oil pipes in copper paint and will do the same to the injector piping. It wont stay bright though as I will be weathering all three locos, but not heavily.

Cheers,
Pete

And after punching out and applying. Unfortunately the diameter of the dials is larger than the gauges. Still it should pass uster when inside the cab.

I have now started the lining fest on the three tanks, beginning with the boiler bands on the 4P. With those done the boiler could be added to the body and screwed in place. I've also done the detail painting inside the cab so the backhead is now fitted. However, I may need to removed it to glaze the front windows in the cab, but that's no bother. The exterior detail painting is also dome apart from the buffer beams which need a second coat of red, hence the masking tape is still in position on the front one.

Looking not too shabby methinks.


I've picked out all the oil pipes in copper paint and will do the same to the injector piping. It wont stay bright though as I will be weathering all three locos, but not heavily.

Cheers,
Pete
PhilMortimer
Member
Peter,
That looks stunning!
PM
That looks stunning!
PM
John57sharp
Western Thunderer
Not shabby at all!
P A D
Western Thunderer
Many thanks Gents.
So it's the same sequence of events as on the BR 4MT. Marking out the extremities of the lining on the tank and bunker. In my opinion if you did manage to apply the panels in one piece as outlined in the decal instructions, then the lines would be too close to the edges all round.
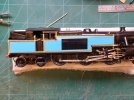
Ready to rock and roll. Note how the model is protected on the bench by resting on a folded cloth. Not rocket science that but just to highlight a point I will make in the Stanier 3P thread when I update that.
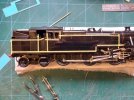
And the panels done and dusted.
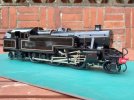
The corners ar the front of the bunker dont look right so I'm going to redo those as I have some spare corners.
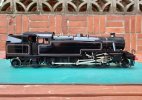
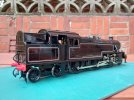
Cheers,
Peter
So it's the same sequence of events as on the BR 4MT. Marking out the extremities of the lining on the tank and bunker. In my opinion if you did manage to apply the panels in one piece as outlined in the decal instructions, then the lines would be too close to the edges all round.

Ready to rock and roll. Note how the model is protected on the bench by resting on a folded cloth. Not rocket science that but just to highlight a point I will make in the Stanier 3P thread when I update that.

And the panels done and dusted.

The corners ar the front of the bunker dont look right so I'm going to redo those as I have some spare corners.


Cheers,
Peter
P A D
Western Thunderer
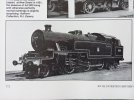
This is the prototype for the 4P, taken from Essery and Jenkinson's history of LMS locomotives (vol. 5). As with the BR 4MT, the power classification is on the cab side.
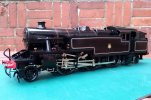
I've managed to get both sided completed apart from the cylinder lining, but hopefully I'll get that and the 3P cylinder lining done today.
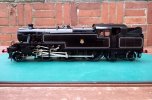
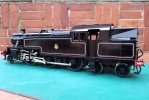
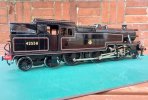
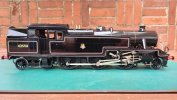
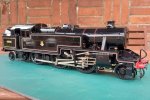
As per the image of 2500 posted early doors in the thread, I've given the edges of the coupling reinforcing plates a coat of gun metal to match.
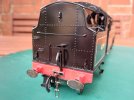
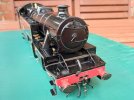
I see the top edge of the red on the beam needs touching up as the white base is showing. I've already dealt with the same on the 3P by running a fine line permanant marker along the ridge. Much easier and more accurate than trying to do it with a brush and paint.
Cheers,
Peter

I've managed to get both sided completed apart from the cylinder lining, but hopefully I'll get that and the 3P cylinder lining done today.


As per the image of 2500 posted early doors in the thread, I've given the edges of the coupling reinforcing plates a coat of gun metal to match.


I see the top edge of the red on the beam needs touching up as the white base is showing. I've already dealt with the same on the 3P by running a fine line permanant marker along the ridge. Much easier and more accurate than trying to do it with a brush and paint.
Cheers,
Peter
P A D
Western Thunderer
Thanks Larry.A Shame the radius of the corners on the bunker lining (drivers side) is too large. Otherwise, the 'Big Tank' is looking fine.
Yes, I somehow got those radii wrong. I re-did the top corner next to the cab door as it was the worst, buy thought I'd get away with the bottom one. Don't know if thas was an error with the decal panel or my cock up. Can't slide anything past you pro painters! I think I've got a spare corner so I may re-do the bottom one as well.
I said I'd completed both sides but in fact I've still to do the hanging plate and the number.
Cheers,
Peter
P A D
Western Thunderer
I had a look back at some earlier images and edited this one to show the corners of the two panels. Looks like the larger radii on the bunker panel is down to Fox not me. Dont know if they've got that wrong or if the radii was different on the real thing. I can't find a decent enough prototype image to confirm which is correct.
This cropped image of the Fairburn tank taken from Essery and Jenkinson's book suggest the radii were the same on both panels.
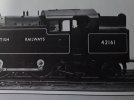
Bottom line is I can live with it as I had one or two problems with the BR 4MT and now I dont have any spare corners. The decal work on the 4P is now finally done on both sides, having lined the cylinders and the left hand hanging plate.
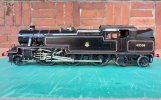
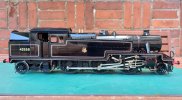
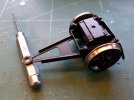
I had to separate body and chassis to line the cylinders, so while the the pony truck was off I added some strips of lead to increase the weight on the axle.
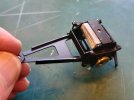
And after a quick coat of paint.
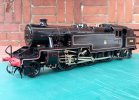
Handsome beast isn't it. I've now added a short length of grey lining under the grab rails above the motion bracket on both sides.
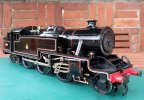
The joints in the lining could be better in one or two places, but overall I'm happy with the result. Dulling the finish and dirtying it may disguise my errors.
Cheers,
Peter

This cropped image of the Fairburn tank taken from Essery and Jenkinson's book suggest the radii were the same on both panels.

Bottom line is I can live with it as I had one or two problems with the BR 4MT and now I dont have any spare corners. The decal work on the 4P is now finally done on both sides, having lined the cylinders and the left hand hanging plate.


I had to separate body and chassis to line the cylinders, so while the the pony truck was off I added some strips of lead to increase the weight on the axle.

And after a quick coat of paint.

Handsome beast isn't it. I've now added a short length of grey lining under the grab rails above the motion bracket on both sides.


The joints in the lining could be better in one or two places, but overall I'm happy with the result. Dulling the finish and dirtying it may disguise my errors.
Cheers,
Peter

