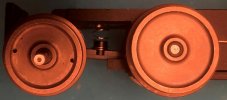
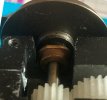
7mm Heljan class 40.

OzzyO

Western Thunderer
Hello all,

I picked up a O gauge Heljan class 40 for a very good price of £220 +£16 for P & P. with no motors. But when I opened it up it also had no gears, pick ups, lights, etc. But it still looked like a bargain, some of the bits I'll make myself, some of the bits are not needed. Onto the photos.

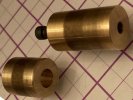
The photo of the filling jig, this will also be used for setting the gears at the correct distance from the end of the gear shaft. I'm quit happy to mix imperial and metric in my drawings.
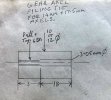
Filling jig..JPG

This photo is of my first class 40 that is complete. This photo shows all of the gears in place, along with the pick ups (you will see that one of them has become displaced from the top L/H driving wheel. I'm also going to have to fix some of the sand pipes into the correct place
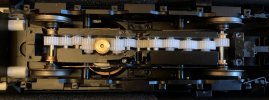
Class 40 001.JPG

Time to put our tea on,

ATB

OzzyO.
 

OzzyO

Western Thunderer
That's an awful lot of gears.
Dave.
Hello all, Dave,

try working out what gear goes where:confused::headbang::headbang:.

Back to the strip down (you will see why I'm not stripping the working one down). Getting the side frames off it takes a bit of brut force to do this. I was thinking one is going to snap soon.
Class 40 009.JPG

This pony-truck is a bit "ODD" in how it's running, the fellow who built Heaton Lodge Junction just took all of the pony wheels off ( I wonder if he had the same problem this was on class's 40, 44,45 & 46). To take the pony off you have a big strip down job. As you can see in the next photos.
Class 40 010.JPG
Class 40 011.JPG

All of the side frames are off with no major damage to them one sand pipe took a bullet for the whole lot, but some of them are at odd angles to how they should be.
Class 40 004.JPG
Class 40 012.JPG

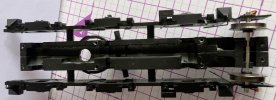
Now to get the two sides apart, they have three screws holding them together. Then they drop apart, before I fit them together I'm fitting the forth screw in place in the motor mounting bracket.. It looks like they have three sizes of screws M2, M2.2 & M3. Why not just have two sizes? But at least they are not self tapping ones.
When you get the sides apart you see all of the gear running holes, I bought a 3.05mm reamer to open up the holes they're cast to size :shit:. Well it will go into the tool box for use at a latter date. Now to wait for it to turn up so I can make the filling jig.
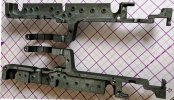
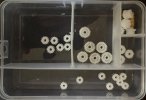
Class 40 006.JPG
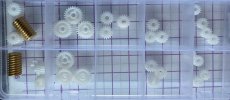
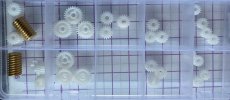
The gears, I think that I've got enough of them.
Class 40 007.JPG

I've just had a count up of the gear axles, one size there is nine of them and the longer ones two of them (but it could be two different sizes).
The jig can accommodate all of these sizes I'm glad to say.

ATB

OzzyO.
 
Last edited:

Brian McKenzie

Western Thunderer
Some odd sized reamers there, OzzyO. I looked out of curiosity.
£4.75 each - Postage to New Zealand: £33.64 :eek: plus £8.00 import charges

( A UK supplier recommended by modellers here, asked £25 postage for ten 0.95mm drills - renegotiated to £15 )

My source for most small tools has been Travers Tool Co., in New York - never an order supplied with anything missing out of stock.
Their reamer selection extends to thousands of sizes.
Of "Machine Chucking - Straight Shank" type, there are 3,743 sizes (listed in 0.0005" increments up to 1/4inch diameter, and 0.001" above).
Other reamers start from #80 drill size :rolleyes:
 

Brian McKenzie

Western Thunderer
> this is the “we don’t want your business“ style of quoting.

Just the opposite, Simon. They were good to deal with - and now I receive invitations to visit at trade shows with free vouchers and for coffee etc! (for which one might say, I've already pre-paid for :D )

Postal charges and freight rates increased dramatically from the onset of Covid. Also, not helped by the likes of, for example, eBay's shipping policy where the want not just a slice but add a chunk to the action.

NZPost operates a consolidation/forwarding service in several countries, and this assists both buyer and those sellers who don't want to deal with the complexities of export orders.

-Brian
 

OzzyO

Western Thunderer
Hello all,

I have sorted out all of the gears out into the sizes and found out that three of one size are missing. I've been on to Gaugemaster about this and I'm waiting for the replacements to turn up.
Class 40 19.JPG

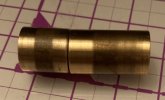
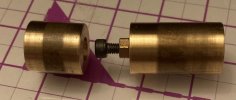
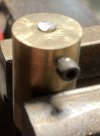
I've got the axle jig made. I decided to make it in two parts so it can be used to fit the gear wheels to the axels by changing the length of the screw the problem is I don't have a screw long enough to do that.
Class 40 13.JPGClass 40 14.JPGClass 40 15.JPG

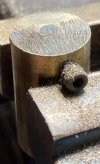
I made the parts out of brass that was a mistake.
Class 40 16.JPG

After a few axles this was the result of the top face of the filling jig so option two.
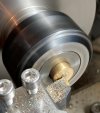
Class 40 17.JPG

So onto using the lathe much better now onto a job that I've been meaning to do for some time sorting out the starting of the lathe.

Class 40 18.JPG

ATB

OzzyO.
 

OzzyO

Western Thunderer
Hello all,

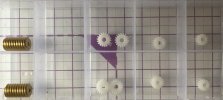
I got the missing gears from Gaugemaster and started putting them into place. Just to remind everyone this is what I had from Gaugemaster. Note the empty space this is the gears that were missing that I did get from Gaugemaster.
Class 40 19 a.JPG
Putting the gears into place, this was fun (not) , no drawings just a couple of photos of my complete Cl.40. I was not taking it to pieces to see what gear goes where, I got there with a lot of hear scratching. If I was allowed to drink I would have sunk a good number of pints. The two for the worm gear to mesh with were easy along with the three large gear wheels to the left. The rest were guess work.
Class 40 22.JPG

I ended up with these left over, so much for following the parts list from Heljan. £8.00 down the drain. This would have been time for a number of pints to calm me down.
Class 40 19 b.JPG

The rest of the jobs on the bogies should be a walk in the park.

ATB

OzzyO.
 

paulc

Western Thunderer
Hello all,

I got the missing gears from Gaugemaster and started putting them into place. Just to remind everyone this is what I had from Gaugemaster. Note the empty space this is the gears that were missing that I did get from Gaugemaster.
View attachment 210478
Putting the gears into place, this was fun (not) , no drawings just a couple of photos of my complete Cl.40. I was not taking it to pieces to see what gear goes where, I got there with a lot of hear scratching. If I was allowed to drink I would have sunk a good number of pints. The two for the worm gear to mesh with were easy along with the three large gear wheels to the left. The rest were guess work.
View attachment 210482

I ended up with these left over, so much for following the parts list from Heljan. £8.00 down the drain. This would have been time for a number of pints to calm me down.
View attachment 210479

The rest of the jobs on the bogies should be a walk in the park.

ATB

OzzyO.
Are the gears that are left over the ones that you had to wait for from Gaugemaster , just wondered ?
 

OzzyO

Western Thunderer
Hello Paul,

yes I had three of the size that I was waiting for and wanted two, but I didn't know that I only wanted two not the six that it says on the parts list.

Hope that's clear,

ATB

OzzyO.
 

OzzyO

Western Thunderer
Hello all,

me and the lads from the club had seen how the fellow who has Heaton Lodge junction layout. Got around the problem of the front pony truck and curves, by fixing the front pony truck been fixed just above the rail head and filling the flange off.
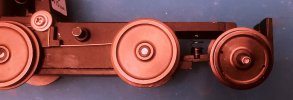
That is not for us. So after a discussion across the layout, we came up with two or three ideas the first was to use a less powerful spring, along with spacers between the wheels and the pony truck.
Class 40 27.JPGClass 40 26.JPGClass 40 28.JPG

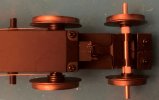
Then I had too sort out the pick-ups. these are the first go.
Class 40 23.JPG

One thing I will say if you have to remove the keeper plate, keep the screws in the correct location. If you have removed the keeper plate and are going to refit it make sure that the small flats got to the top and bottom.
Class 40 24.JPG
Class 40 25.JPG

A lot of the screws are M2. But you get the odd one that is M2.2 (8 BA) works for the length we are talking about.
I took the two bogies to the club and both of them ran well. I think that I'll fit a spring to the bogie that doesn't have one at the moment.
The next job is to fit them to the main frame

ATB

OzzyO.
 
Top