Making FiNe scale American track

WM183

Western Thunderer
Hi folks.

As my signature suggests, I love the early 1900s era of American railroading-pre WWI. Arch bars, truss rods, loads of Moguls and Consolidations and Ten-Wheelers, wooden cars with rickety sides - bliss! I want to build a few models in N scale, using wheels, etc from the 2mm scale association. However - how can I best make track? American track is very, very different in appearance from British trackage.

The German/Continental FS-160 are the standards I'd use (Simply 2mm reduced in width by .42mm) so flatbottom rail is fine. Am I best just using soldered track and hoping no one looks at the ties too closely?

Bearings creaking in the cold.. in my brainbits.

Amanda
 

JimG

Western Thunderer
Hi folks.

As my signature suggests, I love the early 1900s era of American railroading-pre WWI. Arch bars, truss rods, loads of Moguls and Consolidations and Ten-Wheelers, wooden cars with rickety sides - bliss! I want to build a few models in N scale, using wheels, etc from the 2mm scale association. However - how can I best make track? American track is very, very different in appearance from British trackage.

The German/Continental FS-160 are the standards I'd use (Simply 2mm reduced in width by .42mm) so flatbottom rail is fine. Am I best just using soldered track and hoping no one looks at the ties too closely?

Bearings creaking in the cold.. in my brainbits.

Amanda

I'm modelling US railroads in N scale using FS160 track standards. I'm using 2mm Association Code40 FB rail and their PCB sleepers to construct the track, with the PCB sleepers every fourth sleeper with the infill sleepers being of 0.8mm ply which I cut in my laser cutter to match the PCB sleeper size. The sleepers are slightly too large for exact scale US sizes but I came up with a pitch in Templot which gave the impression of the closer spacing of sleepers (compared to UK standards) using the 2mm products. Here's a pointer to the section in my thread where I started placing the wooden sleepers in the PCB constructed track.


I laid a trial length a few years ago and used acrylic paints applied to the ply and PCB sleepers to get quite a good end result which gave a good representation of the colour of the sleepers but also disguised the differing textures of the PCB and ply. I dare say you could use styrene for the infill sleepers which would have a surface finish similar to PCB, but the acrylic paints gave the same matt finish to both ply and PCB.

You might find someone willing to produce PCB sleepers to US scale sizes. The 2mm Association produces PCB sleepering for narrow gauge track which is around 1.4mm wide and scales to about 9" in N scale but the ready-made gapped sleepers are rather short at about 12mm length. But they do provide packs of 50mm lengths for pointwork which you could cut into appropriate sleeper lengths which you than have to gap yourself. I went for the easier option of using their larger "standard" sleepers. :)

Jim.
 
Last edited:

WM183

Western Thunderer
Hi Jim,
It's good to know there's others doing US railways like this. I suppose I could even 3d print sleepers with little tie plate impressions on them. I will probably do just what you've done, though - soldered track with ply or styrene infills. Thankfully tie plates aren't as noticeable as British chaired track, and a lot of early US trackage, sidings, etc., didnt even use tie plates - just rails spiked straight to the ties!

Thank you much.

Amanda
 

JimG

Western Thunderer
Hi Jim,
It's good to know there's others doing US railways like this. I suppose I could even 3d print sleepers with little tie plate impressions on them. I will probably do just what you've done, though - soldered track with ply or styrene infills. Thankfully tie plates aren't as noticeable as British chaired track, and a lot of early US trackage, sidings, etc., didnt even use tie plates - just rails spiked straight to the ties!

Amanda,

You might also be interested in using solder balls in track construction. I got the idea from 2mm modellers who used them in bullhead track construction to get regular sized solder "lumps" to represent chairs. I went into detail in this message in my thread :-


I do recommend the Telux flux. It works extremely well and leaves no residue to oxidise, so you don't need to clean up after soldering. Using solder balls means that you have one hand free when soldering to hold rail, track gauges, etc.

Jim.
 

Jordan or Plymouth Mad

Mid-Western Thunderer
Amanda, not sure if you are aware....
Free to download & print switch templates from FastTracks. Scroll to the bottom of page 3 (linked) for the start of the N scale lists. Not sure if they'd work with the FS160 standards but might help.?
Apologies if this is a granny/egg sucking moment....
 

WM183

Western Thunderer
Amanda, not sure if you are aware....
Free to download & print switch templates from FastTracks. Scroll to the bottom of page 3 (linked) for the start of the N scale lists. Not sure if they'd work with the FS160 standards but might help.?
Apologies if this is a granny/egg sucking moment....
It not a granny and eggs moment! Thank you!
 

garethashenden

Western Thunderer
For my layout I have been printing the plain ties, complete with tie plates, and gluing the rail to them. Then using pcb ties for the structural parts of the turnouts and styrene strip for the rest.
 

martin_wynne

Western Thunderer
I asked Martin Wynne many years ago if he could accommodate FS160 in the listings of the various scales/gauges and he did. :)

Even if he didn't, you can set Templot to any track gauge and any scale you wish as a custom setting.

But if you are looking for 3D-printed COT or CARROT track, it is REA chaired bullhead only at present. Don't hold your breath for anything else.

Martin.
 

Nogbadthebad

New Member
Hope this is helpful.
I experimented with hand laid US Code40 (not FS160) N Scale track using this video as a guide:

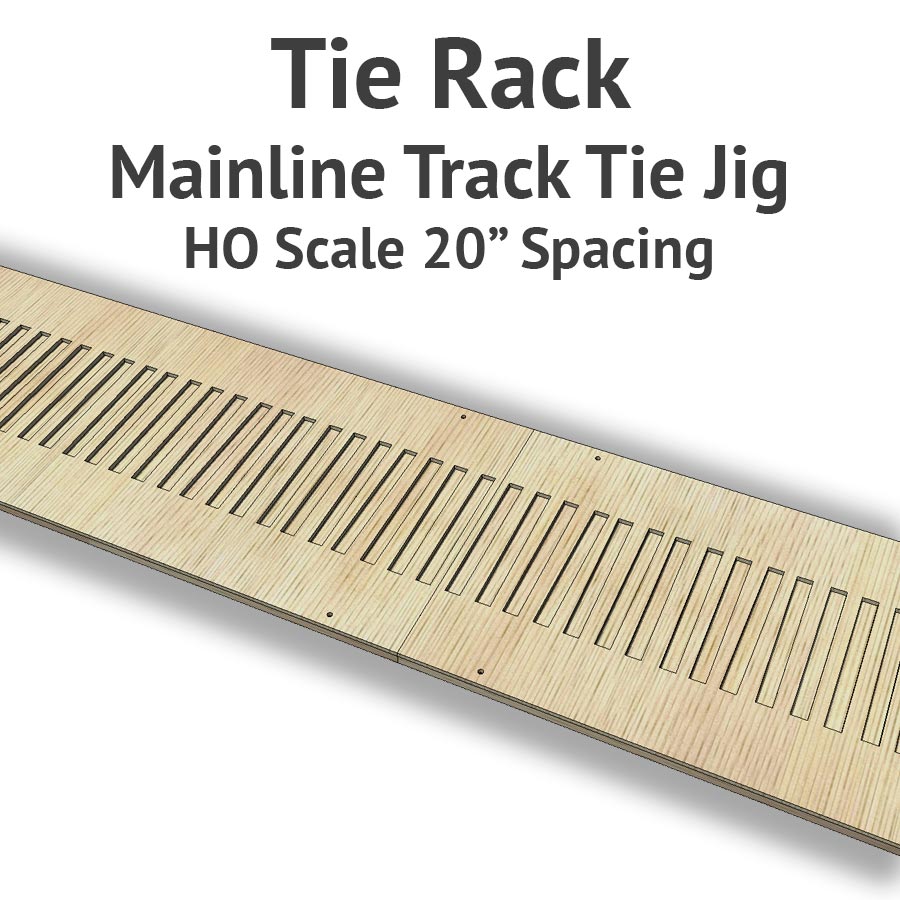
Fast Tracks have three types of tie racks:

They all have variable track centres as per the prototype. The trouble was that 2mmFS sleepers are 17mm long and the templates are 16mm - width is fine. Each sleeper then needs to be trimmed down 1mm or so, which will inevitably give variable length - not a bad thing as many photos show ties of varying lengths on the prototype.

I also found that solder paste is best, particularly the very expensive Carr's, but diluted with much cheaper no-clean liquid solder from DCC Concepts. This can then be painted on to the ties in very small amounts with an old brush. The original paste is a bit too viscous making controlling the amount used quite difficult. I wish the NFine track gauges from the Association shop were available when I was doing this - far superior than anything else available.
 
Top