7mm Mickoo's Commercial Workbench

OzzyO

Western Thunderer
Hello Mick,

instead of the nuts in the smoke box. Why not use the brass inserts that you fit into holes in the smoke box by heat (a modified soldering iron tip will work), you can get them off the bay of E I know that you can get M3 ones, you may also be able to get them in M2.


or you could try this one.


Hope that the link works.

ATB

OzzyO.
 
Last edited:

Big Train James

Western Thunderer
Hi Ozzy,
Unfortunately the UV cured resins we are typically using are not the right types of plastic for the process you linked to. The inserts work great for thermoplastics like ABS or styrene, which can be melted and reformed. Thermoset plastics cannot be remolded, they burn rather than melt. It's the same reason that the various "ABS like" resin for 3d printing are not suitable for burning out for investment casting. They burn rather than melt, leaving ash that will contaminate the castings.

The threaded inserts do work fine with parts printed in ABS (and possibly others) with a filament 3d printer.

Threaded inserts can still be used with resin printed parts, but the process of "setting" them will be different. I would look at creating a keyed cavity of some sort that the insert fits into, and then add uncured resin (or epoxy) around the insert to fill the cavity. Once the added material cures, the insert should be locked in place.

There are also "screw-to-expand" inserts that do exactly what it sounds like. They lock in by forcing the insert to expand, deforming the surrounding plastic to form the keys that retain the insert.

I found this article from Formlabs that describes the various insert types and applications for filament versus resin 3d printed parts.

Jim
 

mickoo

Western Thunderer
End of week update, early today as packing up for CTL Seal show tomorrow.

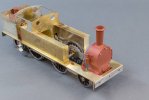
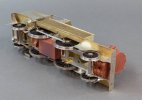
More progress on the LNWR 2-4-2T, but, as often happens, new information arrives after the horse has bolted ;) Basically new smokebox and cylinder modules in the machine now ready for fitting Sunday.
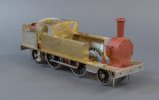
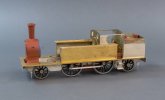
But this one does have the final resolution and expected surface finish and it does all fit, so we're just talking tweaks to details.

The grey plug goes inside the boiler and smokebox, it'll be bonded to the boiler as well as the front metal disc (which is recessed to take the plug) and allow the nut to be fixed inside to hold both together, then the boiler will be inserted into the smokebox and bonded with adhesive, once it's on it'll be on for good.

I revised the smokebox to have an open rear as printing the door with it's thin lip and fragile hinges was problematical, now the whole front end is one printed piece and much stronger/neater.

The chimney is internally sleeved with thin bore brass for strength and there is an internal plug on the underside of the smokebox to accept it and make a good robust joint. I did toy with printing the chimney on the smokebox but it adds about three hours to the print due to orientation. Plus, the optimum angle for the smokebox is not the optimum angle for the chimney, so it makes sens to split them.

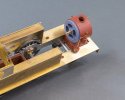
The upper autogear cylinder is just loosely fixed, it'll slide off the rod as well as the lower cylinder, then the small platform can be added under the lower cylinder. The rod will be secured to the platform and add strength to the whole assembly, normally I'd not leave the thin arm as 3D but it's close to the engine and in a low snag risk area.

IMG_5683.jpg

IMG_5684.jpg

IMG_5685.jpg

IMG_5686.jpg

IMG_5687.jpg

IMG_5688.jpg
 

Dave Holt

Western Thunderer
The smokebox, with cylinders included, looks very neat indeed - as we've come to expect from you. I'm intrigued to know if this model is to have a representation of, or even working, inside motion? If so, there will be an interesting interface between the cylinders (part of the body) and the valvegear/motion bracket/slide-bar support(part of the chassis).
Dave.
 

mickoo

Western Thunderer
The smokebox, with cylinders included, looks very neat indeed - as we've come to expect from you. I'm intrigued to know if this model is to have a representation of, or even working, inside motion? If so, there will be an interesting interface between the cylinders (part of the body) and the valvegear/motion bracket/slide-bar support(part of the chassis).
Dave.
Cylinder block is attached to the frames with a joint to the front face (attached to the smoke box and footplate) behind the first rib and drain cock stubs.

Has to be this way for the inside valve gear to work, that’s going to be fun as there’s nothing to exactly fit, so lot of cutting and trial fitting ahead.
 
Last edited:

LarryG

Western Thunderer
Back in the 1980's, I befriended a railwayman who in his younger days had fired the various LNWR small tank locos stationed along the North Wales coast. He told me that everything about them was wrong, from the narrow cab doorway to having to step over that balancing pipe, which made the cab floor even narrower.

He was messing around on a Coal Tank one day holding a rag near a vacuum pipe or something. Suddenly is sucked the rag out of his hand and down into the brake system! No wonder they had poor brakes haha...
 
Last edited:
Top