Mike G's Workspace.

Mike Garwood

Western Thunderer
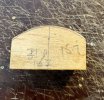
Another piece of the jigsaw, another jig. Still haven't found the jig box, but then I have not really been looking that hard...
Roof jig1.jpg Roof jig2.jpg

This time for the cab roof, I could have put this thru the rolling bars, but, I wanted to see if this method could be successfully scaled up to take larger pieces. Truthfully, the answer is no. I reckon I've got the start of the curve right on either side (starting from the middle), but, it does not appear to have produced the right curve down to the cab sides. Now this may be of my own manipulation or I didn't get the ends hot enough when the etch went over the gas cooker. It's not the end of the world, as they can be 'persuaded' to take the correct arc. There's a lot of bracing to be soldered on the roof, on the ends and underneath.
I've also taken the plunge with the cab sides and front and also added the boiler mount, which was a real PIA...hence the filler to hide my inadequate soldering skills.

GWR 63xx footplate 5.jpg

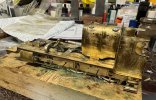
The firebox is just balancing for effect. However, there does appear to be a problem with this sitting properly against the the wheel splashers. I think the remedy will be in the form of a P4 modeling file. When I squeeze it in, the firebox does sit flush with the cab.
GWR 63xx footplate 6.jpg

Tomorrow will see the rest of the cab fitted out, but the backhead will be bare bones only, enough to make it busy but certainly not fully kitted out.
I do now have a time table to complete the engine and tender as Mrs G is off to the smoke for 2 nights in August, so that'll be 3 days to get the painting done and get rid of the fumes. This particular engine was in BR green and fully lined. When I first found the photo of this engine, it looked as though it was your usual black mogul, which would have been nice and easy.

Still happy with the way it's going.

Stay safe

Mike.
 

Mike Garwood

Western Thunderer
Been a funny old week but not in a good way. Preparations for holiday are not going as planned, and theres' too much month left at the end of the money!! Never mind, over come and conquer.

I've managed to get the firebox to sit comfortably in between the footplate and against the cab front. Also completed the backhead - ready for fitting once painted. But my major accomplishment was getting the roof to fit properly. My shaky hands didn't help with this at all. The other thing fitted was the reversing screw, that was a game of patience and finger burning. So, still going well.

I do have a problem with some of the castings that sit on the footplate...but that can wait till the smokebox and boiler are rolled.

GWR 63xx footplate 7.jpg

GWR 63xx footplate 8.jpg

Bit of a break coming up from modeling for a couple of weeks.

Stay safe

Mike.
 

Mike Garwood

Western Thunderer
Having been back from my hols for a week or so now...

Whilst away I took the time to review some of the work I thought I'd completed. My eye was taken my my GWR M set, in particular the gap between the coaches using my couplings. Conclusion, far too much of a gap. What to do about it then, well I bought some Masokits coach coupling bits and pieces. As Masokits kits go, not too bad on the fingers and they will certainly tighten the gap - probably half it! You do need to have your wits about you when these are built. I found that once the wire was made to shape the 'catcher' didn't sit as described. Pulling the 'arm' out from the base plate by a mil made all the difference to this pivot movement. This is the piece that holds wire in place. The wire hanging down is what allows uncoupling. A picture is worth...

Masokits coach couplings.jpg
I've also bought the appropriate bellow units for the set. Should be a fun, but I think the coach ends are not going to see the funny side when I start pulling their present occupants out.

Work on the 63xx has now centered around the tender. The 2 sub frames are together and the chassis has been started.

GWR 63xx tender 2.jpg
GWR 63xx tender 3.jpg

Some cleaning up of errant solder is still required.

GWR 63xx tender 1.jpg

The chassis has progressed a fair bit more since I took this photo. All standard stuff - which in my book is great. So jobs needing to be completed before moving further on.

- Roll the smokebox and boiler
- Form the flare on the edge of the tender ( did it once, years ago and made a right dogs dinner of it)
- Put the minute levers on the front part of the chassis...not looking forward to that!

It's good to be back in the saddle, but I did enjoy the break with Mrs G. I think she did as well - but probably won't admit it :)

Stay safe

Mike.
 

45609

Western Thunderer
Mike, remember what I found on the Mitchell tender chassis that I built for your Grange. The etched slots for the compensated axles aren't exactly in the right place. I think this is due to an inaccuracy in the hand drawn artwork. If it were me, I'd be replacing the tender chassis with a High Level sprung one.

See you later...Morgan
 
Last edited:

Mike Garwood

Western Thunderer
Time to grasp the nettle and form the flare on the tender edges. I can't say that I had a cunning plan but I did have a flash of the grey cells. Enter to the fray some aluminium L angle, a block of wood and some steel rod 3mm in diameter. Plus 3 G clamps.

First thing was to glue the rod to the edge of the L angle. The rod was as straight as it could be so using the flat surface of the wood as a datum - which created a stop for the rod - I used Gorilla glue to attach the steel rod to the L angle. I let it set for a day or so...just to be sure. Then heated up the edge of the tender side so that it would take the bend without to much of a struggle.

Flare jig.jpg

Then I lined up the edge of the tender where the bend was going to be made and taped it to the wood. After a false start, I taped the wrong side! I then lined up the former to about half way up the rod. Securing the former to the wood with the 3 G clamps.
Then pushed it over the former with a large lolipop stick. I kept doing the rubbing over bit until I could see that a bend had been made. And that the bend was all the same throughout the length of the etch.

This evening, the tender side was soldered to the tender shell. Plus a few other bits. Theres' quite a lengthy piece of rivet detail to add to the base of the tender side.

GWR 63xx tender 4.jpg
I have some really thin brass to make the gaps at the back of the tender disappear. Have to say I'm pleased the way my bodge has turned out. The next nettle to grasp will be the rolling of the outstanding engine bits, somehow I don't think this is going to be as easy as forming the flare was! Still the build is going no where without this being done.
Ideally I'd like to finish these builds by 04/08. Why? Because Mrs G is out the house for 4 days - an ideal time to get the engine and tender into paint :) . The only fly in the ointment is having to scratch build some pumps that adjoin the boiler support. Fortunately I have a Dapol body in stock so I can copy the measurement of that. It's a pity that they aren't removable from the footplate - would have saved a lot of fiddly work. The casting (singular) in the kit, is way too small and the fact that there should be 2 (one for each side) is just another entry to the ointment.

Well pleased with the progress so far.

Stay safe

Mike.
 
Top