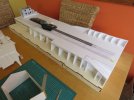
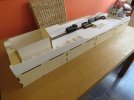
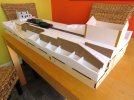
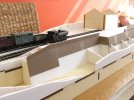
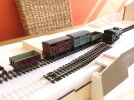
4mm Newton Lane, BR(W) Circa 1955

2996 Victor

Western Thunderer
Hi everyone,

welcome to my first thread on WT! I've recently started a couple of micro layouts: this is the furthest advanced simply because I've got the track!

The overall size of the scenic area is 1.2m long x 0.4m wide, and there will be a 0.6m long fiddle yard board. The baseboards are laser-cut ply kits from Grainge & Hodder, and I find they go together very well and are both strong and lightweight.

Although the baseboard for Newton Lane is one of G&H's standard sizes, its actually a bespoke baseboard with a 0.1m wide x 0.05m deep step in the rear face. The reason for this is that I wanted to experiment with the landscape falling away into the distance. Whether it'll work is another thing entirely! The idea is that the station is benched into a hillside, so that one side is cutting and the other is embankment. The station building and platform are "perched" on shallow retaining walls. Have a look at Washford station on the West Somerset Railway for a better idea than my attempts at describing it!

Trackwork is EM Gauge Society ready-to-lay, After a good deal of thought and considering my options, I decided to change tack and go with PECO's OO gauge bullhead track. My main reason for this is that I work at a glacially slow pace, and to have to learn the skills required for building loco chassis before I can even test the trackwork seemed a bit daft. By going down the OO route, at least I can hope to have something running before I get too much older! Trackwork is laid onto 5mm thick foam board. At the moment, I'm constructing the basic scenery, and once that's done, the trackwork will be fixed in place and tested.

For locos, I'm looking at ex-GWR types, 14xx and 57xx for instance. I'll be building High Level chassis kits for them For locos, I'll be sticking with the RTR chassis to begin with and using RTR bodies with a bit of titivation: Airfix for the 14xx and Bachmann for the 57xx. There'll probably be others in due course. Most rolling stock will be kit built as I'm a serial wagon builder, although several Bachmann BR cattle wagons have found their way to Victor Towers recently.

So, a few pics.

Sketch of track plan:img20220630_11041683.jpg
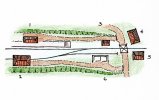
1. Station building, 2. Goods shed, 3. Signal box, 4. Pub, 5. Station Master's house, 6. Cattle pens. There's been a slight change to the buildings at the right-hand end, but it gives the gist!

Some full-size planning
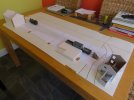
IMG_4612.JPG

And a bit of a jump forward
IMG_4759.JPG

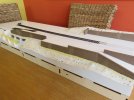
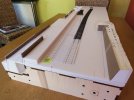
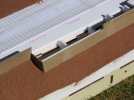
Scenery construction well under way, all using 5mm foam board for lightness. This is actually the back of the layout.

There are three layers on the baseboard surface, that's because of the dual-use fiddle yard and the need to get the track levels the same on both layouts! The core of the platform is also built up from foam board. Its not fixed in place yet to make it easier to face the walls. The eggbox structure should hopefully support it all!

A bit later.....
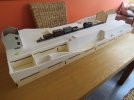
IMG_4766.JPG

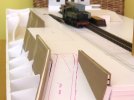
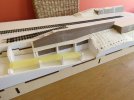
The eggbox structure has been faced, and will be clad in due course with Wills stone or something of that ilk. The basic shape of the scenery at the left-hand of the pic is also taking shape.

And there I'll leave it for now.

Thanks for looking in!

Cheers,
Mark
 

Attachments

  • IMG_4769.JPG
    IMG_4769.JPG
    160.3 KB · Views: 6
Last edited:

simond

Western Thunderer
Mark,

I’ll dive in before anyone else does, please post your pictures using the WT “attach files / photo library” (or take “take photo”) and add them full size, which will embed them directly in your posts - it saves the audience having to click links or go searching!

cheers
Simon
 

2996 Victor

Western Thunderer
Mark,

I’ll dive in before anyone else does, please post your pictures using the WT “attach files / photo library” (or take “take photo”) and add them full size, which will embed them directly in your posts - it saves the audience having to click links or go searching!

cheers
Simon
Hi Simon,

many thanks - I hope(!) I've corrected that now.

Cheers,
Mark
 

2996 Victor

Western Thunderer
A little more progress to report, largely to what is ostensibly the "back" or the layout!

The retaining walls have been clad with Wills Dressed Stone sheets, and low walls created either side of the station approach and along the rear of the platform - the latter are still to be finished off. I'm debating whether to add buttresses*** to cover the joints in the sheets, or just use some convenient vegetation or weathering. As the retaining walls are battered, I think the latter? Capping stones for the walls are needed, too.

The track is still only plonked in place, but the point makes me want to get on with track laying, which I'll need to do soon if I'm going to get it painted in situ.

View of the "back" of the layout showing the Wills Dressed Stone retaining walls:
IMG_4772.JPG

Looking up the station approach:
IMG_4773.JPG

Wills retaining walls:
IMG_4775.JPG

EM Gauge Society point and (very!) flexi track:
IMG_4776.JPG

Thanks for looking in, hopefully more soon!

Cheers,
Mark

***EDIT: I've decided I will add buttresses!
 
Last edited:

2996 Victor

Western Thunderer
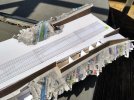
A little more progress on the scenery front with the first areas of woven paper strips appearing over the foamboard eggbox. Additional foamboard supports were added first, otherwise the weave would have been a lot more reliant on its own strength. Wills retaining walls have been added to the front of the layout where the goods shed will be situated. I still need to finish the platform walling.....

From the back, as usual:
IMG_4779.JPG
The paper weave is made from strips of wall lining paper fixed in place with Javis Velo-set PVA glue. I think the retaining walls look a little less overpowering now!

And from the other direction:
IMG_4781.JPG
You can see the retaining wall return around the goods shed area. The masking tape is to give me an idea of where the sunken lane will be - I think its still too sunken!

From the fiddle yard end.
IMG_4783.JPG
I'm planning to keep the slight curve to the siding to add a little more visual interest.

Thanks for looking in - hopefully more soon.
Mark
 

2996 Victor

Western Thunderer
This looks splendid, Mark.

Really like the whole look and excution of this.

Rob.
Hi Rob,

Thank you very much for your kind words - praise indeed if I may say so!

I'm hoping it's going to turn out alright - the actual shape of the landscape is evolving a bit organically as I'm putting it together!

All the best,
Mark
 

2996 Victor

Western Thunderer
Some papier mache fun and games today as I've layered strips of newspaper over the weave using thinned PVA glue.
Trying to remember the last time I did this: I think it was at school when I was about ten years old.....
I've put the layout out in the sunshine to aid the drying process - hope it doesn't melt the Wills sheets!

IMG_20220810_170506025_HDR.jpg
 

2996 Victor

Western Thunderer
Newton Lane, BR(W) EM Gauge
Keen to get a bit more scenery done, yesterday's papier mache was trimmed, and the edges sanded and re-sealed with some PVA.
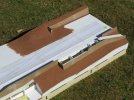
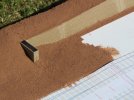
When that had dried, I had some fun mixing up some earth covering. I was a bit dubious of the colour to begin with, but "Bugger Oi!" (az we sez in zider land) its looks the spit-and-image of Somerset's gorgeous red earth. One happy bunny!
Mix consisted of Tesco's DIY filler, a good dollop of PVA, a weird and wonderful mix of Vallejo Model Air acrylics (consisting of Red, Black, RAF Dark Green, RAF Dark Earth, RAF PRU Blue), fine sand and a few drops of water, all painted on with a 1 inch brush (except for corners which I did with a 1/4" chisel brush from my modelling brushes).
Can I match it? Not a snowball's chance in the 'ot place!

1660246765017.jpeg

1660246802771.jpeg

Eugh! Look at the crack in the corner of that retaining wall!
1660246828790.jpeg

I've also started facing the platform, and once that's done I can hopefully get it in place and then think about actually laying some track!

Thanks for stopping by! More soon.....

Cheers,
Mark
 

2996 Victor

Western Thunderer
Although there haven't been any posts for a week or two, there has still been a bit of progress with the landscaping at the right-hand end of the baseboard. However, this has had to be paused as I really needed to get the shell of the pub built before I can final shape the landscape.

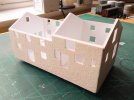
So, yer tizz! Shell built entirely from 3mm foam board glued together with Javis VeloSet rapid PVA. The foam board is faced with paper, so to hopefully give it some stability it was coated with PVA, and has had the first coat of it's surface texture, which is lime washed stonework.

IMG_20220825_145603105.jpg

More soon, hopefully!

Cheers,
Mark
 

2996 Victor

Western Thunderer
The building is a gem, well done. Please explain your technique for the surface texture, it is fab.


Tim
Many thanks, that's very kind of you!

Its quite a simple technique, using cheap DIY household filler, PVA glue and a few drops of water. The ratio was about 70/30 filler to PVA, the water is just to thin the mix a bit more so that its workable but doesn't slump. I paint it on fairly thinly but deliberately unevenly using a cheap old 1/4" brush with coarse, stiff bristles. The unevenness tends to merge as the mix settles, so I use the brush to just add a little extra texture here and there.

The corner joints will all need a bit more where the filler shrinks as it dries (I should have done those first but I was in too much of a hurry!), and there are a few surface shrinkage cracks. In a few days I'll give it another overall coat, maybe slightly more PVA, and when that's dried a final coat of PVA to seal it.

I was pondering using Wills Limewashed Stone sheets, but disguising the jointing isn't easy, and cutting window and door holes is a drag. Foam board is so easy to work, and I think my filler/glue mix works quite well!

Best regards,
Mark
 

2996 Victor

Western Thunderer
Mark,

Thanks for your explanation, I just ordered a Fair Price kit of a non-industrial warehouse and a rendered finish would be different.

Tim
I've had quite a few kits from Fair Price and been very pleased with their usefulness. Terraced houses I've extended backwards by adding card segments, so that the roofs don't end at the ridge line, a pet hate of mine :D

I've built but not completed their Lock Inn kit, and I've finished it with a textured spray rattle can from Rustoleum to represent "pebble dash" roughcast render.

Hope you get a good result on the warehouse kit!

Cheers,
Mark
 

Tim Hale

Western Thunderer
Hi,

It is a shame that the business owner doesn’t respond to emails.

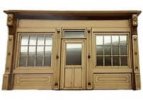
I wanted to buy the rather attractive double fronted shop (with corbels) to improve the rather plain frontage of the modern shop and warehouse combo but no response. However, I will have resort to buying an entire kit, not too expensive but I am a skinflint.


D856D9B6-7D25-491D-AA7B-B21D2456CBEE.jpeg

Not sure about the finish, a trip down to Beaminster is on the cards.

Tim
 
Last edited:

2996 Victor

Western Thunderer
Hi,

It is a shame that the business owner doesn’t respond to emails.

I wanted to buy the rather attractive double fronted shop (with corbels) to improve the rather plain frontage of the modern shop and warehouse combo but no response. However, I will have resort to buying an entire kit, not too expensive but I am a skinflint.

Not sure about the finish, a trip down to Beaminster is on the cards.

Tim
Scale Model Scenery do some nice shop fronts, not sure if they would be suitable. Fair Price also do/did separate shop fronts - I got a couple as I thought they'd make good frontages for Irish bars!

Cheers,
Mark
 

Tim Hale

Western Thunderer
Hi Mark,

I spoke too soon, Fair Price has offered the rather nice double-breasted shop front (see above) complete with corbels and the offer was taken up. This is the second attempt at a building a small part of a milk factory, the same octagonal chimney and the chopped Airfix loco shed.

Thanks to both you and Neil R for your encouragement.

Tim
 

2996 Victor

Western Thunderer
Hi Mark,

I spoke too soon, Fair Price has offered the rather nice double-breasted shop front (see above) complete with corbels and the offer was taken up. This is the second attempt at a building a small part of a milk factory, the same octagonal chimney and the chopped Airfix loco shed.

Thanks to both you and Neil R for your encouragement.

Tim
Tim,

That's good! I did ask him months ago if he'd be able to make a full building kit from one of his low relief warehouses, and although his response was positive, it never materialised. I'm sure he's busy enough with existing projects, and I modified the low relief kit.

In case you're interested, this is the spray paint I used for the pebble dash roughcast render:
Rustoleum Texture Spray
I gave it a light patchy coat Tamiya acrylic spray white and it looks okay.

Cheers,
Mark
 
Top