4mm An EM workbench - Peckett, The Marshal

Italian Fruit Van (from scratch)
  • AJC

    Western Thunderer
    An update on my Italian ferry van from plastic sheet, last seen here. As can be seen below, the bare carcass now has all the various framing, the double skin on the roof and a start made on the door fixtures. Most of this is from Evergreen strip, though in the case of the hinge detail, the 10 thou' thickness has been sanded back a little: it will still be over scale! Next on the agenda are the remaining door details before I think more about the underframe.

    Italian Ferry_001.gif

    The overall impression is pleasing, but the truth of how well I've done will be seen only when it ends up in primer. In the meantime, here's what it's supposed to end up like - in silver!

    14399216598_758bf783db_z.jpg

    Italian Vans at Hove Station, 30 June 1966 by Ian Nolan, on Flickr

    Adam
     
    Last edited:
    Italian Fruit Van (from scratch)
  • AJC

    Western Thunderer
    A couple of updates from the wagon shop. First, the Ferry van has acquired the first of its strapping - T section from 5 thou' and 10 thou' strip with the corners from 5 thou'. Yes, they really did have that half-way up arrangement in the middle.

    Italian_Ferry_009.gif

    Something ready for painting - a modified grain hopper: new brake shoes situated close to the wheels being the biggest change and lots of tiny grabs.

    Grain_004.gif

    Re-lettering and weathering to go.

    Adam
     
    Italian Fruit Van (from scratch)
  • AJC

    Western Thunderer
    I always enjoy your posts Adam. It's good to see as much detail and research going into a humble wagon as is more often put into the motive power.

    Richard

    Thanks Richard. Ah, well, as I've written before my perspective is a bit different; wagons are to point of the railway and locomotives came along later. Most modellers have this the wrong way about. ;)

    The latest contribution to that maxim is further development on the Italian ferry van, preparatory work for the roof:

    Italian_Ferry_007.gif

    The false roof that will sit on top of these ribs will be 40 thou' and, as can be seen, will be well-vented.

    Italian_Ferry_008.gif

    Also added are the curious things below the buffers - they're often referred to as lashing points but photos of the wagons show that they were never used for that on train ferries at least. Lots more detail still to add, of course.

    Adam
     
    Italian Fruit Van (from scratch)
  • AJC

    Western Thunderer
    Just fettling the side panels on the first of the Palbricks. It's going to take a while to finish all four...

    Palbrick_10.gif

    And also, courtesy of this picture taken at Hove in 1966 and found on Flickr - https://www.flickr.c...57635467172110/and some extremely useful gen from Jonathan Wealleans, an Italian ferry van, or at least, the birthpangs of one in sheet plastic. Reshaping the Bill Bedford W irons took longer than the plastic work, the joy of working in 60 thou' sheet. Detail overlays to follow.

    Italian_Ferry.gif

    Italian_Ferry_001.gif

    I think I've also found a source of 1m (scale) diameter wheels in 4mm...

    Adam
     
    Chas Roberts slope-sided mineral
  • AJC

    Western Thunderer
    Some time back, I finished a model of a Chas Roberts slope-sided mineral a while ago - 4mm - An EM workbench - Palbrick and Tomatoes | Page 17 | Western Thunder - I was interested to note that the HMRS photo' collections has a large number of Chas Roberts' official photos. There are some variants here which I was totally unaware... Here's what I produced:

    Chas_Roberts7.gif

    Here's a 'normal' one: http://www.hmrs.org.uk/photograph-collection/images/1200px/AAT607.jpg

    Here is what mine would originally have looked like (part of the Chas Roberts hire fleet):

    http://www.hmrs.org.uk/photograph-collection/images/1200px/AAT618.jpg

    http://www.hmrs.org.uk/photograph-collection/images/1200px/AAT635.jpg

    Pressed steel side doors, continental-style axleguards, reversed solebars. Quite exotic. More exotic is this:

    http://www.hmrs.org.uk/photograph-collection/images/1200px/AAT615.jpg

    I've never seen one with top cupboard doors like that...

    Adam
     
    Chas Roberts slope-sided mineral
  • Lyndhurstman

    Western Thunderer
    Last edited:
    • Like
    Reactions: AJC
    Chas Roberts slope-sided mineral
  • AJC

    Western Thunderer
    Hi Mick,

    Yes, I gathered that you'd been away (glad to see you back).

    The Chas Roberts wagon I built is based on a vehicle pictured in those very Modeller's Backtrack articles. I've posted pictures of the finished vehicle earlier in the thread but I'll post it again at the bottom of this one, though I don't seem to have taken any pictures since I lettered it. Seemingly, Chas Roberts built a batch with the 'continental' axleguards for their own hire fleet and I'd quite like to do one in 7mm - I've got the bits for a couple lurking in the bottom drawer, left over from a club competition - but I hadn't seen the cupboard door version before yesterday. Thinking about it, the idea isn't so odd, there were wooden-built wagons with top cupboard doors like that; some appear in John Hayes's book on 4mm Coal Wagons (Wild Swan) and I guess it's just a variant on the top flaps that all those thousands of BR 1/108s had.

    Modelling the '60s, as I do, quite a lot of these variants had gone but the Yeovil club's 7mm layout 'The Summit' is short of wagons so I might try one or two in that scale, lettered for the Chas Roberts fleet. Don't hold your breath on those, however!

    Chas_Roberts_9.gif

    Adam
     
    Italian Fruit Van (from scratch)
  • AJC

    Western Thunderer
    Meanwhile, my little Italian ferry van has inched forward a little. The extent is limited: just bracing and internal reinforcement - the vehicle now consists of a 60 thou' carcass with a 40 thou' outer layer. I'd have been better off using 40 thou' for the ends and 60 thou' for the sides since this would have saved a fair bit of plastic for no discernible loss of rigidity, but never mind. Just behind the basic body you can see the false ceiling that will go on top preventing the sides from bowing inwards - the holes are to allow the solvent fumes to evaporate off and there are similar ones in the floor. Having reached this stage, it will be allowed to harden off for a week or two.

    Italian_Ferry_002.gif

    So far, so tidy.

    Adam
     
    Brighton Terrier
  • AJC

    Western Thunderer
    Way back when, I made some steps towards a model of one of my favourite prototypes, a Brighton Terrier. Those wagons won't move themselves...

    It all looked quite good, but led me a merry dance trying to get it to actually run. So, bullet bitten, I've striped it down and started again using conventional compensation rather than the whizzy fully comp' version I'd intended and some Comet frames. These are dimensionally sound but have some strange features. The brakegear is designed for a much larger engine using the same dimensions so the pull rods and brake shoes are still on the etch and I reused the Branchlines versions which while not perfect are at least of appropriate proportions. I also recycled all the additional detail and added a bit more.

    Terrier_7.gif

    No sandboxes are supplied with either the Comet or Branchlines etches so I sourced some from Perserverance Kits - Perseverance Kits by Puffers Model Railway Products- and a Marsh chimney to go with them (I could have had a chassis too, I suppose). Steam lines for the sandpipes also went on, something that was surprisingly straightforward using the wire that comes wrapped round some bottles of rioja and the next stage is to add the brake pull rods and pick ups but it rolls nicely - though one of the wheels needed pinning to its axle - so that shouldn't prove too traumatic.

    So, why have I painted the chassis such a fetching shade of maroon?

    Well, this should answer that:

    Terrier_8.gif

    A start has been made on reworking the body to better represent 'Brighton Works' which means lopping off the front splashers, scratchbuilding a new saddle for the smokebox (which will have the extension ring fitted with a new smokebox door), carving off the clack valves and that lovely chimney has to go as well since Brighton Works had a slightly less delicate replacement under Marsh. The full list of body modifications currently runs to a side of A4 but none of them will affect the tank or cab sides so that lovely paintjob will remain.

    Yes, the boiler will have to be repainted which isn't a great problem since the Hornby rendition is a good match for the Precision version of Stroudley 'Improved Engine Green'. The valance will also have to get a repaint as well to match the chassis as opposed to the buffer beams. And before you ask, yes, I have the lining in hand in the form of transfers from Eric Gates (who designed them on behalf of the Brighton Circle).

    Adam
     
    Brighton Terrier
  • AJC

    Western Thunderer
    World of Terrier, same but different. Brighton Works's striking Stroudley colour scheme takes several steps forward and, in the midst of it all, it runs, which is quite exciting. First, a view of the mechanics:

    Terrier_14.gif

    Just this once I put some thought into this. The chassis a basic compensated job with a beam connecting the front two axles and the axles themselves running in tube sleeves which the beam bears on for lower friction. Drive is on the rear axle with a Mashima 1024 installed via a High Level gearbox. Note that the pick up assembly consists of a pair of pieces of PCB screws to cross members and linked by bus bars onto which the pick ups for the centre wheels are fixed. The kink over the cosmetic ashpan is invisible the right way up. Happily, the pull rods on these are outside the wheels and that makes life easier. As luck would have it, I even wired the thing in the correct orientation at the first time of asking which is truly remarkable...

    Terrier_12.gif

    This way up shows the paintwork: the Precision paint yellow (sorry, Improved Engine Green) had to be let down a smidge with some very light grey to match the colour Hornby painted the body and is the better for it, I feel. We also have claret-coloured frames, and rods, green rims and the axle ends (the Gibson standard 1/8" axle being somewhat oversclae here), picked out in black. The guard irons and sandpipes are painted bright red which is all rather exciting while the continuation on the spokes over the balance weights is a neat touch on the real thing that was a bit of a fiddle to add. It appears much less gaudy than might be expected. The body is coming on a little too, with a couple of wedges added to build up the smokebox saddle. This will be completed using Milliput.

    Terrier_13.gif

    Adam
     
    Last edited:
    Brighton Terrier
  • AJC

    Western Thunderer
    So, the workbench, and everything else, has been relocated and is now sort of up and running again. It's a bit slow, however, because I painstakingly stored everything very carefully - though the bench itself moved in one piece with all its drawers - and I now have to find it again. With that in mind, it made sense to take one project and use that as a search aid and in the process get some modelling done. In this instance, it's giving my plastic Terrier a facelift. So, starting with the bit that Dapol got 'most wrong' (at least for an A1X), the smokebox. A handful of posts ago the bones of the new smokebox saddle were shown in all their gory detail. I didn't take any pictures of the process of building up the saddle in Milliput, partly because my fingers were covered in the stuff but some way down the line, this was the result:

    Terrier_16.gif

    Note the nice even curves and the 'orrid file marks on the buffer beam. No matter, we'll be coming back to that. The white area is 5 thou' plastic sheet which represents the smokebox ring behind the door. And so, a day or two later, spot the difference:
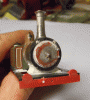
    Terrier_17.gif

    There's a dart (made from a turned base and a couple of handrail knobs for 0.3mm wire - a Terrier is a small machine, the real things are appropriately dainty: one size does not fit all). I'll be using these for the boiler handrails as well once I've bought some more. The buffer beam has been slightly reduced in height and you should be able to see that the hole for the coupling hook is now in the centre of the 'beam as it should be. It also means that the buffers look as though they'll be in the correct spot for this engine without too much modification to what's left. This is where the detail oddities come into play. Terriers had (have!) buffers at two different heights and different brake fittings. This one, weirdly, only had an air pipe on the bunker end in its latter years for example. The straps have yet to go on, but the Marsh chimney (Perseverance - happily available again) has and the loco looks better for it. Side on the effect is clear:
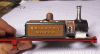
    Terrier_18.gif

    The tank fillers - somewhat underfed - have been sheaved with plastic tube and look better for the weight gain. Work still to do includes making the corners of the valances sharper and fabricating enormous amounts of pipework. The seriously eagle-eyed may notice that some of the filled holes in the boiler have been redrilled, but not all.

    Terrier_15.gif

    Why? Well, I discovered that most of the 'boiler' handrails were - and are - located on the tank tops, as this photo on Flickr shows: 02/11/1963 - twixt Hayling Island & Havant.

    Onwards and upwards.

    Adam
     
    Last edited:
    Coil Wagons
  • AJC

    Western Thunderer
    Hah! Very kind of you I'm sure. Those boltheads are just the thing for wet September afternoons with the T20 World Cup in the background! I've dug out a couple of pictures of some of the others. A pair of Coil S conversions from pre-nationalisation designed highs for carrying rod coil, and a Coil H, a rather elaborate - and quite short-lived - mid-60s conversion of a BR-built Pig Iron vehicle, apparently for carrying coiled tinplate from Trostre. The Coil H is now a bit more advanced but I haven't put it in front of the camera again.

    Blah 015.gif

    Coiled 006.gif

    The hood actually looks a bit better than that - I've since smoothed the edges on it.

    CoilSE.gif

    The Coil S have actually gone backwards: I've broken a couple of bits while they were in storage. Since one of these will be modelled loaded and sheeted, much of the above solebar detail will be hidden. Despite that, it's going to be a real pain to do since the coils of rod will probably have to be done properly as I reckon they will be visible under the sheet.

    Adam
     
    Dad's work
  • AJC

    Western Thunderer
    While I think of it, a quick note on inspiration. It's one of those words you see time and again on forums, but generally - in my view - it seems to be used as a synonym for 'desire'. That is, 'I want to do what he/she is doing' or 'I wish I had the skills to do what he/she/it has done' as a substitute for actually taking what has been shown off as a hint to produce something of their own. To illustrate this point, a couple of examples of why I spend my spare evenings mucking around with solvent and bits of plastic and brass.

    Miscellany 153.gif

    Dad made a batch of four china clay tippers goodness knows how long ago, but probably in the early '70s, decades before the Ratio kit. I seem to remember that he told me the 'clayhood' was based on the prototype conversion of the breed. Being based in Cornwall/Plymouth at the time, these were probably modelled from transparencies (since lost) taken by him at the time and made from plasticard and metal toothpaste tube and the limited range of castings and bits then available from the trade (probably the EMGS and Kenline). This no doubt explains the GW and modified LNER axleboxes on what were BR-built wagons. Would you notice? For the Plymouth club at the time - steeped in the pre-war GWR - this was all a bit radical: now, it's relatively mainstream. There was a scratchbuilt (plasticard on Tri-ang DMU bogies) Pressed Steel single car and a rail blue class 22 as well. He still has the latter in a box somewhere and it's pretty respectable even if the Tri-ang motor bogie it had was feeble. The wagons are still in use.

    Plastic Van.gif

    This is a much more recent - and more esoteric - vehicle. One of Mr Bulleid's experiments and probably one of the better ones: the fibreglass PMV on a skeleton chassis. Barring the buffers, handwheels, wheels and couplings (and possibly the 'W' irons) this one is completely scratchbuilt. Dad's pretty modest about these things but wagons like these, and his encouragement, really do inspire me to have a go at making something that bit different.

    Adam
     
    Dad's work
  • AJC

    Western Thunderer
    Steve - since the model is in Somerset - it was built and belongs to my father after all (I claim no responsibility, barring the mediocre photo) - and I'm in Southampton, detail pictures are going to have to wait. The shot below is the only other one I have. As for proximity to the prototype, you'll have to dig out a copy of Gould's book on SR non-passenger coaching stock. I think they built 10 of them altogether, full of Bulleid ideas to save material, hence the low tare weight. I still think the model is one of the best things dad's done, though the chain-driven diesel bogies (in 4mm) pip it in engineering terms. No, I don't have any pic's of those...

    PlasticPMV.gif

    Ian - since 'motivation' for my actually doing modelling at the minute tends to be relaxation from work or another rained-off Cricket fixture this summer, that word has almost taken on negative connotations, albeit of a personal nature! I don't get too hung up on the means of describing it, but the tag of 'inspirational' [You''re right 28ten, a whole other fish kettle] strikes me as too pat. Perhaps because I'm a historian in the day-job, at the moment, and labels are both the basis and the bain of the profession, I tend to use the same mental approaches to interpret what I'm building. It's knowing how to make things or working out where a model can follow the prototype or where it's best to deviate that takes the skill rather than whether it's derived from thing a or thing b. Take the hood on that Coil H, for example. It would be very difficult if not impossible to get a sheet material to look like a full size canvas. My attempt with Miliput simply emulates what military modellers have been doing for years but isn't inspired by that.

    Anyhow, time for a cuppa.

    Adam
     
    SR Shock Open (scratchbuilt)
  • AJC

    Western Thunderer
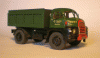
    Ok, so I did manage to do a little more - I had the paint out for something else. Now resplendent with the post '64 white blocks indicating a shock vehicle on the original bauxite livery (apparently correct) painted free-hand with a brush. You can see the witness mark where one was a touch over width. In a photo twice life-size this is an issue, after weathering, it won't be, even so, they would probably benefit from another coat. It's now hiding out in a box until I get round to half-finishing something else and feel like getting on with lettering it.

    Selection 014.gif

    What you can't see is that I've taken the opportunity to paint the interior it's first coat of brownish mid-grey. That can wait for when I have the weathered wood paint selection out too.

    Adam
     
    SR Shock Open (scratchbuilt)
  • AJC

    Western Thunderer
    I've noted that I like building wagons and most of these are from kits - Parkside, Cambrian and the like. Nice though these are there is always scope for further variety and scratchbuilds and kitbashes - not that I build much as it falls out of the packet - provide this. The queue on the length of track that sits above my workbench currently includes no fewer than four of these: a couple of specialist coil types and this, an SR-designed, BR-built shock-high. I'm starting with the the shock-high, purely because it's close to being complete and ready for painting. Well, it will be once the solvent has gone off. The choice of prototype, by the by, was purely based on having the Masokits etch for the brake gear in stock. I hadn't realised when I started it, but dad built one of these himself about 35 years ago. I'm not certain we really need another, but it's done now...

    The techniques aren't anything especially novel - Geoff Kent's wagon books will describe them - and as an open box on a spare set of Parkside solebars, it offers few challenges beyond a bit of patience. A short string of progress shots should give an idea. The prototype information came via Dave Larkin and Paul Bartlett while the drawing was found in SR Wagons, vol. 4

    SRShockHigh.gif

    DSCN1313.gif

    Shock 003.gif

    Shock 005.gif

    Hope this is of some interest

    Adam
     
    Lorries
  • AJC

    Western Thunderer
    Yes, these are wagons too just of a rubber-shod variety, although really, they're kitbashes rather than full scratchbuilds. You can blame Geoff Kent for these as well. Although MRJ 40 will always be remembered for Hursley, it was one of the other articles in it, by Geoff, on scratchbuilding 4mm scale road vehicles which really caught my imagination. That issue really changed what I thought a model railway could be. I suspect that this wasn't immediate - I was er, aged about 9 when MRJ 40 came out (I went to the MRJ show at Central Hall too!) but the long-term effect is a greater interest in what goes on around the railway.

    Since I'm not Geoff Kent I've made use of Frank Waller [Road Transport Images] components rather than doing it all from plastic sheet, though the tipper bodies here are all my own work. I do like the way Frank (and Bob Fridd, who makes the masters) do business - professional, friendly and prompt - and I enjoy using the products. Some are better than others - though RTI do revisit stuff and improve it - but for the most part, the essential character of the vehicles they portray are there in the resin castings. As such, this is really about the detailing and the paint job rather than the modelling since the hard part, the cab, has been bought in. Well, not quite, the reason these two have emerged from their box is that I need to finish the glazing and the curved rear quarter lights mean digging out a Fererro Rocher box and setting about it with a razor saw...

    lorries 026.gif

    Mercury1.gif

    Frank can supply transfers for several of the bigger fleets but I wanted to model a specific vehicle - the AEC featured here - found in a book on Somerset and Dorset hauliers and I decided that custom transfers weren't worth the hassle and expense for a single vehicle. Micro-signwriting is not good for your health especially if you do it as I do, using a size 000 brush. There's a local connection for me since I was brought up in Yeovil and Bird Brothers built the Concrete batching plant near Pen Mill Station in Yeovil, just out of shot to the left in this George Woods picture (but the image is just too nice not to include on so many levels. Even if you're totally unconcerned by 4mm scale lorries do take a look) which is still there, though not served by vehicles as elegant to look at as this AEC Mercury. They're probably better to drive though...

    lorries 031.gif

    The Big Bedford tipper, greedy-boards and all, is a figment of my imagination however, intended for the South Wales landsale yard/opencast disposal point micro-project which I will get round to before too long. Don't ask how long 'too long' is!

    Adam
     
    Coil Wagons
  • AJC

    Western Thunderer
    Painfully slow, owing to lack of correct paint (you try finding 'Freight Brown' on the shelf in Southampton), but here is the Coil H after some attention from the paintbrush. It will need more, especially on the underframe since the photographs show no end of red oxide primer grinning through here and there. That and my tin of Matt Chocolate needs a better stir...

    Painted1.gif

    This end view hopefully shows the work that's gone into the hood. Overall, I think it's quite successful, though the quality of the light here doesn't show it to its best advantage. I'll have to have another go in proper sunlight. It'll be a while in this state since no one does any suitable lettering I shall have to get some custom transfers done and that can wait until I need a reasonable quantity (unless someone else needs some I can piggyback on, of course?)

    third 004.gif

    Adam
     
    SR Shock Open (scratchbuilt)
  • AJC

    Western Thunderer
    Some more slightly scruffy (like the prototype on this occasion) micro-signwriting. The data panel should be sharper since on this vehicle it was stencilled and will be done as a transfer: if custom decals are the way to do the Coil H, then I may as well do a few extra elements such as these while I'm at it.

    shoc 025.gif

    The weathering will hide to worst of the scruffiness (honest) as will viewing the thing at actual rather than 1.5 x actual size.

    Adam
     
    Top