Beginners OO 1950's Banff

David Waite

Western Thunderer
What a lovely job you have done, the trusses and skylights look absolutely superb my last large job I did for the railways was to repair a termite damaged Queen truss similar to what you have made in the model this has brought back memories.
David.
 

aardvark

Active Member
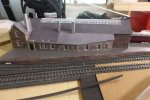
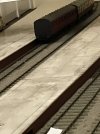
The external platform is done (I think), excepting a couple of gas lamps.

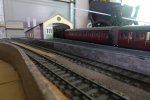
Here's the ever-patient 80121 arriving with the 4:55 from Tillynaught.

P1170821.JPG.a86aa7e31224ff74f691adaeb64bca84.jpg

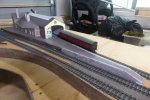
... and the obligatory helicopter view.

P1170822.JPG.f6ff37cfcfed82b61f543ea520918dd3.jpg

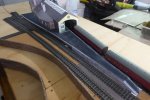
A moments silence 'was held when the mock-up went in the bin.

P1170819.JPG.d0a6eecb493b78be4ee9d14534136d1e.jpg

The next project will be a limited bit of scenic-ing to blend the platform into the adjacent trackwork, then onto the goods shed, which will fit over the outer track in front of the station in the helicopter view.

Another project to consider is where to store the buildings and platform when they're off of the baseboards.
 

aardvark

Active Member
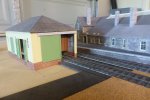
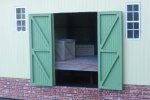
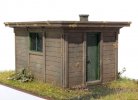
And 11 weeks later, the Banff goods shed is complete - or as complete as anything ever is. Although it's a much simpler structure than the station building, it's still surprising where the time goes.

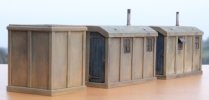
Here it is, in company with the station building and an incomplete Parkside van.

P1170885.JPG.d5f365ed72eb559decaee2524f23cdf0.jpg

I'm generally happy with the end result, although the colours are too flat/even/saturated/something. I'm not sure what's wrong, nor am I sure what to do about it. The shed also needs guttering , downpipes and bedding-in, which will disguise several millimetres of the bottom of the model. One day, perhaps.

Construction is Slaters 2.16 mm planking over 1.5mm card with ScaleScenes slates and bricks and details cut from plasticard.

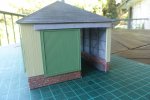
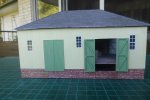
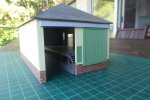
Here's some detail shots.

P1170888.JPG.a3fef25184ab753df72a877f460ebf61.jpg

P1170892.JPG.f6e7ae338c2117fed1493f867e27e637.jpg

P1170891.JPG.e3891b7186dc77b5ef317b98c5edaa31.jpg

P1170893.JPG.70f9046af9db7fe48c2b80ce26d3859a.jpg

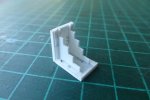
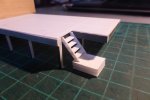
Despite being barely visible on the layout, I'm most pleased with the stairs. Constructed from plasticard, these were attempted as a practice for the highly visible signal box stairs.
 

Ian N

Active Member
And 11 weeks later, the Banff goods shed is complete - or as complete as anything ever is. Although it's a much simpler structure than the station building, it's still surprising where the time goes.

Here it is, in company with the station building and an incomplete Parkside van.

View attachment 210296

I'm generally happy with the end result, although the colours are too flat/even/saturated/something. I'm not sure what's wrong, nor am I sure what to do about it. The shed also needs guttering , downpipes and bedding-in, which will disguise several millimetres of the bottom of the model. One day, perhaps.

Construction is Slaters 2.16 mm planking over 1.5mm card with ScaleScenes slates and bricks and details cut from plasticard.

Here's some detail shots.

View attachment 210297

View attachment 210298

View attachment 210299

View attachment 210300

Despite being barely visible on the layout, I'm most pleased with the stairs. Constructed from plasticard, these were attempted as a practice for the highly visible signal box stairs.
I totally agree with John.The station building looks likes it's it had many decades exposure to the elements from the sea. The way you've done the inside wall next to the track, and the inside wood platform, has lots of interesting variations of wear and tear in the colour, and in the image next to the station building the goods shed doesn't look obviously out of place, or too clean. any weathering should be subtle.

It's a cracking model - do the guttering and down pipes etc - but unless it's really bothering you, consider leaving weathering, etc until the layout is more advanced when you can get better consistency of weathering over multiple buildings at the same and the larger scene blends together better.

Any chance of a "The Good, the Bad & the Ugly" on the stairs construction? I'm sure you and I aren't the only people with the joy(?) of having to build signal box stairs, and any information you've able to share about your construction method, or what might not be a good idea from your experience, will be much appreciated. Keep the good work coming

cheers
Ian
 

aardvark

Active Member
Thanks John and Ian. I think you've named what I couldn't. I have no experience with distressing/weathering, but there's lots of information in magazines and on the web that I can research into and procrastinate over.

I do like Ian's suggestion to leave it until the buildings are bedded into scenery in order to attempt some degree of consistency.

As to the stairs, I had thought I had taken a photo or two mid-construction, but appear to only have thought about doing so. I looked at various products and blogs on the web, but most used saw-tooth stringers that the treads were placed on top of. For the life of me, I've never seen wooden stairs that looked like that - more usually the treads are checked into the inside surfaces of the stringers - but perhaps this is some sort of regional variation.

In the end, I built a jig to hold the stringers and treads in place then dropped glue onto the butt joins, hoping that the famed capillary action would draw it into the butted surfaces. There were more parts in the jig than the stairs!

P1170894.JPG

The end result was surprisingly robust.

P1170850.JPG

The only thing I would do differently is to make the jig to hold the stairs upside down, so that the glue marks would be hidden on the undersides of the treads.

As to "The Good, the Bad & the Ugly", I'll leave that for readers to judge.
 

aardvark

Active Member
Thanks John, I'm sure I will. As they say in the movies, it will all be good in the end.

Most likely I'll follow my normal technique of taking ages to get my head around a new skill before trying it out on scrap a few times before I'm happy (and brave) enough to tackle the real thing. Washes are definitely on the list to try, although I'm cautious about washes over texture papers.

They say that practice makes perfect, although in my case it's more like practice makes sufficiently good.
 

Ian N

Active Member
I do like the jig idea. So simple and effective and scalable to various lengths.

Regarding washes, if you make them yourself - the cheapest option - keep a note of the proportions of paint to thinner ( and possibly retarder if using acrylics) for when you finish the first batch and want to make more. Commercial washes, although more expensive should be able to give more consistency of colour and finish
 

aardvark

Active Member
Thanks Ian. I'll probably start with bought as it removes one variable from the equation. Acrylic retarder - that sounds useful. I'm guessing that that's not necessary for the commercial washes?
 

Ian N

Active Member
My experiments ( trying to get dirty, weathered, or should that be weathered, dirty concrete platform surface ) have only used commercial products. I don't remember adding anything to it. Used straight onto white plastic, with no primer or base colour it looked like this. It did teach me that for horizontal surfaces you had to do it all in one go, Since then a colour photo has turned up showing the platform surface doesn look like concrete..... Another thing to fix!

IMG_2203.jpeg
 

Yorkshire Dave

Western Thunderer
Thanks Ian. I'll probably start with bought as it removes one variable from the equation. Acrylic retarder - that sounds useful. I'm guessing that that's not necessary for the commercial washes?

Commercial washes come in two types - water based and oil based. In my experience both occasionally require a degree of thinning to suit.

If you are making your own up from acrylics then add one drop of washing up liquid to break the surface tension, especially if applying to painted plastic surfaces otherwise it can 'pool'.

I tend now to use the oil based washes available from various suppliers such as MiG. When applying washes to buildings my favoured colours are browns and occasionally a touch of green on northern aspects - I try to avoid black washes. It's a case of experimenting and you can apply as many light washes as you desire to build up the effect you're after.
 

Yorkshire Dave

Western Thunderer
My experiments ( trying to get dirty, weathered, or should that be weathered, dirty concrete platform surface ) have only used commercial products. I don't remember adding anything to it. Used straight onto white plastic, with no primer or base colour it looked like this. It did teach me that for horizontal surfaces you had to do it all in one go, Since then a colour photo has turned up showing the platform surface doesn look like concrete..... Another thing to fix!

IMG_2203.jpeg

Concrete can be a difficult colour to achive and I find it pays to look around to see what old concrete structures are still standing today, taking into account 60 years+ of weathering since the clean air acts. Modern concrete tends to be a more grey colour whereas 1930s to 1960s concrete tends to be a more buff colour which weathers to a speckled brown/grey colour.

I start with a buff, yellow, beige and white on the palette with a minute drop of red and just mix as desired to give a base colour before applying washes. These 7mm buildings are the result - ending up with two different concrete colours.
SR 16.jpg
WT 03.jpg

Apologies for the hijack @aardvark .:)
 

Yorkshire Dave

Western Thunderer
Just a further note on concrete surfaces to see how they appear - some can still be seen on old petrol station forecourts, aprons in front of buildings, industrial yards, track infill, old runways and roads on older housing estates where they haven't been resurfaced.
 

aardvark

Active Member
Don't worry about it, Mr Dave. Happy to have your company, and you never know, I might need to paint some concrete myself one day.
 

aardvark

Active Member
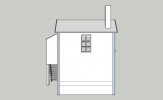
I don't usually post much, as I don't expect that the things I do are particularly innovative or my location particularly interesting, but perhaps this time, as I construct the Banff signal box, I might try posting just a little more frequently.

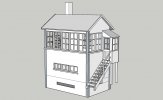
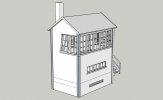
I've completed the CAD for the 'box. I've learnt to draw it as I intend to build it. This time, it will be plasticard over a 1mm card carcase, mostly because I already have most of a sheet of Evergreen clapboard remaining from the western end of the station building.

ignalBoxMk3-1.jpg.cd2a79fc5156bba87d58f615bc71bb11.jpg

ignalBoxMk3-2.jpg.1d964fc36fb8c99b3c23209e5be1b072.jpg

Regrettable, due to a complete lack of foresight in the 1850's by the BP&SR, the viewer will be presented with the following less-than-rivetting aspect.

ignalBoxMk3-3.jpg.53b84767be78143d086b9d763f6b04f8.jpg

Because of this, I'm not convinced that I 'll bother with the usual Peco signal box interior, but time will tell.
 
Top