Cookie's Workbench - 7/8ths Alan Keef K40

michael mott

Western Thunderer
Hello Steve, Nice to see somebody else using a shooting board and jewelers saw on styrene. I also fashioned one for making 45 degree cuts for corners.
Nice work on the Bagnal, My conversion is based on Sipat the 18 inch loco Now that i have a small blaster I can finish painting the new sides and roof, but you have inspired me to consider making a new saddle tank.

Michael
 

Steve Cook

Flying Squad
Hi Michael
The shooting board is all your fault! I saw you demonstrate one over on the Gnatterbox forum and if my memory serves I think you provided instructions as well - I didn't have any acrylic to hand but was able to cobble one together from mdf. I have to say, once you've used one, its very difficult to go back - as soon as you need right angles for scratchbuilding, I can't think of a better tool :) I hadn't considered one for corner cuts, thats an interesting proposition....
Thank you for your kind words on my Bagnal - its not a patch on your craftsmanship though! I shall have to hunt out some photos of your 'Sipat', she is a great looking loco. I really ought to get back on track with it and finish it off, alas I am very good at starting and getting half way through things before getting distracted, I'm sure its time will come back around. I have to say, I think replacing the saddle tank is well worth it - as it stands the loco looks top heavy and a bit on tip toes, shrinking the tank and adding a vertical face below the footplate helps to visually move the mass down - thats another task I haven't quite finished... I look forward to seeing what you do if you choose that route!

Steve
 

Steve Cook

Flying Squad
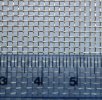
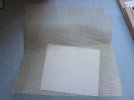
The material for the grills arrived this week, a 300mm x 300mm sheet of 16 LPI Brass mesh via Amazon.

AK13 Brass Mesh.jpeg

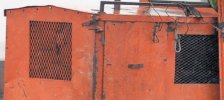
Its was a bit of gamble on the mesh, I had my fingers crossed that I could squeeze it to create the more distinctive diamond shape that the prototype has

AK21 Grills on Prototype.jpeg

As delivered its very square

AK14 Mesh Size.jpeg

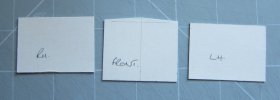
I started by cutting cardboard templates out from the front and bonnet side panels

AK15 Templates.jpeg

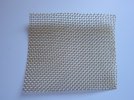
3" squares of mesh were cut off

AK16  Square.jpeg

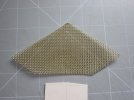
These were then squeezed from top to bottom and I'm pleased to say it was possible to create the diamond shape required. There is a limit to how far you can go, beyond a certain amount of squish it becomes impossible to keep things in straight line but overall it looks much closer to what is needed.

AK17 Squash the square.jpeg

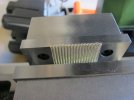
Once its been trimmed around the template it was placed in a vice and squashed to make it flat and hopefully lock it into position a bit better.

AK18 Apply the vice.jpeg

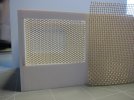
A trial fit shows the difference in shapes achieved

AK19 Trial Fit.jpeg

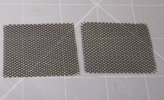
The grills were then dipped in dilute chemical black for brass ready for fixing into position.

AK20 Blacken to suit.jpeg

Overall the mesh is still a little large, but I get 16 holes in the height of the bonnet side grill as opposed to a target of 18 - I suspect the other option of 18 LPI brass mesh would probably give me 20 holes so I'm always going to be 2 out, in which case the coarser option is the better option.
 

Steve Cook

Flying Squad
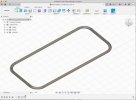
The window seals were next - drawn up in Fusion360 to be 2mm wide and 0.8mm thick.

AK22 Window Seals in Fusion360.jpeg

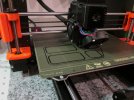
I set up the critical dimensions so that I only had one thing to alter on each model to create the seals for the front / rear, side and door. All four drawings were sent to my 3D printer and it was set to work

AK23 Putting to robot to work.jpeg

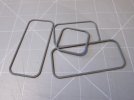
The seals were printed at 0.1mm layer height to minimise the layer lines, but the seals were shot in a couple of coats of primer so I can sand them down and remove most of the visible markings

AK24 peeled off and primed.jpeg

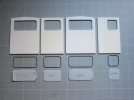
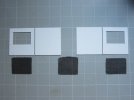
I also cut out some glazing from the material Adrian sent me a few years back - its still going strong, thanks!

AK25 Cab Parts and Glazing.jpeg

The bonnet sides have been cut from 0.5mm styrene ready for fitting to the main carcass

AK26 Bonnet Sides.jpeg

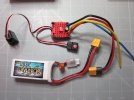
A quick shot of the electronics going in - they are all from my spares bin for my RC rock crawlers - its nice to only have to worry about one channel for a change! Receiver, ESC and battery are all thats required.

AK27 Electronics.jpeg

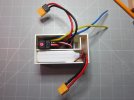
A styrene box was made up to house it all in the minimum space I could get away with - some trimming of the wire lengths will improve the neatness a bit further

AK28 Underbonnet electronics box.jpeg

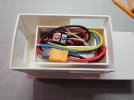
And thrown in the bonnet carcass to show I have managed to create some space behind the grills. The height of the electronics box is also lower than the top of the grills on the sides so photos showing some daylight through the bonnet should be possible.

AK29 Neatly packaged.jpeg

That brings us up to date - onwards and upwards..
 

Simon

Flying Squad
Wow, 3D printers and all. Only you would think of squishing the mesh - brilliant! It all looks great Steve, I'm looking forward to when you get to painting it.

I'd better crack on with its wagon!!

Simon
 

michael mott

Western Thunderer
A question about the window seals Steve. How are they removed from the platen and stay so flat and even?
The mesh looks great.
Michael
 

Steve Cook

Flying Squad
Steve - typical clean, precise and quality build going on there, matey, very pleasing to see!
Thanks Tim :) Its nice to be building again, and remembering to slow down!

A question about the window seals Steve. How are they removed from the platen and stay so flat and even?
The mesh looks great.
Michael
Thanks Michael.
In terms of the seals, they just popped off the build plate. One of the joys of the Prusa is the coated spring steel plate - once you have the squidge of the first layer dialled in then you can just print and at the end leave everything to cool to room temperature. The build plate can then be lifted off and flexed, most of the time the prints just pop off. This is with PLA, I've not yet moved up to PETG for more strength.

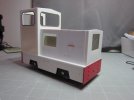
Much to my surprise, MEK is doing an excellent job of holding the seals to the styrene - I can't separate the two on my test piece so I think its should be a good long term seal. Well, at least I hope it is as three of the seals are now in place...

AK30 cab mock up and bonnet sides.jpeg

There has also been some assembly of the bonnet parts - the rear panels are glued directly to the carcass and the grills held in with superglue - I'll do a more permanent fixing job tomorrow. The front side panels are glued to strips of 5 thou styrene to just keep the front and rear edges off the carcass and give a small gap, I hope I can keep that throughout the painting process to stop everything being quite so perfectly clean and square - I will be knocking the corners off things to soften it a little I think.

The grabs on the panels are bent up from phosphor bronze, drilled through and then plastic rivets inserted all the way into the carcass, then the whole lot glued with MEK - its doing a good job of keeping things tied together.

Got to chose between styrene and nickel silver for the roof and bonnet tops now, I keep swinging between the two with neither being a particular favourite. I also need to sort a driver out so I can determine cab / seat layout - I had not thought about that until this weekend which is a bit of a bind, my usual place of purchase (Model Earth Products) don't have seated drivers unless you want the more comical sculpts so I need to consider alternatives.

Steve
 

PhilH

Western Thunderer
I also need to sort a driver out so I can determine cab / seat layout - I had not thought about that until this weekend which is a bit of a bind, my usual place of purchase (Model Earth Products) don't have seated drivers unless you want the more comical sculpts so I need to consider alternatives.
Steve

Steve, you can get 7/8" scale figures here: Miniature Figures // Design Scan Print 3D at a fairly reasonable £8.50 each.

They only list one seated figure in 7/8" scale and several others in 16mm scale, but they will consider doing a resize to any scale for £2.00, so probably would supply any to 7/8" scale.

There's also this one from the US:
View 7/8th people by SWC3DBackshop on Etsy
Fourth row down, second from left.

Any of these will probably require a little "surgery" to be suitable.
 
Last edited:
Top