Crymlyn A Shop Techniques. GWR 1366 class.

daifly

Western Thunderer
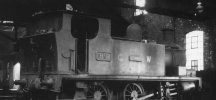
I've looked at lots of my photos of other LMMR & BP&GVR locos and with one exception, all of the side-tank locos with original flared bunkers - like 704 - did not have fire iron brackets. Some had tank-top stirrups to hold them. When rebuilt with the bigger, taller GW bunker, most seem to have acquired the fire iron brackets below the bunker flare. On balance, I'd leave them off.
The exception was 2197 Pioneer which had very short side tanks which may have a bearing on the fire iron provision!
2197 at Llanelly shed 31Jun51.jpg
Dave
 
Last edited:

davey4270

Western Thunderer
January 2023.

I've lost my way somewhat with this thread for various reasons I won't go into so perhaps an occasional update will suffice.
Today sees the frames of 1369 assembled with rear sandboxes made from laminations of Plasticard and wire rear sand pipes, the cylinder assemblies have been Araldited in position with the fixing screws shortened to give space between them to fit a speaker if required. To facilitate this an extra hole has been drilled through the frame spacer and into the smokebox so a wire can be threaded to the speaker. The frames have been sprayed with ACID#8 and Halfords matt black. The insides of the frames have been painted red and reassembled with a Taff Vale Models 18/33 motor and one of their 40:1 gearboxes with the nylon worm which should give almost silent running.
Since the last picture I have fitted the L/H conrod but am experiencing some clearance problems with the R/H centre wheel crank pin and the vacuum pump.

IMG_5173.jpg
The primed frames. Blutak was used to "mask" the horn blocks while copious amounts of masking tape was applied to the slide bars/crossheads. The vacuum pump was only placed in position for painting and to mask the mounting spigot on the slide bar support bracket.

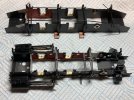
IMG_5183.jpg
Painted black with the inner frames painted red. The vacuum pump mounting spigot is visible. The other frames are from an ancient Gateneal kit of ex Llanelly & Mynydd Mawr Manning Wardle 704 VICTORY which was shelved to concentrate on the pair of 1366's. Opportunity was taken to paint the almost complete chassis of this kit.

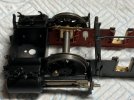
IMG_5187.jpg
A close up of the leading wheelset showing the axle box keeps and the plunger pickups. one of those jobs where an extra pair of hands are useful. Thank you blutak.

IMG_5194.jpg
The completed chassis running nicely on jump leads. Unfortunately it's only a picture so not actually running. Doh!
 
Last edited:

davey4270

Western Thunderer
Cab Seats.

After spending a great deal of time fitting the cab seats to the bunker front on the twins and making them work as per the instructions, I have noticed that the preserved 1369 has them fitted to the cab side sheets. Is this a preservation modification or were they always fitted there? I have several pictures giving a tantalising partial view through the cab doors of the rear bunker with no sign of the seats but this is not clear. Hopefully someone can confirm or deny this before I move them.

B8CED5C8-1F0E-43AA-B333-881BF727BF27.jpeg
No. 6 is the relevant instruction.

EF478E6E-949B-4E4F-ADE5-15D0E660E70A.jpeg
The seats fitted to the model’s bunker front.

119FC963-8786-4323-8A5A-EBE3A396A45B.jpeg
The preserved 1369 showing the fireman’s seat and the raised step on the floor.
 

daifly

Western Thunderer
I thought that this would be easy to resolve - just look for the presence of bolt/rivet heads on the outside of the side sheets. However, the seat backs on to the cabside numberplate and I've been unable to find a photo of a loco on a scrap line with number plate removed!

A trawl through all of my sources of photos has shown no evidence of bunker bulkhead-mounted seats. They would have needed to be well inboard to avoid the rear-hinged cab door from hitting them. I'll add my vote to the 1369 position!

Dave
 

davey4270

Western Thunderer
Hmm, there appears to be a different permutation in every picture! I have plenty of pics in the Pannier Papers on 1366 class and can make out a vertical pair above and slightly to the rear of centre on the number plate with another pair in line but behind the cab side handrail. Another cock up with the kit methinks.
 

davey4270

Western Thunderer
I haven't decided on the seat position yet, perhaps the easiest option is to fit the cab doors in the closed position and omit the seats! The jury is still out on this and even though there is a scaled down technical drawing with the instructions showing a horizontal line protruding from the bunker front that could be the seats, this doesn't mean that they were fitted here.
Even though I have plenty of pictures of this class, for various reasons I seem unable to resolve queries and keep moving onto something else. Whistle shields were fitted to most of the class at some point which were attached to the tank top with the whistle's pipes passing through the shield into the cab. The locos without shields just had the whistles mounted to the cab. I can't solder these to the cab front as it will prevent removing the tank, which needs to be lifted off vertically, to help painting the model.
Both the twins now have a L/H injector fitted. I'll have to check there's clearance on the R/H side for the reverser reach rod before fitting those.
A modification the the injectors was fitted to some of the class and a description is with the picture of each type.
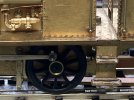
I've yet to find a correctly cast injector suitable for a pannier tank. These were fitted in reverse to normal with the feed going through the cab front sheet or curving up outside the pannier tank on a top feed fitted specimen. The cast water valve now faces the wrong way and needs to be filed off for clearance while the valve operating rod can't be horizontal because the valve is too low for the rod to clear the injector body. Minerva have got this right on their RTR pannier. The rod (Brass) will be painted body colour so will be less noticeable.
IMG_5345.jpg
The angled water valve operating rod.
IMG_1386_injector.jpg
1371 as built with the injector drain dropping straight down through the footplate then bending round to drain under the step. This is as the supplied cast brass injectors.
IMG_5344.jpg
The modified type as later fitted to 1369 and some others in the class. The body seems to be cast with a side take off for the drain and the drain pipe run is suitably modified to end up at the same point.
 

davey4270

Western Thunderer
I haven’t updated on the twins here for a while. Both chassis are built with 1369 painted and motorised. Both tank units and footplate/cab/bunker assemblies are also finished. The bodies have been sprayed with primer, matt black and then with the black bits masked off, green.
Reverser, front sandboxes with some kind of operating mechanism next then the injectors with pipe work can be fitted before adding the tanks.

IMG_5816.jpeg
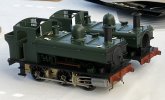
The floor units have been “dropped” in with this view showing 1369 to the left with its seats relocated to the cab sides at some time in its life. 1371 to the right has its seats as originally located on the bunker front.

IMG_5818.jpeg
1369 on the left has its tank fronts painted green as on the preserved locomotive and requested by its owner while 1371 has them in black.
 

David Waite

Western Thunderer
I have just seen your post for the first time and have enjoyed seeing your progress.
What a great solution you came up with for the position of the cab seats, now the two locos are the same but different.
David
 

davey4270

Western Thunderer
Main bodywork assembled on the twins but loads of detailing left.
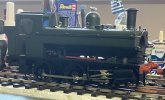
Fitted the tank assemblies to the footplate/cab/bunker assemblies. A bit of a fiddle trying to thread the extended tank side handrails into the cab side handrail knobs at the same time as fitting the injector pipe work through the cab front and coercing the tank itself into position but got there in the end. I gave up on the front sandbox operating mechanism, a 2mm modeller could probably have got it to work but I could hardly see it!

IMG_5858.jpeg
1371

IMG_5859.jpeg
1369.
 

WM183

Western Thunderer
What beautiful models! This kit looks so much nicer than the one I am building. The cab interior in particular is so well done - and reminds me to add the seats!
 

davey4270

Western Thunderer
What beautiful models! This kit looks so much nicer than the one I am building. The cab interior in particular is so well done - and reminds me to add the seats!
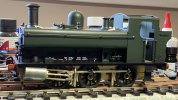
Thank you. Apparently the cab seats were fitted to the bunker front when built and moved at some time in their life, well 1369 certainly has them on the cab sides. My customer wants his done as preserved with the green tank fronts. The white bits of card are masking the body from the recently fitted lifting rings while they are painted. The twins are on a table in our conservatory where the heat will help cure the paintwork hopefully. Which kit are you building?
1371 sits on a rolling but not motorised or painted chassis.
IMG_5865.jpeg
 

WM183

Western Thunderer
Hi Dave,

I am building the very old "Majestic Models" kit, which was all brass etchings (pretty poor ones) a few nickel silver etchings (Frames and rods, surprisingly "ok" ) and white metal castings (more or less all bad) and I have had to remake a significant number of the etches myself. It's slowly building into a model I am happy with, but it doesn't hold a candle to your models here. These are simply gorgeous. In my workbench thread I have shown some of the steps as my model also nears completion, but wow... what a pig's ear the kit was, and the loco sort of is, even despite my best attempts!

Your posts here have given me a few ideas for bits to repair and do better, though!

Amanda
 

davey4270

Western Thunderer
Hi Dave,

I am building the very old "Majestic Models" kit, which was all brass etchings (pretty poor ones) a few nickel silver etchings (Frames and rods, surprisingly "ok" ) and white metal castings (more or less all bad) and I have had to remake a significant number of the etches myself. It's slowly building into a model I am happy with, but it doesn't hold a candle to your models here. These are simply gorgeous. In my workbench thread I have shown some of the steps as my model also nears completion, but wow... what a pig's ear the kit was, and the loco sort of is, even despite my best attempts!

Your posts here have given me a few ideas for bits to repair and do better, though!

Amanda
Hi Amanda.

There were a few things with this kit that almost helped it learn to fly from my window! However Percy Veerance proved to be a great help in sorting most things. There is a lovely casting for the vacuum pump piston rod which also acts as a small end bush. Unfortunately the mount for the vacuum pump on the slide bar support bracket is out (in) by about 2mm causing it to be unusable but I think I can sort it.
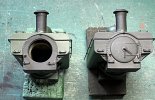
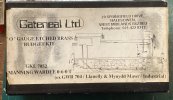
I have acquired an ancient Gateneal kit which hints at a sow's ears and silk purses but I won't let it beat me. it's been in abeyance for a twelvemonth while the twins are built but I have a sweet running chassis and only wish I'd thickened the coupling rods with a scrap lamination. I wont touch it now in case it alters the crank pin centres on the completed chassis. I have made the boiler detachable for painting and scratched inner tank sides.
These were very visible on the prototype as the tanks were quite narrow and there was no panel covering the tank tops to the boiler. Atrocious is not a strong enough word for the white metal castings which are decidedly oval!!!
Sorry I've gone off track a bit (lot).

IMG_4166.jpg
An old kit, I wonder if any living relatives survive?

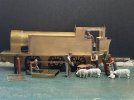
IMG_4274.jpg
Some of the Crymlyn A Shop Boyos at work last year. Lamp irons have since been added with the chassis being painted and motorised at the same time as 1369's was built.

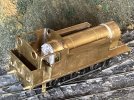
IMG_5868.jpg
This shows the bunker rear attached with the bottom lamp irons. It also shows the thin tanks and the inner tank panel.
 
Top