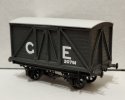
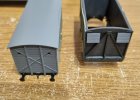
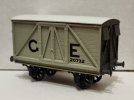
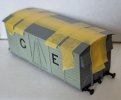
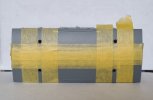
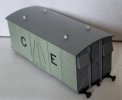
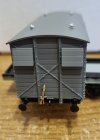
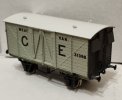
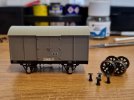
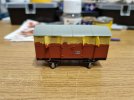
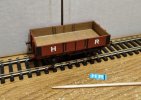
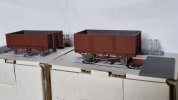
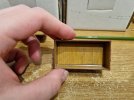
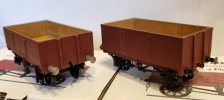
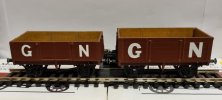
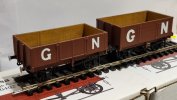
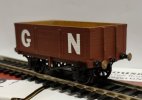
Liver & Fry's workbench

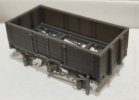
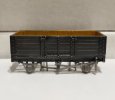
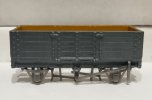
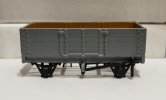
GER lowmac 'Mac K'
  • Liver & Fry

    Western Thunderer
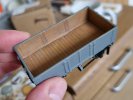
    To start things off, here is a wagon build I undertook in January 2023 during some downtime between night shifts.

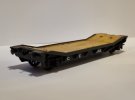
    It is a GER lowmac (later Mac K), using the Dapol lowmac kit as a starting point. The Dapol kit is based on the BR built 'Mac K' lowmacs which themselves were built to a GER design incorporating Diagrams 25/50/75 between 1886 and 1914. This gave me the perfect starting point for a kit bash that would give me another GER wagon.

    The starting point for this was to prepare the wagon sides; namely removal of the axleboxes and fitting appropriate GER ones. This was done using a dremel and by making a makeshift guard out of plasticard the slot around the axlebox, allowing me to sand back to a level without damaging the rivet detail on the original mould. The moulded bearings were then drilled out to take brass bearings. This process is demonstrated below:
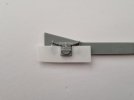
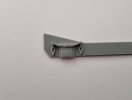
    20230123_140323.jpg
    20230123_142249.jpg
    20230124_093807.jpg

    Other erroneous details were also removed as part of the preparation process.

    The kit was then built "as intended", following the instructions provided, with the exception of fitting a brass coupling hook and whitemetal buffers that are of a greater quality than those provided by Dapol.
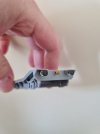
    20230124_132938.jpg

    Having built the kit, I then fitted the new axleboxes. These are GER Type E axleboxes salvaged from a spare Oxford Rail GER van chassis.
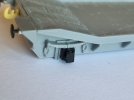
    20230124_152946.jpg

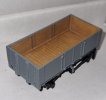
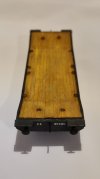
    One of the main visual differences between the original GER wagons and the later Mac K's is the orientation of the planks on the deck; on the later wagons, as represented by the kit, these are horizontal but on the GER examples these were longitudinal. To rectify this on the kit, I sanded down the raised moulded details on the deck and used Evergreen 2mm plastic strips (1.5mm for the outer edges), cut to size and laid plank by plank on the deck of the wagon. I then created and fitted some wire tie down loops using a technique I discovered in this handy video:

    This was the result of those efforts:
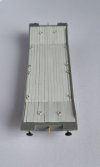
    20230126_112307.jpg

    Some final details were added and Alan Gibson wheels were fitted, meaning that the building aspect of the project was now complete:
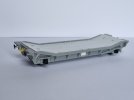
    20230126_110825.jpg

    All that was left was to paint and add lettering, using Powsides presfix transfers (a fiddly job for the smaller letters and numbers!):
    20230130_181034.jpg
    20230130_181250.jpg

    Weight in the form of Liquid Gravity was added underneath, although it is my long term intention to build and add a load, such as a stationary engine, to aid this.

    I have to say I'm quite proud of what I achieved! It was my first foray into learning how to paint a realistic wood finish and this is something I've continued to develop and enjoy as the year has progressed (In fact, my current wagon builds, a pair of Jones Highland Railway opens with sheep flakes fitted, were chosen so I had an excuse to paint some more wood!).

    Let me know what you think!

    - James
     
    Achieving a wood effect
  • Liver & Fry

    Western Thunderer
    So, as a nice segue from the lowmac build, one of my main take aways from said build was that of learning how to achieve a painted wood effect (after all, you kind of have to learn when the main surface and visual focus of the wagon is a wood deck!).

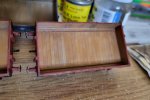
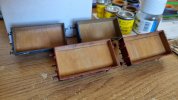
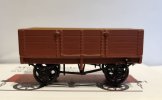
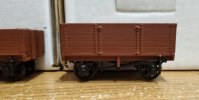
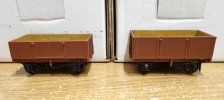
    As such I revisited a number of open wagons I'd previously worked on; these included two kit built HR Jones open wagons (Mousa Models) and two reworked NB jubilee wagons from Oxford Rail. Originally I had painted the insides of these wagons with a generic "wood" colour, but this lacked any tonal variation and the shade was far too golden. It did (and does) however make for a great base colour to build up from.

    My method involves drybrushing; first applying a patchy layer of earth brown, focusing on crevices, corners, plank gaps and the like. This is followed by a more generalised layer of a sandy yellow/brown (I've actually been using a tin of loco tan!) to lighten the overall tone before finishing with highlights of light grey, owing to the fact that sunlight bleaches wood to give it a silver sheen.

    This results in the effect seen below:

    20230806_102936.jpg
    20230806_102628.jpg

    Hopefully this offers a little insight for anyone wondering how to approach this same challenge!

    - James
     
    GER covered goods vans
  • Liver & Fry

    Western Thunderer
    Right, strap in because this one's potentially a long one!

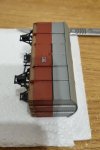
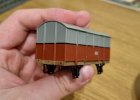
    In early 2022 Oxford Rail brought a ready-to-run model of the GER Dia.72 covered goods van to the market. This naturally peaked my interest and so I purchased six of these, plus two of the later LNER banana vans, in order to see what I could do with them and how many variants I could create.

    Straight out of the box, we are presented with this:

    20230927_210145.jpg20230927_210205.jpg

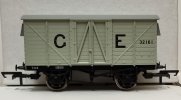
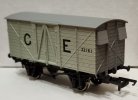
    For all intents and purposes, this is a faithful recreation of the van in question. However, two errors are immediately noticeable: the ends of the van are too light (they should be slate grey) and the sole bars are black, whereas they should be French grey like the bodyside.

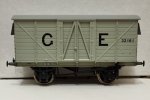
    So, my first reworked van is simply a corrected version of GE 32161:

    20230927_212435.jpg20230927_212506.jpg

    For this I used Phoenix Precision P505 and P506. Keeping the "as released" running number meant I could paint around, and thus keep, the running number on the solebar.

    Next up, some body swapping! The Dia.72 vans were introduced in 1911 and were a 19ft long version of the earlier Dia.47 of 1903, which was almost identical aside from being a whole 3 inches longer. In 4mm scale this equates to a 1mm discrepancy which is unnoticeable and thus something I'm willing to accept if it provides wider variety in my fleet.

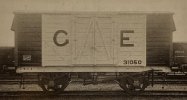
    With that in mind, here is a photo from 1st September 1910 of Dia.47 GE 31050 (Credited to Peter Tatlow):

    20220222_183846.jpg

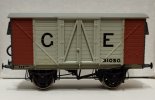
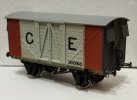
    This particular example was fitted with vacuum brakes and carried a special livery that incorporated red oxide end panels to denote this feature.

    The diagram of banana van also released by Oxford Rail was based on the Dia.72, except these vans were all fitted with vacuum brakes and had no end vents and thus this presented me an opportunity; by swapping the bodies of a Dia.72 van and a banana van, I could add two more variants to my GE van fleet.

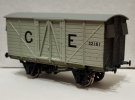
    First up is my take on GE 31050:

    20230927_210020.jpg20230927_210818.jpg

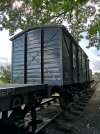
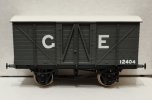
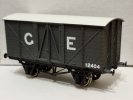
    Of course, this body swap meant I was also with an unfitted, unventilated van. Enter GE 12404, now preserved on the Mid Suffolk Light Railway:

    IMG_20190818_153658.jpg20230927_212919.jpg20230927_212820.jpg

    Being unventilated means GE 12404 carries GER slate grey as opposed to the French grey bodysides seen on the other examples. The GE lettering and numbering was done using Powsides presfix transfers.

    Finally we have GE 31612:

    20230927_212945.jpg20230927_212700.jpg

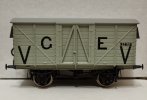
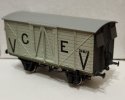
    This is another bodyswap to create a further vacuum fitted example, except this time the van carries the post-1912 livery for fitted vans, whereby the red ends were replaced by a large V. It's less aesthetically pleasing than the earlier livery, but I included it to complete the set and have one of each, so to speak.

    Of the original eight vans purchased, three Dia.72s and both banana vans have been used to create four different variants of GE van. One of the spare chassis donated its GE axle boxes to the lowmac build previously discussed. Two Dia.72 vans remain "in store" for whenever I decide I want to model yet more vans. So what of the final unaccounted for Dia.72 van? Well, the body from this was cannibalised for another project. Stay tuned for Part 2 to find out more...

    - James
     
    GER covered goods vans
  • Liver & Fry

    Western Thunderer
    Part 2 of the GE van thread is shorter but takes us back, chronologically speaking, to both the first vans I built, and to an earlier design of van.

    This time the focus is on Dia.15 vans, of which I built three of these from the 3D printed resin kits by Mousa Models. These were some of the first wagon kits I'd ever worked on and I really enjoyed the build process, gaining the confidence to venture further into kit building rather than just detailing/improving rtr models. Each one had interal weight added, Alan Gibson 8 open spoke wheels fitted and the lettering was once again done using Powsides GER presfix transfers.

    I decided from the start that I wanted to have each one finished in a different livery variation in order to add variety to the fleet and so the first two examples represent pre and post 1903 lettering variants:

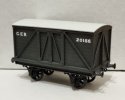
    GE 20156 with pre-1903 lettering:

    20230927_210421.jpg

    GE 20791 with post-1903 lettering:

    20230927_210346.jpg

    The final one, however, came about following the release of the Oxford Rail Dia.72 vans. From 1902, a number of Dia.15 vans were fitted with ventilators and this design of ventilator was perpetuated on the Dia.47 and Dia.72 vans. I therefore cannibalised one of my Dia.72 van bodies, relieving it of its ventilators and fitting them to the third Dia.15 kit.

    20220206_164845.jpg

    Because this van was now a ventilated example, it could be finished in the GE French grey livery with black lettering as GE 20732:

    20230927_210239.jpg

    With that, I believed I'd represented the full compliment of vans possible from the two sources available to me, having three Dia.15, one Dia.47 and three Dia.72 vans in a range of conditions. However, since posting Part 1 yesterday, @Herb Garden has informed me that there is another diagram that can be easily modelled using the Oxford Rail van as a basis. Work has already begun and this will eventually be detailed in Part 3... Stay tuned!

    - James
     
    GER covered goods vans
  • Liver & Fry

    Western Thunderer
    Well, Part 3 has come about sooner than I expected! Turns out I'm pretty in tune with these vans and what needs doing to them now, so I was able to add another example to the rostrum quite quickly!

    So, having created four variants from the Oxford Rail vans already, what else could I possibly create using them? Well, in 1905, order D59 was placed for 100 Dia.47 vans; however, six of these were to become meat vans, using the Dia.47 as a basis but with a few modifications. Numbered 31395 to 313400, the only visual differences on these new vans were the fitting of two pairs of torpedo vents, a Westinghouse through pipe and screw couplings. These were christened as Dia.74.

    The first thing I did was correct the Morton clutch error, which I posted about recently when I did it. The solebar was painted French grey and weight was added to the chassis. This was then set aside whilst I focused on the body.

    I removed the running number and then masked the roof, using landmarks such as the bodyside uprights to get the correct position of the torpedo vents. I drilled out the holes for these and fitted them accordingly, as can be seen below:

    20230930_155437.jpg20230930_162448.jpg20230930_163553.jpg

    I then fitted some Westinghouse pipes to the ends; the position of these having been a discussion between myself and @Herb Garden where we believed these to be to the left of the draw hook as you look end on, in keeping with how the GER used this arrangement on it's locos. After much searching, I found reference to a gas holder wagon (Tatlow) which was Westinghouse fitted from new and this too had its pipe to the left of the draw hook. As such, this is the arrangement I have gone with:

    20230930_173529.jpg

    All that was left then was lettering and painting. I confess to using a generic font (Franklin Heavy 2mm, Fox Transfers) for the lettering, but it is one that is close enough to matching the GE style and with no alternative option, this works for me! With only six examples to choose from, I settled on GE 31398, simply because I hadn't lettered anything with an 8 in its number yet!

    20231001_223100.jpg20231001_223220.jpg20231001_223317.jpg

    So there we are! Five GE vans that can be modelled using the Oxford Rail van as a basis. I have one left that remains untouched but this will probably just have the corrections done and be kept as a standard Dia.72.

    Hopefully this has been as interesting a conclusion to this topic for you as it was for me in modelling it. I quite enjoyed this one, I must say!

    - James
     
    GER gunpowder van
  • Liver & Fry

    Western Thunderer
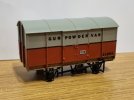
    So, what's the logical follow upto a thread about GE vans? Why, another GE van of course! But this one is a bit more involved...

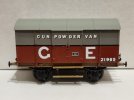
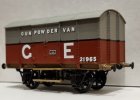
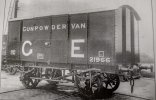
    The subject of this entry is the Dia.62 gunpowder van. 18 of these were built between 1909 and 1914 and they were finished in a rather colourful livery (as many gunpowder vans seem to have been - E.g the GNR vans).

    Screenshot_20230912_160645_WhatsApp.jpg

    These vans bear a striking resemblance and dimensional similarity to the later RCH design as produced by Rapido and so it made sense for me to see what I could make of one...

    20230324_105808.jpg

    Initial work would include removing the buffers, removing the brake gear on one side of the wagon, removing the lamp irons on each end, removing the wheels, sanding off the lower door locks, sanding off the surface detail of the axleboxes and reprofiling these so they angle inwards towards the top (I had no way of representing an X type oil axlebox but I figured removing the offending features and getting the profile correct was good enough), removing the printed bodyside detail (bar the warning notice which is a raised feature and a detail I'd like to try keep) and sourcing some GER buffers from the spare sacrificial Oxford Rail van:

    20230329_161044.jpg

    I then masked off the bodyside in order to repaint the lower half. The building of the Dia.62 vans coincided with the GER changing their livery for gunpowder vans. This was now to feature a "light grey" upper half and a red oxide lower half, separated by a black line, with chocolate solebars and bufferbeams. I struggled to pinpoint what constituted as "light grey" given contemporary photographs show this to be much darker than the usual GER light grey (French grey as used on ventilated stock) and so I simply kept the original colour used by Rapido:

    20230403_204511.jpg

    I then began to line the bodyside:

    20230413_210141.jpg
    20230417_214230.jpg

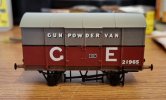
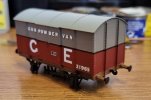
    Another interesting aesthetic feature (and something new to me from a modelling perspective) is that the words 'GUNPOWDER VAN' and the running number were white, shaded in black (whilst the G E was done in the standard white style). In order to replicate this, I started by lettering in plain black and then adding white lettering over top, offset to achieve the desired affect:

    20230424_215310.jpg
    20230513_160831.jpg20230513_160657.jpg

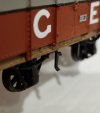
    By this point I had also fitted the buffers. The next challenge was the footsteps that adorned either side of the van; step brackets were made by folding thin strips of brass and the footboards were made using cut down planks from a plastic fence kit. the planks however had a triangular shape to the rear and so the brackets had to be shaped suitability so that the uper face of the footsteps would sit on the level:

    20230910_203042.jpg
    20231005_203750.jpg

    And with that, the project was deemed complete!

    20231005_205311.jpgScreenshot_20230912_160531_WhatsApp.jpg

    Hopefully mine bears enough of a resemblance to that which it's meant to represent! I would later use the lessons in shading to tackle a quirky private owner wagon that had been on my wishlist for some time, but more on that in a future update!

    - James
     
    A loco for the L&FR
  • Liver & Fry

    Western Thunderer
    Whilst I'm busy populating my thread with GE modelling projects, some of you are probably wondering "But aren't you called Liver & Fry? Where's the Lynn and Fakenham modelling?". Well, for starters, there is little to no L&FR stock available on the market, meaning most things would have to be scratch built or at the very least designed on CAD for etching or 3D printing. And secondly, my soldering skills are currently non-existent and so the ability to competently built from scratch is, well... Let's just say it's going to be a little while before you see anything that meets the L&FR criteria.

    That said, I do have one item in my collection that qualifies and its actually a locomotive!

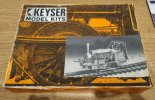
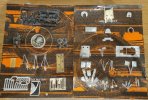
    20231009_215349.jpg20231009_215445.jpg20231009_215654.jpg

    It's a TVR (later GWR) S class by Keyser Model Kits. What's the relevance to the L&FR I hear you ask? Well, time for a history lesson!

    In 1878, Wilkinson and Jarvis, the contractors of the L&FR, took delivery of Hudswell, Clarke & Rogers No.183. This was followed by Works No.192 in 1880. The former was named 'Alpha' whilst the latter was named 'Vici'. These locos were used by the contractors during construction of the line until 1881 when they passed into L&FR stock proper, becoming Nos.4 & 5 respectively, but retaining their names (the only locos to do so after the L&FR was amalgamated into the Eastern and Midlands). The link? The S class (as depicted here) were almost identical to the L&FR pair, bar a different smokebox (circular on the L&FR engines) and different buffer casings. This means that, remarkably, I effectively have a kit for an L&FR loco! I'm yet to decide if this will become 'Alpha' or 'Vici', but I'm leaning towards 'Alpha'. Aside from the interest of it being the first loco on L&FR metals, I've found there are far more photos of that loco than that of 'Vici'.
    Both were delivered in "green" with black lining, bordered on both side by white. This is the same as later locos built for the L&FR and so it is fair to assume that the green used was also the same shade, especially as the first locos built for the L&FR, the 4-4-0 tank engines ("B Class" under later M&GN parlance), were also built by Hudswell, Clarke & Rogers. The L&FR shade has been described by R.S. McNaught, and latterly Bob Essery and Nigel Digby, as "Great Central" green - I.e a mid chrome green. The only uncertainty is whether the contractor engines carried what was to become the full L&FR livery by having brown underframes (a shade described by Alan Wells as approximating to "Venetian Red" as used by the Midland, who called said shade "Chocolate"). I've found no reference to confirm or deny the use of brown frames for 'Alpha' and 'Vici', only what later (L&FR proper) locos carried. Discussion on this is welcomed!
    And so, whilst not yet built, I can claim to have something in the pipeline that fits with the intended criteria! Now to work out how to source the rest of the fleet...

    - James
     
    Last edited:
    English Oilfields Ltd
  • Liver & Fry

    Western Thunderer
    Continuing on from the lessons learnt in shaded lettering (see #28) I decided to model a quirky footnote of local history.

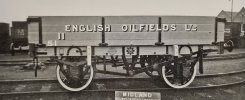
    Did you know there used to be an oil refinery in Setchey, Norfolk? In 1918 'English Oilfields Ltd' was established to mine a known seam of oil bearing shale on a site bordering the A10 in the vicinity of what is now 'Beers of Europe'. The venture, fronted by a Dr William Forbes-Leslie, saw its capital increased to a ridiculous £1.5 million by the AGM of 1919, based on positive initial samples and promises of a further 2,000 million tons of shale in the ground. However, the whole venture was a massive fraud; the initial samples had been "salted" with Pennsylvania crude-derived oil and the shale oil later extracted in 1921 was found to have a sulphur content of 8-9% vs the industry accepted 0.25% meaning it had no commercial value whatsoever. Understandably the company rapidly saw a massive decline and the shareholders lost their money. That is except for Dr Forbes-Leslie who ran away to Somerset with his new found fortune... (He was later arrested for trying the same scam again).

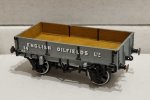
    So what of the wagon I've modelled? Well, to serve the new refinery, a long siding was built from Clarks Drove on the mainline to King's Lynn, across the fens to Setchey. 10 wagons were built by the Midland Railway Carriage and Wagon Co. and numbered 11-20 (a common practice made to make wagon fleets look bigger than they were). It is believed that these were to serve the refinery by moving freshly mined shale from the pits into the facility. In the end, it appears the majority of their use within E.O.L was for the extraction of gravel, which is all the site became good for following the collapse of the oil extraction side of the business!

    20230905_212557.jpg

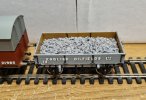
    My interpretation is based on a Mousa Models kits of a Midland D.305 3 plank wagon, as the nearest "that looks the part" 3 plank wagon I could source. This was built as intended but painted and lettered to represent No.14 of the fleet. I also added the battens to the solebars that prevented the doors hitting the running gear beneath, aswell as a removable gravel load.

    20230905_212005.jpg
    20230912_200448.jpg

    It's a quirky addition to the collection that I couldn't resist given the story behind it and the fact it is also a local tale.

    Until next time...

    - James
     
    Highland Railway open wagons
  • Liver & Fry

    Western Thunderer
    For once I have a live modelling update!

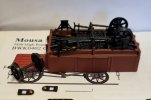
    I'm currently working on a pair of Highland Railway Jones open wagon kits by Mousa Models and I figured I'd share my solution for adding weight to the wagons.

    20231109_203843.jpg

    Liquid Gravity! Poured into the recesses of the wagon's frame and doused in glue, this sets like stone and sufficiently increases the weight of the wagon in a balanced manner without affecting the appearance of the vehicle.

    For extra adhesion/sealing (and for aesthetic purposes if someone were to see the underside of the wagon) I then give a top coat of black paint to match the frame.

    20231110_182716.jpg

    This probably isn't revolutionary but I felt I ought to post an update about something I'm actually working on rather than going through my back catalogue projects!

    - James
     
    Highland Railway open wagons
  • Liver & Fry

    Western Thunderer
    Happy New Year everyone!

    I hope you all had an enjoyable festive season. Apologies for my absence in the latter weeks of 2023. Modelling took somewhat of a backseat in the game of life!

    I am, however, back to it this evening by finally finishing off those Highland Railway Jones open wagons with some lettering:

    20240102_204908.jpg

    Really do need a brake van to go with these, if anyone happens to know where I might source one (preferably something suitable for the Jones/early Drummond era - i.e turn of the century). Loco wise, I confess to waiting on Rapido to release their Jones Goods - My modelling is nowhere near loco building standards just yet!

    Hopefully 2024 will see me develop some more skills and become more active on here. Call it a new year's resolution, if you will...

    - James
     
    GNR open wagons
  • Liver & Fry

    Western Thunderer
    Time for a live update!

    Having finished the last of my Mousa Models Highland wagon kits, I felt like change was needed, so my next build brings me back south to Great Northern territory.

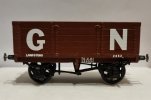
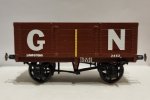
    These are another pair of Mousa kits representing a standard Dia.1 4 plank wagon and a Dia.24 5 plank mineral wagon. I find if I have wagons from the same company, it's easier to batch build them and do all the painting in one go; that and I've got quite adept with these kits and so am able to build them quickly and efficiently, meaning I can clear two more off the long list of things to build!

    20240114_122904.jpg

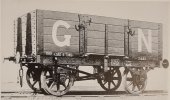
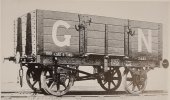
    The Dia.1 was an integral part of the GNR wagon fleet and so it made sense for me to own at least one but my acquisition of the Dia.24 was accidental and I had to refer to Tatlow to identify it. Thankfully, there is a nice clear photo as seen below:

    20240114_164649.jpg
    (LNER Wagons Volume 1, page 33, credited W.O.STEEL CTY. R.J.ESSERY)

    If nothing else it adds some variation!

    Now, it's my understanding that the entire bodyside of GNR open wagons was painted brown, with only the ironwork below the solebar (and buffer casings) being painted black, but the photo leads me to question if mineral wagons were an exception this rule? Or if it's simply the effect of a metal surface reflecting more than wood? Any thoughts or discussion on that would be appreciated!

    In the meantime, I'm off to paint the first coat of the interior/floor...

    - James
     
    GNR open wagons
  • Liver & Fry

    Western Thunderer
    Greetings, all!

    I'm happy to report that the GNR wagons are proceeding nicely! Since last time, the ironwork below the solebars have been painted black and, initially, the base coat for the interior and floor 'wood' colour was applied. At this point there was a minor hiccup, insofar as I became aware that the 4 plank didn't sit level, with one W-iron riding up when the wagon was sat on my workbench as a result of the body being twisted. I overcame this by submerging the wagon in hot water ("hot" being whatever temperature the kitchen tap chucks out!) and then twisting it in the opposite rotation, before placing a weight on top of the wagon body to keep it pressed straight to the surface of the workbench. This certainly improved things!

    Following that, I fitted the floor sections and have spent this evening painting the interiors in my usual manner:

    20240118_222120.jpg

    Once dry, I will look to fit weight underneath the wagons and then it'll be wheels and lettering; but more about those when they happen!

    - James
     
    GNR open wagons
  • Liver & Fry

    Western Thunderer
    I promise one day I'll actually make one of these update posts at a reasonable hour!

    Anyway... W is the letter of the weekend as weight and wheels have been added to both the GNR wagons!

    20240121_151151.jpg
    20240121_151914.jpg20240121_203128.jpg20240121_203019.jpg

    Bufferbeam detailing will follow next, but there will be a slight delay (Royal Mail dependent) on lettering. My sheet of GN transfers from Powsides is suitable for the Dia.1 but the Dia.24 requires something bigger for the main G and N, at least by the reference photo I posted above. I've ordered some 10mm high Franklin Heavy lettering in white from Fox Transfers and I will try make these work (a little bit of GNR brown here and there to tweak the font of the G and no one will ever know!).

    - James
     
    GNR open wagons
  • Liver & Fry

    Western Thunderer
    The first stages of lettering have been done (I.e the G & N on both wagons):

    20240125_213148.jpg20240125_220234.jpg

    The Fox Transfers Franklin font used on the Dia.24 is definitely "fatter" than the actual GN font provided by Powsides for the Dia.1, with the G having to be carefully cut to shape, but generally I feel it captures the correct look of the font used by the GNR. (See below an example of the true Franklin Gothic G):

    Screenshot_20240126_121539_Chrome.jpg

    Certainly when viewed at a "viewing distance", as if over in a siding on a layout, or when positioned alone, it looks passable to me, and with no alternative for taller GN lettering in 4mm, this is what I have to work with.

    20240125_213349.jpg

    The next stage is to try an add additional details such as tonnage and running number. Again, the Powsides transfers don't seem wholly suitable for my specific needs in what examples are provided or the sizing (I must stress, I regularly use Powsides for my GE modelling and they have been very good for those projects). I'm going to experiment with a sheet of 1mm and 2mm high Franklin letters and numbers and see if they will work for me. I'll obviously share my findings with you all when I do!

    - James
     
    GNR open wagons
  • Liver & Fry

    Western Thunderer
    "Fiddly" is the word I'd use to describe yesterday's endeavours!

    Using 1mm high transfers, I slowly applied additional detailing to one side of the Dia.24. This initially consisted of the running number and tonnage details on the lower edge of the bodyside. My attention then turned to the works plate on the solebar. Powsides provide pre-made transfers for this, including one with the running number left blank. However, they are too deep for the solebars of these wagons and so I had to make my own using the 1mm transfers. I edged these on each side with a white line to recreate the edge of the plate and I'm happy that my efforts match the look of what should be there, to me at least!

    20240127_003625.jpg

    Due to the weight of the font, the tonnage details are a little squeezed in, but I was trying to match the prototype by having this line of text between the two rivets along the bottom of the body, which they are, just!

    So that's one side done, right? Right....?

    Well, not quite... If we look again at the prototype, what do you notice about the wagon itself? Something I confess I overlooked until now:

    20240114_164649.jpg
    20240127_004058.jpg

    I guess that adds weight to the theory that a project is never truly finished, especially when you think you're done, or that the finish line is in sight! Still, it's an easy fix and it'll do wonders for the finished wagon!

    Now to do the other side... And then the Dia.1!

    - James
     
    Great Central D.8 wagon
  • Liver & Fry

    Western Thunderer
    With the GN wagons temporarily on hold and me finding myself with a little bit of free time in the coming week or so, I've started another wagon build. This time its a GCR D.8 5 plank open wagon, again by Mousa Models (I'm nearly at the end of my Mousa kit pile...)

    20240227_203552.jpg20240227_203716.jpg

    This should be a quick and easy build so watch this space in the coming days!

    - James
     
    Great Central D.8 wagon
  • Liver & Fry

    Western Thunderer
    50 (-48) Shades of Grey!

    Figured I'd do a base coat of grey on my GCR D.8 wagon this afternoon. Now, I'll confess, I am not a GCR man; this wagon was an accidental freebie, like the GNR D.24. My reference points are Tatlow's work on LNER wagons and Nigel Digby's pre-grouping livery books. GCR Grey is described as a mid grey and I've read one online reference comparing it to later LMS grey. That said, as a non-GCR man I did the cliché thing and purchased a tin from Phoenix (P606 "G.C.R Wagon Grey"). This is what I got:

    20240228_185826.jpg

    Now bear in mind this is a first coat and it is still drying, but to me, that shade is more akin to a product of Stratford Works... I don't know the intricacies of the GCR but that doesn't look right to me?

    So, I'm appealing to those who may have better knowledge, to support the literature I already have available; would LMS grey (I already have a tin...) be more appropriate for the mid-grey shade used by the GCR than this?

    - James
     
    Great Central D.8 wagon
  • Liver & Fry

    Western Thunderer
    After a few trials and tribulations, I think I've cracked it.

    Initial searches gave me two options:

    "Something akin to LMS grey" or a few cases stating Humbrol 27 as a starting point (given a white wash after to lighten the colour).

    If I were to go strictly by Nigel Digby's depiction, GCR grey is slightly darker than Midland grey, and I wanted to keep to this as I want variation within the wagon fleet (rather than painting everything LMS grey, as my English Oilfields wagon was also painted in this colour!).

    With that in mind I purchased a tin of Humbrol 27 and got this result:

    20240229_212353.jpg

    Better, but still a touch too dark, almost reminding me of an LNWR grey (which proves why this is used as a starting point and lightened thereafter).

    I then experimented mixing in a lighter grey, eventually settling on a half-and-half mix. This is what I've ended up with:

    20240301_221415.jpg

    Much better! And yet, still meeting the criteria of being slightly darker than Midland/LMS grey (I used the EOL wagon to verify that!).

    Happy with my achievements, I've painted the underframe black and will continue building the wagon tomorrow by fitting the floor and building up the wood colour inside.

    - James
     
    Great Central D.8 wagon
  • Liver & Fry

    Western Thunderer
    Next steps complete! The floor was fitted after taking a few mil off down one side with the dremel and I've spent my post-night shift downtime today painting the wood interior. Below are a natural light "in progress" photo and a finished photo under flash (because the room lighting just doesn't show it in the same, er, light...)

    20240303_155731.jpg20240303_182212.jpg

    Later on I'll flip the wagon over and add weight to the underside, before leaving it overnight so that the glue can set.

    - James
     
    Top