Nick Dunhill
Western Thunderer
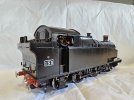
Although I post most of my more intricate kit or scratchbuilds, I do a whole series of out-of-the-box, budget builds that I rarely post other than, maybe, a pic of a finished loco. This is the kind of kit-build that, as a pro-builder, is my bread and butter.
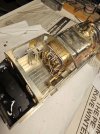
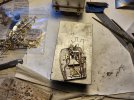
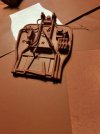
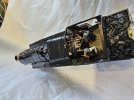
The brief was to build it as the designer intended with some nice upgrades, such as cab interior and some nice pipework. The inside motion is not visible on this loco so we thought it unneccesary to build it. Here's a pic of the finished chassis, there's more here; nick dunhill It took 23 hours to build.
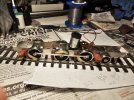
Here are some notes I made during construction.
The etches in the kit for the rods made some really nice components. I upgraded them with some oilbox plugs and a nice clevis pin (scratchbuilt.)
The chassis etches were also fine, and made a good chassis. I think I would have preferred the FS stays to be slightly wider as the finished chassis is only 25.7 mm wide. This leaves about 2 mm or so between the wheel backs and the outside of the frames. I would have shot for 27.5 mm, or maybe even a bit more, it makes the chassis look more prototypical, and allows fitting of inside motion (if required) without major modification. The rear of the chassis is joggled in, as on the real loco, but again the rear of the chassis is much narrower than needed. This is just a personal preference though, but this model isn’t going to have to go round dinner-plate radius curves, and I can see that the designer wanted to produce etches to suit all needs.
As a rule I always locate the axleboxes using jury axles and the coupling rods as a jig. Hence making the coupling rods first. In this way you transfer the rod centres to the axleboxes and the wheels and rods don’t bind. Lots of kits rely on pre etched holes or tabs/slots setting your centres, but it is always good practise to use jury axles or a chassis jig. The kit has tab and slot location for horn guide etches, I filed the tabs off and let the horn guides find their own location. The horn guide etches were modified slightly to hold the axleboxes more snuggly.
The radial box 3D prints didn’t fit together and needed a fair bit of fettling. The hole in the centre bit for the axle was too small for both axle and bearings. The outer structure was slightly too wide for the frame stays. I did get a nice working radial truck with a bit of work though. Does anybody any idea what would be a good lubricant for the radial truck? Resin on resin contact may cause excessive wear, we will see in the fullness of time. I would really have liked to have fabricated a better radial box from brass, but budget constraints prevent it.
The 3D prints for wheel balance weights that fit between the spokes are a good idea. I've seen some that Mick Davies printed and featured on one of his builds, and they fitted like Lego. These did not and I decided that it would be quicker and neater to make brass overlays than fettle the 3D prints to death.
Most of the brake components were 3D printed, they were a bit chunky and layery. However I did fit them after some modification, as the outer faces of the hangers and brake shoes stuck out beyond the wheel rim. I also, therefore, had to alter the cross beams to match. The parts were painted in hi-build primer to disguise the poor finish, and sanded later to a smooth finish. I would have preferred brass etchings for the brake system, but the 3D prints (mods notwithstanding) were quite quick to install, and will look fine when painted.
The axle springs and hangers supplied were very poor 3D prints. They are hidden behind the wheels so I fitted them anyway and I saved a bit on the budget for something else. The sand boxes were also a bit iffy, but an application of hi-build primer rescued that and they fitted well to the chassis and were quick to install.
The body etches were all well designed and fitted together very well. There is an awful lot of it, as the basic design is to make a skeleton body onto which all the overlays are attached. I was pleased that I didn't have to bop out hundreds and hundreds of rivets, with all the attendant distortion to panels. But at the same time I was a bit worried that, if one of the overlay etches was a bit out, I'd be snookered. I needn't have worried, it all went together very well, with only a couple of minor issues with the tank extension, which were obvious and easy to remedy.
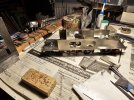
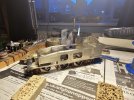
The only panel that doesn't quite fit was the firebox crown wrapper. Its about 0.8 mm too short at either side of the rear. The instructions recognise this and suggest that the builder reduces the height of the front of the firebox to compensate. I decided to make a new part (I'd already drawn round the etch, as a precaution, before I started folding!) and extended the part forward so I didn't have to use the 3D printed firebox throat plate. The boiler went together flawlessly.
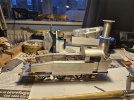
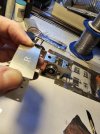
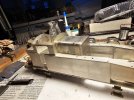
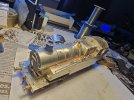
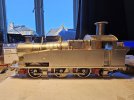
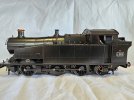
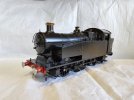
Here's the loco nearly finished.
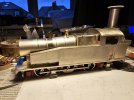
The kit also includes a complete 3D printed backhead and fittings (pic on my Flickr page above) which some might like. It isn't however fit for purpose for a commercial build in my view. I did luck-out though and came across some Tony Reynalds castings for a backhead and fittings as replacements, which will give the loco a nice lift.
My overall impression of the kit is very favourable. The etches are very good (although you have to be super-accurate to make it all fit together nicely) let down by some, frankly pants, 3D prints. I have spoken to Mike at 88D and he acknowledges that they could be better. I suspect that the .stl files are fine but the printing would benefit from more care. It's a great kit for a pro-builder as there are no hidden horrors and the client will get a super model on budget.
It was a complete contrast to my SECR P Class or NBR Atlantic builds.
Both of these builds were from kits that were not fit for purpose and the clients picked up a significantly bigger invoice than would have been expected.
I really enjoyed building it, and I'm not a GWR fan-boy (but much thanks to big GWR fan-boys Malcolm Mitchell and Steve Fay for their help), and it makes a chunky brute of a loco.
Talking of which, Broad Gauge GWR anyone?
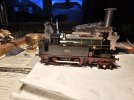
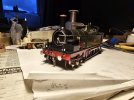
The brief was to build it as the designer intended with some nice upgrades, such as cab interior and some nice pipework. The inside motion is not visible on this loco so we thought it unneccesary to build it. Here's a pic of the finished chassis, there's more here; nick dunhill It took 23 hours to build.

Here are some notes I made during construction.
The etches in the kit for the rods made some really nice components. I upgraded them with some oilbox plugs and a nice clevis pin (scratchbuilt.)
The chassis etches were also fine, and made a good chassis. I think I would have preferred the FS stays to be slightly wider as the finished chassis is only 25.7 mm wide. This leaves about 2 mm or so between the wheel backs and the outside of the frames. I would have shot for 27.5 mm, or maybe even a bit more, it makes the chassis look more prototypical, and allows fitting of inside motion (if required) without major modification. The rear of the chassis is joggled in, as on the real loco, but again the rear of the chassis is much narrower than needed. This is just a personal preference though, but this model isn’t going to have to go round dinner-plate radius curves, and I can see that the designer wanted to produce etches to suit all needs.
As a rule I always locate the axleboxes using jury axles and the coupling rods as a jig. Hence making the coupling rods first. In this way you transfer the rod centres to the axleboxes and the wheels and rods don’t bind. Lots of kits rely on pre etched holes or tabs/slots setting your centres, but it is always good practise to use jury axles or a chassis jig. The kit has tab and slot location for horn guide etches, I filed the tabs off and let the horn guides find their own location. The horn guide etches were modified slightly to hold the axleboxes more snuggly.
The radial box 3D prints didn’t fit together and needed a fair bit of fettling. The hole in the centre bit for the axle was too small for both axle and bearings. The outer structure was slightly too wide for the frame stays. I did get a nice working radial truck with a bit of work though. Does anybody any idea what would be a good lubricant for the radial truck? Resin on resin contact may cause excessive wear, we will see in the fullness of time. I would really have liked to have fabricated a better radial box from brass, but budget constraints prevent it.
The 3D prints for wheel balance weights that fit between the spokes are a good idea. I've seen some that Mick Davies printed and featured on one of his builds, and they fitted like Lego. These did not and I decided that it would be quicker and neater to make brass overlays than fettle the 3D prints to death.
Most of the brake components were 3D printed, they were a bit chunky and layery. However I did fit them after some modification, as the outer faces of the hangers and brake shoes stuck out beyond the wheel rim. I also, therefore, had to alter the cross beams to match. The parts were painted in hi-build primer to disguise the poor finish, and sanded later to a smooth finish. I would have preferred brass etchings for the brake system, but the 3D prints (mods notwithstanding) were quite quick to install, and will look fine when painted.
The axle springs and hangers supplied were very poor 3D prints. They are hidden behind the wheels so I fitted them anyway and I saved a bit on the budget for something else. The sand boxes were also a bit iffy, but an application of hi-build primer rescued that and they fitted well to the chassis and were quick to install.
The body etches were all well designed and fitted together very well. There is an awful lot of it, as the basic design is to make a skeleton body onto which all the overlays are attached. I was pleased that I didn't have to bop out hundreds and hundreds of rivets, with all the attendant distortion to panels. But at the same time I was a bit worried that, if one of the overlay etches was a bit out, I'd be snookered. I needn't have worried, it all went together very well, with only a couple of minor issues with the tank extension, which were obvious and easy to remedy.


The only panel that doesn't quite fit was the firebox crown wrapper. Its about 0.8 mm too short at either side of the rear. The instructions recognise this and suggest that the builder reduces the height of the front of the firebox to compensate. I decided to make a new part (I'd already drawn round the etch, as a precaution, before I started folding!) and extended the part forward so I didn't have to use the 3D printed firebox throat plate. The boiler went together flawlessly.


Here's the loco nearly finished.

The kit also includes a complete 3D printed backhead and fittings (pic on my Flickr page above) which some might like. It isn't however fit for purpose for a commercial build in my view. I did luck-out though and came across some Tony Reynalds castings for a backhead and fittings as replacements, which will give the loco a nice lift.
My overall impression of the kit is very favourable. The etches are very good (although you have to be super-accurate to make it all fit together nicely) let down by some, frankly pants, 3D prints. I have spoken to Mike at 88D and he acknowledges that they could be better. I suspect that the .stl files are fine but the printing would benefit from more care. It's a great kit for a pro-builder as there are no hidden horrors and the client will get a super model on budget.
It was a complete contrast to my SECR P Class or NBR Atlantic builds.
Nick Dunhill's workbench - Scratchbuilding a Reid NBR Atlantic from an ACE Kit.
Hi All New project! It's a ACE Kit for the Reid C10 NBR Atlantic. The kit was part built by Graham Varley before his untimely death earlier this year, and we decided to finish it as a tribute to him. Graham had (very nicely, as was his way) built the footplate, cab and the main part of the...
www.westernthunder.co.uk
Nick Dunhill’s workshop building a SECR P class from the Alpha Graphics Kit.
On inspecting the etches I noticed that the footplate was continuous under the boiler to the rear of the smoke box and that the chassis was a one piece fold up jobby. The coupling rods were etched in brass(!) and not jointed, which is essential for a model with suspension. I roughed out some...
www.westernthunder.co.uk
I really enjoyed building it, and I'm not a GWR fan-boy (but much thanks to big GWR fan-boys Malcolm Mitchell and Steve Fay for their help), and it makes a chunky brute of a loco.
Talking of which, Broad Gauge GWR anyone?


