7mm Richards P48 US Thread

Big Train James

Western Thunderer
I recall a plan for a 3-rail O gauge layout which had 4.5% (I think, will check when u get home) grades in and out of staging underneath the main level. Of course the 3-rail locos have traction tires, but I remember the owner reporting no issues bringing a train up out of staging with two Atlas locos on the point.

Agree with what Mick says about non-ruling grades and industrial/shortline trackage. Things can be fairly steep for short bursts.

I would have to dig around for a track profile chart for the DRGW route west from Denver. Around the Big Ten curves and the climb to Tunnel 1 just at the base of the foothills (Rocky through Blue Mountain to Plainview) have what visually appear to be fairly steep but short grades. I'll see if I can find info or photos.

The bottom line is, i think you're fine at your grade or even incrementally steeper, at least as far as prototype plausibility is concerned.

Jim
 

mickoo

Western Thunderer
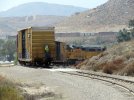
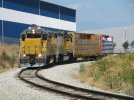
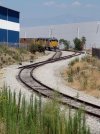
I've shown these before, granted it's a branch but it's far from flat.

UP 1065_Crestmore Branch 2.jpg

UP 1065_Crestmore Branch.jpg

UP 1065a.jpg

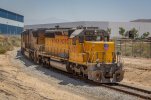
Just in case anyone says you can't run heavy muscle on industrial branches, here's a SD70 and SD40-2 pushing a load up the same hill, best part of 7300HP sat there and I doubt the consist is more than a dozen vehicles.

UP 1838c.jpg
 

richard carr

Western Thunderer
Unless the ramp is to be relocated elsewhere, I'm having a difficult time understanding why you need to clear trackage below in this particular position. There doesn't appear to be anywhere for the lower tracks to go, on either side of the bridge?

The gap does seem to have moved down a bay, as in later photos it is no longer under the outlet box.

Jim

I agree Jim, from her you probably are wondering why do I need to cross a lower track, but all will be revealed in due course as we build the rest of the boards. The other advantage is that it will give us a much higher clearance over the S7 layout.

It's also more fun running trains up a big hill !

Richard
 

mickoo

Western Thunderer
Thanks Mick

Those look great, where is it ?

Richard
It's the Crestmore Branch in Riverside LA, used to be part of the SP system, grades exceed 3% in places, lots of local industries but many not served by rail anymore.

Google UP Crestmore branch, several Youtube videos, steep grades, short consists, heavy muscle power makes it a fan base hot spot.

It's just south west of West Colton but I never found time to get there in 2019, I think there's a daily train but not sure of times though.
 

richard carr

Western Thunderer
Work on the layout has been progressing.

20240404_125537.jpg

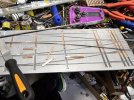
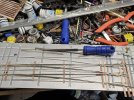
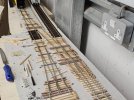
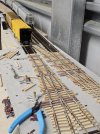
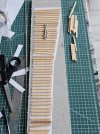
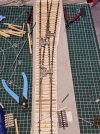
I need some more switches, I have found that the quickest way to get these built is to use these aluminium templates available from Fast Tracks in Canada, above is the 1 in 6 version, in a couple of hours you can have the rails all in place, then you just have to spike it tothe wooden sleepers, that though takes ages. The purple object in the photo is the rail bender, you do need to pre bend the rail for a 1 in 6.

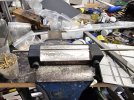
You also need to file the foot off the rail where the switch blade fits, they sell a handy jig for this too.

20240404_125534.jpg

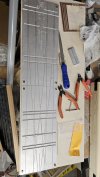
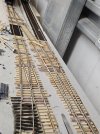
This is the template for a 1 in 10, it's huge, I needed one of these for the mainline.

1 in 10 template.jpg

20240404_135547.jpg

Here's the finished article. The template isn't designed to use the cast frogs and switch blades so you do need track gauges to position these correctly.

IMG-20240405-WA0008.jpeg

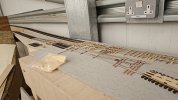
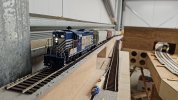
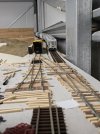
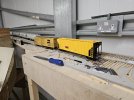
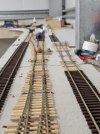
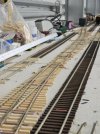
So all 3 are now in position and I'm slowly but surely spiking them down and adding the point motors, but you can now run up the hill.

IMG-20240405-WA0010.jpeg

It has 8 freight cars in tow.
 

richard carr

Western Thunderer
Either - wired up incorrectly, become inadvertently cross wired, broken wire/joint, not wired up or have blown/failed.
Thanks Dave

One thing I noticed yesterday was that one was quite hot to the touch, it is supposed to be a 12 volt LED (ie it has a prefitted resistor) but I'm beginning to wonder if these really are. The power supplies are putting out 12 volts.

Richard
 

richard carr

Western Thunderer
The past week has all been about finishing the switches at both ends of the layout and getting them added to the control panel.

20240410_192002.jpg

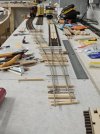
Here's the far end well on the way to completion, although there is still lots and lots and lots of spiking to do here, and it is one of the most boring jobs going.


20240410_192016.jpg

20240412_190139.jpg

Most of the spiking has now been done, although it's actually hard to tell from the photo.

These are the ones at the other end.

20240412_190044.jpg

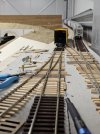
These are now installed and you can run over them, although I still have to power up the frogs.

I've used 5 of the Cobalt motors now and I think they are a bit easier to install than the tortoise, they are also an awful lot cheaper.

Then disaster struck, my spiking pliers broke and I don't have a spare. Fortunately Oz 7mm does.

Richard
 

richard carr

Western Thunderer
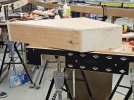
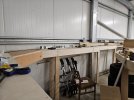
Some more progress was made over the weekend, JB came over SUnday and made another board and then on Monday made the one in the.

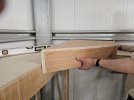
20240422_214009.jpg middle, it fits !

Here it is under construction

20240422_213807.jpg


20240422_215539.jpg

So now we can go right around the corner, this probably goin to be the brewery site. The plan is to have a 1 metre radius curve bring the track around the corner.

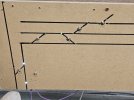
Meanwhile I had been finishing off the track on the other side, getting everything spiked in place fitting all the switch motors and getting them wired into the panel. With most of the cobalt motors I was able to position in the motor so that it worked fine with the supplied steel wire, but on one of them it just didn't want to play ball and some thicker wire was required.

20240422_213847.jpg


20240422_213925.jpg

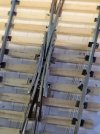
Jay from RIght O Way gave me a 1 in 7 self guarding frog to try a while back, so I thought it was time to use it.
It did mean using a different approach to building a switch. This started with a printed template from FastTracks
I then glued on the ties and then spiked in the rai and baseplates.

20240423_121825.jpg


20240423_202335.jpg

20240423_202342.jpg

I'm not sure if this a quicker way to build a switch, at first it definitely isn't but pretty much all the spiking is complete once you get the rail in place, so I'm not sure yet.
 

Dog Star

Western Thunderer
Very nice - at least we ought to understand what you are doing given Jordan's lesson in guarding frogs from a couple of years back.G
rgds, g
 

Jordan

Mid-Western Thunderer
Very nice - at least we ought to understand what you are doing given Jordan's lesson in guarding frogs from a couple of years back.G
rgds, g
At least Richard has the advantage of the cast Right-O-Way frog in P48 - not available in "OW5" (standard 32mm gauge) unfortunately, probably not wanted by anyone anyway, apart from Muggins, hence my Comedy efforts. :oops:
It's still hard to get your head round the 'look' of a self-guarding frog - it just looks totally back to front compared to normal ones!! :confused:

The plan is to have a 1 metre radius curve bring the track around the corner.
1 metre radius? 3ft3inch? Well it's do-able as I can vouch for, and with careful track-laying should be good in P48 too, but the 3D printed coupler boxes might not have enough swing for that curve.
 

richard carr

Western Thunderer
Jordan

OZ7mm has cut some track templates for me so I'm going to try it with a couple of pieces of flex track and see if it works, once I'm back from holidays.
There is room for a 5 foot radius curve which I already have and that works with the protocraft couplers printed coupler boxes. But I really want it to look tight, as it does ont he real thing, and ideally I would hand lay this in code 100 rail to make it look like an old industrial line.

Richard
 

mickoo

Western Thunderer
Some more progress was made over the weekend, JB came over SUnday and made another board and then on Monday made the one in the.

View attachment 213991 middle, it fits !

Here it is under construction

View attachment 213992


View attachment 213993

So now we can go right around the corner, this probably goin to be the brewery site. The plan is to have a 1 metre radius curve bring the track around the corner.

Meanwhile I had been finishing off the track on the other side, getting everything spiked in place fitting all the switch motors and getting them wired into the panel. With most of the cobalt motors I was able to position in the motor so that it worked fine with the supplied steel wire, but on one of them it just didn't want to play ball and some thicker wire was required.

View attachment 213994


View attachment 213995

Jay from RIght O Way gave me a 1 in 7 self guarding frog to try a while back, so I thought it was time to use it.
It did mean using a different approach to building a switch. This started with a printed template from FastTracks
I then glued on the ties and then spiked in the rai and baseplates.

View attachment 213996


View attachment 213997

View attachment 213998

I'm not sure if this a quicker way to build a switch, at first it definitely isn't but pretty much all the spiking is complete once you get the rail in place, so I'm not sure yet.
Coming along nicely, hopefully cleared enough off the schedule to get back out to mine over the weekend and turn more perfectly good wood into sawdust :D

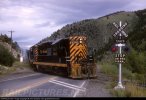
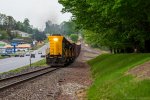
Saw this the other day and thought it a perfect set up for your gradient.
53676808434_645c1bedb7_h.jpg
T31 at Enka by Joseph Randall, on Flickr


As noted before, US Railroads are not shy of sticking in some steep grades where needed.
 
Top