Small features - what is good scaling practice?

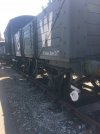
This is my first post, so I hope I've chosen the right sub-forum. This question is about general modelling practice for small features such as the chamfers on coal wagon on coal wagon sheeting planks.

Prototype chamfers that I've measured come out at around 0.25 to 0.5 inches high and 'not very' deep. The works drawings that I've seen (eg those at Railway Clearing House wagons) do not specify a size - I guess they came out as whatever the spokeshave took off that day.
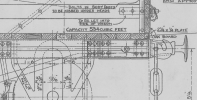
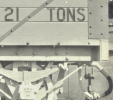
1703346372073.png 1703346520693.png

On RTR models, and in fact even on very high quality scratch models, these chamfers must, I think, be wildly overscale, because people expect to see them even though really they ought to be invisible. For instance, in Gauge 1, a 10mm prototype chamfer would be only 0.32mm wide and deep, and thus barely visible on a model from any distance - that's less than one bead in a 3D printed model using a 0.4mm nozzle.

I make CAD models for Gauge 1 stock (as an aside I'm the owner of the G1 3D Circle forum at home groups.io Group). My CAD models are prototype size, and then I provide a global scale factor that brings things down to, say G1, or 2mm. However, I also provide 'bloat' factors for small features that multiply their size back up again because folk expect to be able to see them. In G1 I use a factors of 2.5-3 for the chamfers which looks fine, but is not accurate.

What do other people do, especially in the smaller scales? If you zoomed your model up to prototype size, how big would the chamfers be? And if we're really serious about fine-scale modelling, where do we draw the line between accuracy and 'artistic license'?

Adrian

* Drawing image from above website
** Photograph from Wikimedia commons at File:BNR coal wagon 17209.jpg - Wikimedia Commons - actually an Indian wagon not a UK RCH wagon
 

Osgood

Western Thunderer
What an intriguing question.

I often look at road surfaces on layouts and think 'I couldn't even walk across that tarmac road without breaking an ankle, its so covered in 3"cobbles' - yet another layout may offer a totally bland smooth grey surface in comparison.
When I finally get round to attempting one myself, no doubt I'll realise how difficult it is to get just right :)) .

Is this perhaps where the 'artistic license' comes into play - not in the sense you suggest, but in a slightly different way where a fine surface texture or small physical feature (e.g. chamfer), instead of being made physically visible by exaggeration, is created as a visual illusion by clever paint effects and techniques?
 

JimG

Western Thunderer
Adrian,

I've modelled chamfers on wooden prototype stock when using my CNC mill to cut the stryene body parts. My most recent body was a 1:32 scale Caledonian brake van and I cut the chamfers along the lower side of this body using a ball end cutter. The advantage of using the ball end cutter is that you get a pretty good representation of the ends of the chamfers.


The mention of cutting chamfers is about two-thirds down the message.

As for sizes, I just took a guess at what I thought would show, and that might be a tad on the large side. I have done the same side in S scale just by halving sizes and using a 2mm ball end cutter and the proportional reduction seems to work just as well on the smaller scale.

Jim.
 
Last edited:

Max M

Western Thunderer
Just an opinion but rather than add realism a champfer or rounded edges provide the catchlight which gives what would otherwise look slab sided a better impression of having some depth and weight.

After I've cleaned up the edges of etched pieces I have a well worn smoothing stick that is rubbed over the etching. This takes off all the sharp edges and, to my eyes at least, vastly improves the look and feel of the part.
 

simond

Western Thunderer
Similar question arises with details such as spring leaves - in two ways, I think.

* What is the minimum resolution that the tool can (reliably) produce? Technology issue.
* What is the minimum size of a visible feature? This is more to do with the model in its environment.

A museum model might be dimensionally “perfect” but lack something, visual appeal, or a similar subjective element, whereas an attractive model might, taking the example of springs, be a few leaves short, but somehow look “more believable”.

Or is this nonsense?
 

Tim Watson

Western Thunderer
I am a firm believer in ‘less is more’ especially in 2mm scale. Scenic textures are particularly easily made over scale, especially roads & pavements. I also take the view that anything that gets in the way of neat painting and lining is best omitted. Many commercial models these days are just too ‘hairy’.

Tim
 

Eastsidepilot

Western Thunderer
When these boards are manufactured I think you'll find that the bevel may well of been made on an overhand planer with the fence set at 45 degrees or a spindle moulder, certainly not with a spoke shave !, also note that there is only a bevel on the upper edge, the bottom edge is left square. This is done to induce water to drip off the board and run off the wagon side. If you had a bevel on both edges you'd risk moisture getting sucked into the joint and risking advancing rot. It has a similar weathering effect as feather edge boarding on a building.

So if you are scratch building a model wagon it may be easy to re-produce in 7mm scale upwards but less so in the smaller scales.

IMG_0104.JPG

Col.
 
Last edited:

Overseer

Western Thunderer
I think you need to start at the finish. As @Max M said above it is edges that are important to catch light to define subtle details. If you apply a thick paint film, as rtr manufacturers nearly always do, then you lose the crisp arrises and fine indents get filled - so details are exaggerated to compensate. Aim for scale thickness paint and you don’t need to enlarge plank grooves (ie joints between planks with one or two chamfers).

I ground a single sided V blade to form horizontal plank lines in styrene but don’t always use it as it is a bit harder to use than an Olfa cutter blade.
 

Max M

Western Thunderer
If you apply a thick paint film, as rtr manufacturers nearly always do, then you lose the crisp arrises and fine indents get filled - so details are exaggerated to compensate. Aim for scale thickness paint and you don’t need to enlarge plank grooves (ie joints between planks with one or two chamfers).
Not sure how feasible 'scale' thickness paint is but agree that it need only be sufficiently thick to cover the substrate.
Not only does this reduce fine detail being obscured but minimises the likelihood of it chipping.
 

Fitzroy

Active Member
We are not computers! I think there are a few aspects in my mind that affect how we process the appearance of models. One is the fact that we have binocular vision and when you look at a loco or whatever, flat surfaces look curved, or at least different to a photo or the real thing at a distance because you create a composite image from two different viewpoints an appreciable scale distance away from each other. Another is the birds eye view affecting how big things appear depending whether they are near the top or the bottom. Another is to children for example, the realness of a surface texture doesn't necessarily scale. Hence large ballast or splintery wooden sleepers still often look ok because the material is the real thing. So having visual cues of features that are too big for scale but would not be seen otherwise is on this childlike level, visually pleasing. At least that's what I think.
 
Top