You are using an out of date browser. It may not display this or other websites correctly.
You should upgrade or use an alternative browser.
You should upgrade or use an alternative browser.
USATC S100
- Thread starter spikey faz
- Start date
spikey faz
Western Thunderer
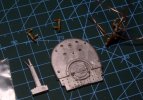
Once again Dave you have come to my rescue!This is what should have been in the kit...
View attachment 211327
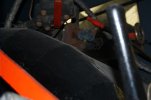
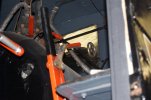
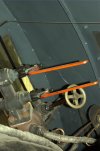
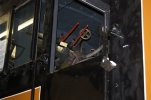
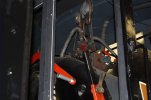
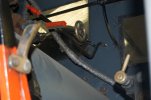
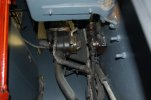
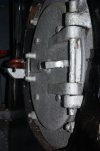
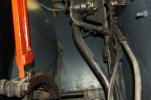
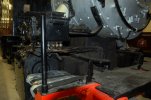
And I don't know if these will be of any use. I took them by poking the camera into the cab of the one on the Worth Valley when it was at Oxenhope years ago.
View attachment 211318View attachment 211319View attachment 211320View attachment 211321View attachment 211322View attachment 211323View attachment 211324View attachment 211325View attachment 211326
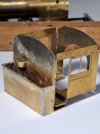
The kit I have certainly doesn't contain the backhead casting, which is a tad annoying. I know I should really get in touch with the kit supplier/manufacturer to see if they can send me said part, but I think instead I'll make my own.
Cheers
Mike
Yorkshire Dave
Western Thunderer
I have come across this photo of a Porter 1942 built S100 at the Oklahoma Railway Museum
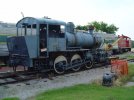
REE Modèles has a gallery of the 030TU (SNCF S100) which has glimpses of the cab interior Les 030 TU - REE Modèles
Better still- found this.... Une 030TU arrive au PVC ! - Pacific Vapeur Club
It was a case of thinking of where the S100 ended up. Started with France and didn't get as far as Austria or Greece .
.

REE Modèles has a gallery of the 030TU (SNCF S100) which has glimpses of the cab interior Les 030 TU - REE Modèles
Better still- found this.... Une 030TU arrive au PVC ! - Pacific Vapeur Club
It was a case of thinking of where the S100 ended up. Started with France and didn't get as far as Austria or Greece
 .
.spikey faz
Western Thunderer
They're really helpful pictures.  Methinks you must have a supercharged search engine to find them.
Mike
 Methinks you must have a supercharged search engine to find them.
Mike
Yorkshire Dave
Western Thunderer
Once the chimney has been installed the crane will build it's nest.
spikey faz
Western Thunderer
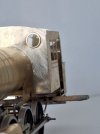
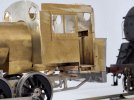
Whilst rummaging around in the bags of bits that accompany the kit I discovered the steam dome had taken a bit of a hammering. Either that or mice have developed a taste for whitemetal!
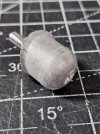
Either way I thought I'd better have a go at fixing it with some low melt solder.
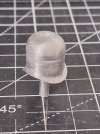
Still looks bit crude in closeup but trust me it's a lot better than it was.
Mike

Either way I thought I'd better have a go at fixing it with some low melt solder.

Still looks bit crude in closeup but trust me it's a lot better than it was.
Mike
spikey faz
Western Thunderer
Having repaired the rim of the dome I started taking a few measurements and came to the conclusion the dome is too tall! 
It's not a lot, but the thickness of a saw cut to seperate the two halves plus 1mm off the top half of the dome seems to have done the trick.
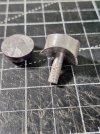
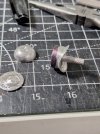
Even without permanently reattaching the two halves it already looks (to my eyes) a lot better.
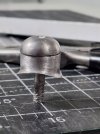
It certainly measures a lot better.
Mike

It's not a lot, but the thickness of a saw cut to seperate the two halves plus 1mm off the top half of the dome seems to have done the trick.


Even without permanently reattaching the two halves it already looks (to my eyes) a lot better.

It certainly measures a lot better.
Mike
spikey faz
Western Thunderer
simond
Western Thunderer
Yorkshire Dave
Western Thunderer
spikey faz
Western Thunderer
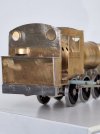
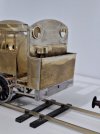
In between lunch and afternoon gardening I was able to fit in an hour or so of trainset time!  I've been adding a bit more detail to the smokebox support,as well as soldering the slidebar assemblies to the cylinder housing.
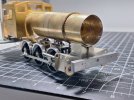
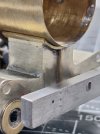
Of course there is always a step backwards! The rivets/bolts at the side of the smokebox were out of sync with those on the front of the smokebox. Whether this was down to my incompetence or not, I don't know, but they've come off now. Once the smokebox front is permanently installed I'll reinstate them in the correct position.
I'm pleased to report that the chassis still runs OK with the slidebar assemblies in place. I admit to surreptitiously widening the cylinder housing by a mm or two to get the necessary clearance!

Mike
 I've been adding a bit more detail to the smokebox support,as well as soldering the slidebar assemblies to the cylinder housing.

Of course there is always a step backwards! The rivets/bolts at the side of the smokebox were out of sync with those on the front of the smokebox. Whether this was down to my incompetence or not, I don't know, but they've come off now. Once the smokebox front is permanently installed I'll reinstate them in the correct position.
I'm pleased to report that the chassis still runs OK with the slidebar assemblies in place. I admit to surreptitiously widening the cylinder housing by a mm or two to get the necessary clearance!


Mike
Dave Holt
Western Thunderer
I see from Yorkshire Dave's photo that there is a hinged cover plate on top of the front buffer beam, which rests on top of the buffers. There is also an associated pair of lugs and chain attached locking pin on the smokebox front, which I assume could be used to hold the plate in a vertical position to access below it?
I must say, the cylinder/smokebox saddle area looks far neater now than it did in earlier shots. Your work in that area has certainly made a big difference.
Dave.
I must say, the cylinder/smokebox saddle area looks far neater now than it did in earlier shots. Your work in that area has certainly made a big difference.
Dave.
Yorkshire Dave
Western Thunderer
I see from Yorkshire Dave's photo that there is a hinged cover plate on top of the front buffer beam, which rests on top of the buffers. There is also an associated pair of lugs and chain attached locking pin on the smokebox front, which I assume could be used to hold the plate in a vertical position to access below it?
The hinged cover plate over the buffer beam and buffers to ease access to the smokebox were fitted from 1951, after a serious accident.
spikey faz
Western Thunderer
Cheers Dave.I must say, the cylinder/smokebox saddle area looks far neater now than it did in earlier shots. Your work in that area has certainly made a big difference.
Dave.
It's been a lot of work to get to even this stage, so your positive comments really help.

I'm still undecided as to whether to backdate the kit to represent the loco in its original state with round windows. @Yorkshire Dave has provided me with lots of useful info. I've just got to make a decision soon.
Mike
Yorkshire Dave
Western Thunderer
All depends how far you want to backdate it.
As built......
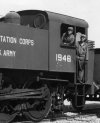
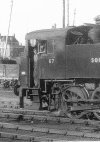
.....or after the first set of SR modifications (cab side windows, backed/plated coal rails, and revised steps)....
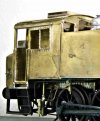
.....or the second set of SR modifications (revised cab windows, enlarged bunker, additional lower gutter and roof vent) but retaining US injector fittings (as mine)....
Or leave it as the kit after the third set of modifications 1949-1951 (Ashford injectors, front buffer beam drop plate).
As built......


.....or after the first set of SR modifications (cab side windows, backed/plated coal rails, and revised steps)....


.....or the second set of SR modifications (revised cab windows, enlarged bunker, additional lower gutter and roof vent) but retaining US injector fittings (as mine)....


Or leave it as the kit after the third set of modifications 1949-1951 (Ashford injectors, front buffer beam drop plate).

spikey faz
Western Thunderer
Decisions, decisions!All depends how far you want to backdate it.
As built......
View attachment 212140
.....or after the first set of SR modifications (cab side windows, backed/plated coal rails, and revised steps)....
View attachment 212141
.....or the second set of SR modifications (revised cab windows, enlarged bunker, additional lower gutter and roof vent) but retaining US injector fittings (as mine)....
View attachment 212142
Or leave it as the kit after the third set of modifications 1949-1951 (Ashford injectors, front buffer beam drop plate).
There's a couple of pictures of SR No.64 in 'The Story of the Southern USA Tanks' taken in 1947 which might be what I'll end up modelling: original bunker; round spectacle windows; no enlarged roof ventilator, but with the later cabside windows. Bulleid Sunshine lettering is a bonus.
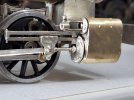
In the meantime valve-guides and cylinder covers have been added.
Mike
SouthernFan Ian
Western Thunderer
This selection of mediocre parts is rapidly turning into a work of art. I’ve been following this build with great interest and you are to be congratulated on your endeavours.
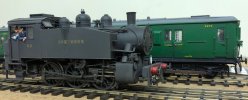
A dirty black USA tank adorned with Sunshine lettering will look grand.
By way of encouragement, here’s my attempt. Pictured at early days at Stroudley Park. Keep up the good work Mr Spikey.
Regards,
Ian
A dirty black USA tank adorned with Sunshine lettering will look grand.
By way of encouragement, here’s my attempt. Pictured at early days at Stroudley Park. Keep up the good work Mr Spikey.

Regards,
Ian
spikey faz
Western Thunderer
I doubt my effort qualifies for 'work of art' status, but I do have an image of how I want this locomotive to look. Unfortunately to achieve that image does seem to require a lot of upgrading/additional parts!This selection of mediocre parts is rapidly turning into a work of art. I’ve been following this build with great interest and you are to be congratulated on your endeavours.
A dirty black USA tank adorned with Sunshine lettering will look grand.
By way of encouragement, here’s my attempt. Pictured at early days at Stroudley Park. Keep up the good work Mr Spikey.
View attachment 212151
Regards,
Ian
I suspect the forthcoming Minerva model will show how it should be done.

I'm currently perusing the Precision Scale catalogue to see what I'll need to buy if I opt for an early version USATC S100.
Mike

