7mm Loose Ends

28ten

Guv'nor
Dan Randall said:
I say! That looks rather well thought out. :thumbs: Is this what's known as Continuous Springy Beams)?

You've reminded me, I must post some pictures of my bogie compensating units soon. :)


Regards

Dan
Yes it's a CSB. I think it would work with a gearbox and chain drive as well. It's actually pretty simple to do, which is a bonus.
 

28ten

Guv'nor
lancer1027 said:
Well, very impressive :bowdown: Looks abit to technical for my little brain though :oops:
Nah, its really simple, I will post the dimensions for the pivots when everything has been tested. The beauty of piano wire is the ability to change the spring rate by simply changing the wire - try doing that with those little coil springs slaters use :lol:
Of course, this should work for a Warship and D63xx.....
 

28ten

Guv'nor
This took longer than expected - 'Led Zep III', 'Darkside of the moon' half of 'The Free story' :D
The camera battery was flat :( , so no 'how to' pictures The horn guides are just 3x4 brass, glued and screwed with 12ba csk screws, surprise surprise, I ran out of screws :D Its a good job I hadnt ordered the handrail knobs from Eileens !
The horn guides are all the same length even though the middle ones look shorter in the pictures. The final picture shows how the guide and hornblock fit. Another benefit of the CSB is that it will collect current from all the split axles, meaning I will only need to fix a couple of wires :D
Tomorrow nights job is to trim the excess of the outer hornguides, and thats about as far as I can go until I order the bits i need.
 

Attachments

  • IMG_2925.JPG
    IMG_2925.JPG
    130.6 KB · Views: 37
  • IMG_2924.JPG
    IMG_2924.JPG
    97.5 KB · Views: 36
  • IMG_2923.JPG
    IMG_2923.JPG
    186.9 KB · Views: 33

rosspeacock

Modelling on a £1200 table.
Hello, :wave: really like the idea with the piano wire :thumbs: is this something you have devised yourself? looks so simple bet it will work a treat, know what you mean about the little springs they are a nightmare :twisted: :headbang: once built an Alan Gibson Jinty wasnt really happy with the end result either.. really impressed with your power bogie too by the way :drool: :wave: Ross...
 

28ten

Guv'nor
The idea isnt mine this site http://www.clag.org.uk/beam-annex3.html explains the principle, although the maths was way beyond me :lol: I do like to spring everything IMHO it improves the ride. but I would never use the springs again.
I think diesel traction lags behind steam outline models in chassis/bogie development and my biggest criticism of the JLTRT kits is the bogies, I think they should be supplying something more like the Heljan power units which are better engineered :rant:
 

rosspeacock

Modelling on a £1200 table.
Got to admit I dont think the bogies are up to much, the 25 im making for I Futers is getting left as standard Ian says it will be fine as is because its only gonna shunt a couple of coaches up and down, would'nt like to see one thats pulled 10 coaches or 20/30wagons round Phills garden for an hour think it would probably melt. If I was making any JLRT kit for myself Id definately at the least put a Ron Chaplin gearbox in it and Id also make it so you can get the damn thing apart :scratch: :wave: Ross...
 

28ten

Guv'nor
My etch for the marker lights arrived this morning :D so I can get on with that while i wait for the screws for the bogie :D
Dan :wave: also sent me some some laser cut glazing for the headcodes which arrived with the etch, so I have all the bits for the cab.
The etching was very quick I completed the drawings a week ago and I would recommend PPD if anybody else fancies getting anything done.
 

Attachments

  • IMG_2926.JPG
    IMG_2926.JPG
    260.2 KB · Views: 49

28ten

Guv'nor
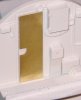
I couldnt resist checking the door overlay :lol: Its not properly fixed but it will give the correct handle recess when everything is straightened up. I did think about doing an overlay for the sound proofing, but it would have meant removing all the bulkhead detail which I thought was going a bit far :D
 

Attachments

  • IMG_2928.JPG
    IMG_2928.JPG
    182.4 KB · Views: 46
  • IMG_2929.JPG
    IMG_2929.JPG
    105.1 KB · Views: 47

Dan Randall

Western Thunderer
Looking good. :thumbs:

I find this etching business is great fun - visualising something in 3D, drawing it in 2D, then waiting for Postie to call with the finished etches. :)

Am I right in thinking that the rivetted rectangles with offset holes, are brake rigging supports for the ABC bogies?


Regards

Dan
 

28ten

Guv'nor
Yes they are for the ABC bogie. I will laminate a couple together and drill some holes through the half etched guide. Scale hardware bolts will probably follow!
Who was it who said you could build the kit in ten days ? :D
 

28ten

Guv'nor
The marker lights are a success :D its not fixed yet but I think it looks much crisper and fitting the fibre optic will be easier
 

Attachments

  • IMG_2934-1.JPG
    IMG_2934-1.JPG
    91.6 KB · Views: 27

lancer1027

Western Thunderer
I am looking forward to the progress reports especially the fibre optics. I have thought about using it myself but i dont know enough or where to purchase etc.
 

28ten

Guv'nor

Attachments

  • IMG_2936.JPG
    IMG_2936.JPG
    188.7 KB · Views: 43
  • IMG_2935.JPG
    IMG_2935.JPG
    126.9 KB · Views: 42

Dan Randall

Western Thunderer
28ten said:
I can take no credit for the fibre optic idea Dan did it before me http://www.westernthunder.co.uk/index.php/2010/01/24/jltrt-western/
But I have refined it slightly by using a long drill from each side rather than hacking chunks of resin out with a burr :D
I am using a 1.5mm dia fibre optic which I got from here http://stores.shop.ebay.co.uk/component-shop__W0QQ_armrsZ1 along with some warm white leds


Hmmm, wish I'd thought of that too..... :oops: :lol:

You seem to be using a thicker fibre optic than me, which is actually a pretty good idea. :thumbs: If it's the same diameter as the brass tube, I guess you could make the visible end "lens" shaped? This would save faffing around trying to represent the lenses with Kristal Klear, as I was intending to do.

The marker light etches look good too. :thumbs:


Regards

Dan
 

28ten

Guv'nor
Dan Randall said:
You seem to be using a thicker fibre optic than me, which is actually a pretty good idea. :thumbs: If it's the same diameter as the brass tube, I guess
Regards

Dan
Thats the idea. for a thinner fibre just heat the end to form a mushroom.
 

28ten

Guv'nor
most of the spring work is now complete on the trailing bogie, I just need the handrail knob. I am pleased with the result the hornblocks are running nicely in brass hornguided and everything is nice and smooth. the wheelsets just drop out when the spring wire is removed so removing the middle wheel will be no problem once the casting is fitted :thumbs:
Next, turn up some spacers to take up the sideplay, make some split axles and fill all the pickup holes...
 

Attachments

  • IMG_2939.JPG
    IMG_2939.JPG
    94.8 KB · Views: 67
  • IMG_2938.JPG
    IMG_2938.JPG
    102 KB · Views: 67

28ten

Guv'nor
I seem to have ended up doing a blow by blow account so here is tonights work
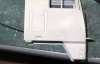
First up s some added detail to the bulkhead, the overlay gives the impression of the handle recess and a little shading will give it more depth, the door catch is a little oversize so that will go tomorrow :oops:
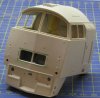
the next shot shows the filler around the headcode box and you can just make out the newly scribed line, I will give it a quick flash of primer to make sure everything is ok before reinstating some of the bits I have removed :D
I will do some more work on the bulkhead tomorrow, the door needs some hinges, a handle and a coat hook, and assuming I the headcode box is ok I may get round to scribing the division between the headcode doors
The problem is that I am looking at too many books and finding things to add/change :mad: Im not entirely happy with the air brake valve on the drivers console, its a little clunky and it is very visible.......
 

Attachments

  • IMG_2948.JPG
    IMG_2948.JPG
    198.8 KB · Views: 64
  • IMG_2945.JPG
    IMG_2945.JPG
    167.2 KB · Views: 63
  • IMG_2944.JPG
    IMG_2944.JPG
    223.9 KB · Views: 63

28ten

Guv'nor
A quick blast on the headcode, the filler has toned the gap down a little, but not as much as I had hoped :( I think it needs a resin filler as there is not much to key into.
The postie brought the plates this morning :D They are N/S so they should look pretty good when painted, I think they are worth the extra.
 

Attachments

  • IMG_2950.JPG
    IMG_2950.JPG
    140.4 KB · Views: 63
  • IMG_2955.JPG
    IMG_2955.JPG
    103.2 KB · Views: 57
Top