
You are using an out of date browser. It may not display this or other websites correctly.
You should upgrade or use an alternative browser.
You should upgrade or use an alternative browser.
7mm Ressaldar's workshop - S&T Inspection Saloon
- Thread starter Ressaldar
- Start date


BrushType4
Western Thunderer
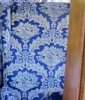
Mike, not sure if the attached can be photoshopped into something to do what you're looking for?

Ressaldar
Western Thunderer
Hi Phil,
thanks for the photo, but I think that I am 'saved by the bell' in as much as I'm pretty sure now that in later service, a much less ornate cloth would have been used. This pattern would hark back to the first class area when the coach was a restaurant car - and rule 1 will be brought intoplay use
cheers
Mike
thanks for the photo, but I think that I am 'saved by the bell' in as much as I'm pretty sure now that in later service, a much less ornate cloth would have been used. This pattern would hark back to the first class area when the coach was a restaurant car - and rule 1 will be brought into
cheers
Mike

Compton castle
Western Thunderer
Picture as requested, I hope it can be of some help 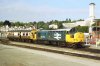
Ressaldar
Western Thunderer
Hi Steve,
many thanks for the photo, I have not seen one of it in Wales before. I have one of DB999509, the Newport CE Saloon taken at Cardiff in July 1988, if you have any other photos of it, they too would be useful as I have one of the Easybuild kits in the 'to do' pile.
cheers
Mike
many thanks for the photo, I have not seen one of it in Wales before. I have one of DB999509, the Newport CE Saloon taken at Cardiff in July 1988, if you have any other photos of it, they too would be useful as I have one of the Easybuild kits in the 'to do' pile.
cheers
Mike


Ressaldar
Western Thunderer
Now that the Q13 & Diag 1/550 are out of the way, it is time to search out another 'shelf queen' so, keeping in the Inspection Saloon mode, I dusted the big white box down and peeped inside to find 
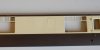
where I had filled in the windows in the redundant double doors, one of the infills has shrunk - a good reason for leaving three years + between the filling and re-opening the box! Not only has there been a slight shrinkage around the edge, the surface has become slightly concave. I think the solution is to scribe around the perimeter and scratch the surface to provide a key for a very fine filler and then a few sessions with 1200 wet and dry and some witness primer. Respraying the area bounded by the windows should be ok and then a keying in at the bottom edges with T-cut should do the trick. I have never painted the sides and ends prior to final assembly before and here is a good enough reason not to do it again at any time in the future. I used JLTRT spray cans and thankfully have a number of cans of both colours in stock.
I have now started to re-read Heather's post on her Collett builds to get me going regarding the underframe. The bogies are complete and ready for the primer to be applied.
regards
Mike
where I had filled in the windows in the redundant double doors, one of the infills has shrunk - a good reason for leaving three years + between the filling and re-opening the box! Not only has there been a slight shrinkage around the edge, the surface has become slightly concave. I think the solution is to scribe around the perimeter and scratch the surface to provide a key for a very fine filler and then a few sessions with 1200 wet and dry and some witness primer. Respraying the area bounded by the windows should be ok and then a keying in at the bottom edges with T-cut should do the trick. I have never painted the sides and ends prior to final assembly before and here is a good enough reason not to do it again at any time in the future. I used JLTRT spray cans and thankfully have a number of cans of both colours in stock.
I have now started to re-read Heather's post on her Collett builds to get me going regarding the underframe. The bogies are complete and ready for the primer to be applied.
regards
Mike

Steph Dale
Western Thunderer
What filler did you use, Mike? One of the solvent-based ones I guess. It's one of those jobs where supergluing in a plug and rubbing down or even Milliput would work well.
I hope you manage to patch it in OK.
Steph
I hope you manage to patch it in OK.
Steph
Ressaldar
Western Thunderer
The dust was blown off of the lid of the re-cycled take away box that has been home to the castings, etches and the few made up sub assemblies and work on the underframe was underway after a three year pause and after four hours enjoyable filing, scratching, cursing and gluing:

and constant reference to Heather's essential article on her three Collett builds, this had been achieved. The trusses (they are level and parallel) were already in place, but nothing else.The next thing to tackle will be to finish the brake rigging and then the battery boxes (these were included in the kit) and gas cupboards (not included so will be scratch built) and the buffer beams - basic fabrication already done but buffer housings etc still to do.
regards
Mike
and constant reference to Heather's essential article on her three Collett builds, this had been achieved. The trusses (they are level and parallel) were already in place, but nothing else.The next thing to tackle will be to finish the brake rigging and then the battery boxes (these were included in the kit) and gas cupboards (not included so will be scratch built) and the buffer beams - basic fabrication already done but buffer housings etc still to do.
regards
Mike