A West Midlands Works

Scanlon

Western Thunderer
A few developments on 75075 to report. The cab has been properly skinned with its outer overlays. The difference is dramatic although this photo gives no impression of the work involved.
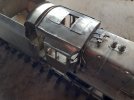
Cab 8 190923.jpg
There are overlays on overlays and it is quite difficult to get everything level but the majority of the filing is now done. I will use wet and dry sanding paper to work out the various blemishes remaining on the roof. The build instructions said to fit the central roof overlay clear of the upright rain strips to allow them to fitted afterwards. I decided to fit the rain strips first and then the overlay to ensure everything would fit. The observant will also see the manifold, some associated pipework and injector steam valves have been fitted. The latter were essential as some of the cab detail could not have been fitted at a later stage.

So the model is starting to look like the locomotive it is intended to be.
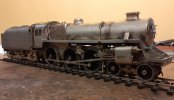
Loco 3 190923.jpg
There is a lot still to do but hopefully with the cab built a start can be made on all the injector and brake pipework. By the way the smokebox door is just resting in place for the moment.
 

Scanlon

Western Thunderer
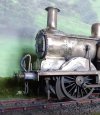
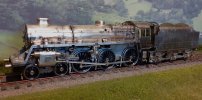
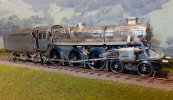
Some developments on the ex LBSCR D3 have taken place over the weekend. Quite a few of the remaining fittings have been stripped off the model but now at last rebuilding has commenced.

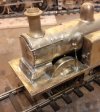
Firstly, a major rebuild of the leading splashers and the smokebox saddle. The original etches were dismantled as far as possible and cleaned up. The original solder was caked on and took quite a lot of hard graft to remove but it had to go. This photo shows the original front end
Smokebox 2 040923.jpg
The splashers overlapped the running plate and in turn the tops of each splasher were soldered on the top of the etch making them too high. They have been lowered and now the running plate is level as per the prototype. Unfortunately, the subsidiary splashers to accommodate the coupling rods are also too big. I have to live with them as it has not been possible to make them smaller without resorting to drastic surgery. Hopefully when painted they will not be so noticeable.

The smokebox saddle has been rebuilt and detailed. Rivets have been added to the lower saddle and the piano front has been replaced and upgraded by the use of a spare Finney7 T9 etch. Overall, a greatly improved scene. In addition, the raised sandbox covers have been removed as they were unprototypical. The clacks and delivery pipes have been reinstated and this is the front end today.
Smokebox 3 240923.jpg
The final stripping previously referred to has seen the buffers, handrails and knobs taken off, the dome was slightly too far forward so that has also been recovered for reuse. Finally, the Westinghouse pump has been removed for assessment’ so hopefully this is the end of removing parts.

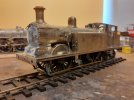
The handrails were incorrect for later versions of these locos. The original holes have been plugged with 1.3mm brass wire and rubbed down. I will use car body filler to tidy up the 6 spots on the boiler. Pilot holes have been drilled for the new handrail knobs. A boilerband has covered the much-reduced gap between the firebox and the cab. This photo shows the loco mocked up principally to reassure myself I am doing the right thing to my “basket case”.
Loco 2 240923.jpg
 

P A D

Western Thunderer
It's looking better already Roger. Getting rid of the sloping ship's funnel makes a big difference.
Cheers,
Peter
 

Scanlon

Western Thunderer
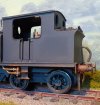
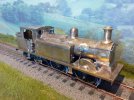
Started work on the bunker area of the D3 over the weekend. This was the original bunker area.
Bunker 1 040923.jpg
The work undertaken so far has been to add rear steps, lamp irons and raise the height of the bunker with “filled in” coal rails. Still to do are add bars on the windows, add a holder for the single line staff, detail the rear bufferbeam including push/pull connections.
Bunker 3 260923.jpg
Naturally there is lots more to do.
 

Scanlon

Western Thunderer
There has been considerable progress with 75075, entirely centered around pipework. This is the first MOK kit I've built where almost all the major pipework is supplied in the form of castings. Consequently it is very comprehensive but care is necessary to get all the orientation right. Here are the injectors with their major pipework tacked in place.
Injectors 4 061023.jpg
The castings are near perfect, just requiring very minor cleaning up and holes drilling out. All the pipes have male/female connections. Here is the finished product fitted in position.
Injectors 3 121023.jpg
The photo shows even more cleaning up is required. Behind the injector pipework there is a steam heat pipe which must be fitted first. The full extent of the pipework under the running plates is shown here, a total of 17 castings so far.
Detail 1 120123.jpg
Not surprisingly the pipe castings require just a little adjustment for it to all fit into place. This is not the entire extent of the pipework as there is a vacuum pipe and steam heat pipe to fit into the frames. They will "clip" into their respective pipes under the running plate.

This is the AWS detail under the cab on the driver's side
AWS 1 121023.jpg
In the instructions this is described incorrectly as ATC. Two types of vacuum pipe are provided for under the cab and behind the frame for the AWS battery box . The model can be built without AWS hence the alternative pipes. The photo shows some tlc is required to the cab and the joint on the running plate.

So today the loco looks like this
Loco 10 121023.jpg
Loco 11 121023.jpg
Distance lends charm! There is some work still required on the engine body detailing front however, attention now turns to super-detailing the frames. This will be quite a task.
 

Scanlon

Western Thunderer
Its the weekend and I have turned my attention back to the LBSCR D3. A large bag of fittings arrived during the week from Laurie Griffin and included the push/pull castings I required.

I decided to start building the Westinghouse pump which surprisingly was in two parts and took some time to ensure both cylinders were in line. It was then positioned on the cabside using photos of the original machine. The pump is fed from a valve situated behind the dome. To ensure it was correctly in position this had to be fitted. As I had surplus glue both the safety valve and the chimney were also fitted. Having let the epoxy resin cure for a few hours I positioned the valve and then attached the pipework and the operating rod. Now the model looks like this.
Loco 3 141023.jpg
The cab roof has yet to be fully detailed and is just in place to give an illusion of completeness. In addition to the pump detailing four stays have been soldered in position retaining the tanks to the boiler.

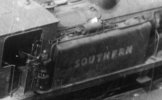
This very poor but invaluable picture courtesy of Mike Morant shows some of the detail on the tank top and will be used as a guide.
32365 unknown.jpg
Very slowly the loco is taking shape.
 

Scanlon

Western Thunderer
It has been some while since my last post. A number of projects have reached fruition including the Gladiator Stanier mogul, the DJH Clan, a David Andrews Merchant Navy and completion of the MOK 75XXX which will shortly go off to Paul Moore for painting. Currently I’m building an MOK 14XX; so, I have been kept busy. This is the Merchant, 35010 Blue Star.
Loco 4 140424.jpg

Recently a Finney West Country was offered for sale. To be fair to the previous owner I will only show the model is a stripped-down state but overall, the build was dreadful. I’m told by others they have seen worse but….! Probably a saving grace was that I knew some of this model’s history as I had seen it at the Steam (Swindon) model railway show some years before. Time had not been kind to it. Getting the model home, I could fully appraise it. At least it ran fairly well being fitted with a Crailcrest motor and gearbox and energised on the American principle. More later.

Work started on the tender which was completely stripped down and all paint removed. At least this improved things a little but there was plenty of solder to get rid of. Whatever the original “builder” used it is incredibly hard to remove.
Tender rear 1 010824.jpg
The initial list of errors which required rectification were brake gear incorrectly assembled. It was outside the wheels and in tension whereas it should have been inside the wheels. The fire iron tunnels were open at the rear, the entire tender body was only tack solder together and out of square. The rear ladders were castings and wholly inappropriate for the model. All tender steps were either incorrectly positioned or required replacement. I was sure there would be more but that was fine to be getting on with.

Fortunately, a number of years ago I had acquired a box of Finney spares for the 4500-gallon tender and this has been a godsend. This has provided new brake pull rods, leading tender steps, tender doors, water gauge and housing, ribs for some of the inner coal space and a frame for building new rear tender ladders. It also provided replacement castings for rear low level tender steps, the little steps at the front of the tender and replacement light fittings.

This photo shows the tender reduced to its major components after stripping off the paint.
Tender stripped 1 010824.jpg
The inner frames were given an overhaul and then resprayed with two coats of etched primer and two coats of Halfords satin black. The outer frames were suffering from huge amounts of unnecessary solder which had to go. Other than the incorrect steps the frames were generally fine but some etches had been fitted back to front. Were possible these have been replaced but others were modified.
Tender frames 1 010824.JPG
The tender body was an entirely different project. With the excess solder removed it was selectively stripped down to remove component parts. I had very few replacement etches so had to renovate what was available. The body itself had only been tack soldered together and was not square, it is now and fully soldered up. Too late I noticed the top of the tank had been assembled inside out but l will have to live with it. It appeared only two half etched slots required for the rear ladders need filling then I discovered the original tender ladder upper handrails had been located incorrectly. The original holes needed filling with 1.2mm wire! One more ladder to build!
Tender body 2 070824.jpg
The coal space doesn’t have all the internal detail so I’ll coal the tender to the brim to overcome this. New ladders are being built for the rear of the tender.

At the front of the tender the returns for the handrails and the cab doors had not been fitted. I made up the returns from scrap etch and drilled them for the handrails. The cab doors were badly mangled and have been straightened out and the fall plate required minor adjustment to allow it to “float”, but I completely overlooked to fit the water gauge and am now wondering how to get it into place.
Tender 3 010824.JPG
Still lots to do, not least clean it up!!!!!!
 

oldravendale

Western Thunderer
You must be a masochist to even attempt this, Roger, but it demonstrates that very little is not recoverable providing time and knowledge is applied to it. A friend who was a good modeller in his time attempted one of these as the first signs of Alzheimers appeared but I suspect his model is beyond redemption. Regrettably I live too far away to visit every week and correct his errors. I fear too many parts are missing/thrown away. That's a real shame when one considers the results which can be achieved from this kit.

Brian
 

Scanlon

Western Thunderer
Brian,
A number of people have doubted my sanity and frankly they are not far wrong. Taking on this basket case may be a step too far but I'm determined to see it through. The model will never win prizes but I'll have the satisfaction of knowing I brought it back from the grave.

The photos show many areas where I still have work to do. My plan is to get the tender as good as I can before starting the engine, parts of which honestly frighten me. Unfortunately I have no spare etches for the engine so I've got to be careful and retrieve everything for reuse. At least one etch for the top of the casing is missing and there may be more. I dare not show you the cab and have no idea how to get the backhead out. The "builder" did not follow any of the build instructions but I think that's obvious!

Cheers
Roger
 

45609

Active Member
Roger,

You are not alone as I get a satisfaction from doing similar sorts of things. I have brought back a number of 4mm scale models from the grave. Some of which were, supposedly, built by professionals. I won't embarrass anybody by naming names but I sometimes despair when I discover what someone has paid for a model that either does not work well, is not squarely built, and/or has poorly applied details and paint. Anyway, here are a few photos of one I did over 10 years ago. A Craftsman kit and, in the words of my client, "a crap Ebay purchase" so I have no idea who built it. Also, don't ask me why it had the wrong number. I only rebuilt the body but everything was recovered from the original build, cleaned up, and put back together. Only a few additional parts were added. Mostly from the spares box. Rarely is something completely beyond saving.

cheers...Morgan

A5 as received.JPG

P1080574_sm.JPG

P1090137_sm.JPG
 
Last edited:
Top