Broad Gauge adventures - Nick Dunhill's Workbench

Nick Dunhill

Western Thunderer
I have to confess to being a bit out of my comfort zone with this project, so I was a bit unsure about whether to upload this. I have been commissioned to build a pair of Armstrong Goods convertible locos from Scorpio (loco) and Broad Gauge Society (tender) kits. There seems to be a paucity of information about the broad gauge versions (photography in it's infancy?), but fairly lenghty chats with Pat Ennis at Scorpio and Peter Boyce at the BGS put my mind at rest.


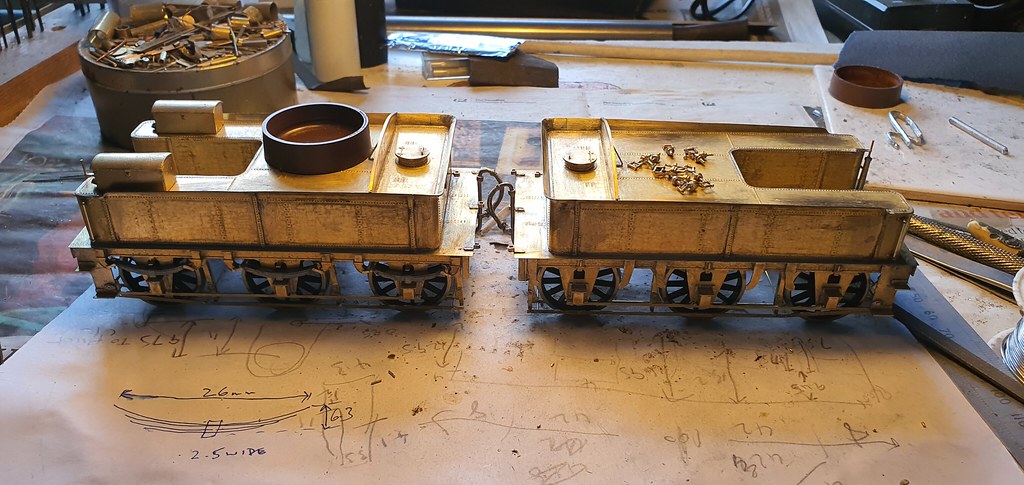
The tender kits from the Broad Gauge society are ok. They are a 4mm blow up but the difficulty I encountered wasn't becouse the kit was lacking, but more because of the shape and method of construction of the originals. I guess the originals were beaten from wrought iron by blacksmiths (Bessimer converters didn't appear until the 1870s, so no cheap steel in large quantities) and the designs are very reminiscient of a (horse and) cart. The tank sides are made of sections of wrought iron sheets, joggled at the ends and riveted together (no TIG!)


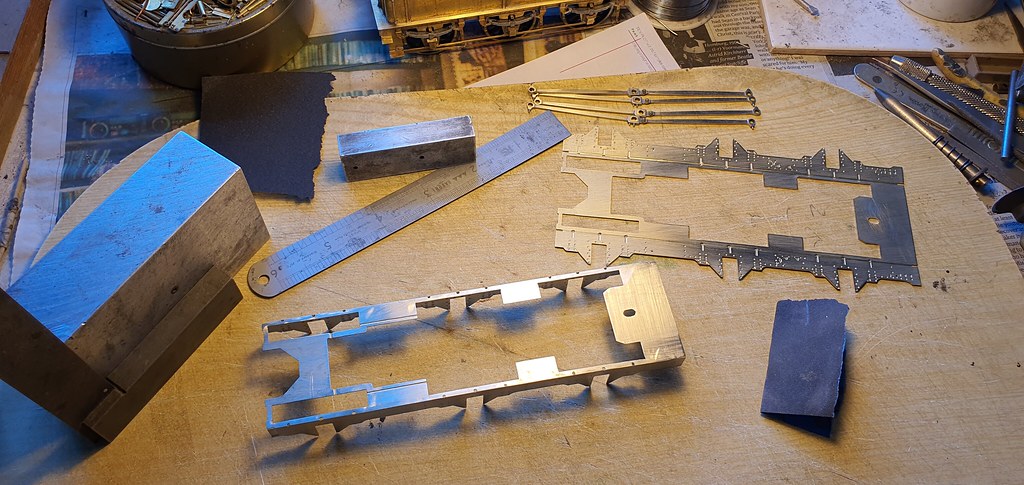
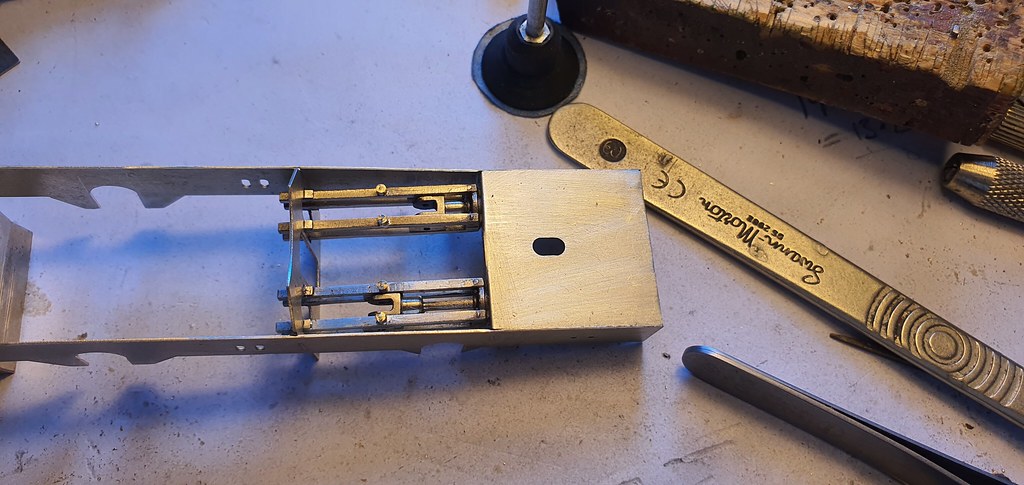
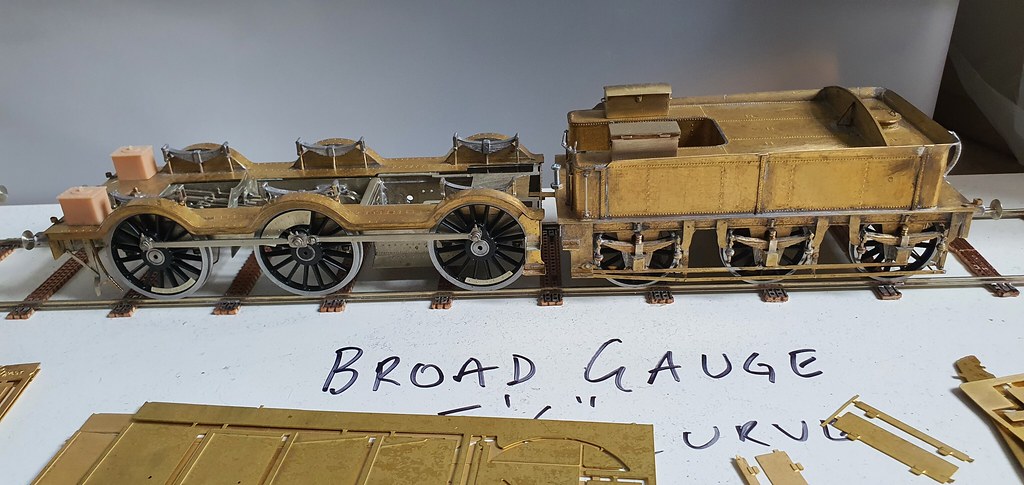
The first problem I encountered was the lack of an inner chassis. This is of course a 7mm peculiarity, we use wheels without outside bearings to simplify tender builds. I decided it would/might be fun to build a Finney style rocking beam inner chassis. I saw that BGS track standards are more like S7 than FS so compensation may be key. I think the tenders turned out OK, there's a lot of etches to fabricate parts that may have been better as castings (yikes if you're making the 4mm version!) but it goes together ok with a bit of care.


51154712691_6e6e0a5ff5_b.jpg


51154713056_fce70d7300_b.jpg


51154713811_0cec07bcb7_b.jpg


There's more photos on my Flickr page here nick dunhill


The next part of the job was building a test track, as Peco haven't ventured into the niche area of BG. I mithered Paul Scott (very modest man who is at least as good as Norman Soloman) and Richard Spoors for help and took my first plunge into trackbuilding of any kind. Tony Geary was kind enough to send me some simple Templots (and a bucketful of encouragement) which I stuck to a laminate board. I built half track, outside rail first (thanks Richard,) then laid the inside rail using a BGS track gauge. It ain't going to win any prizes for the best looking track ever but it seems to be ok. The rail is BGS bridge rail.


51155498309_6dc74d2635_b.jpg


51154945168_2273e2125d_b.jpg


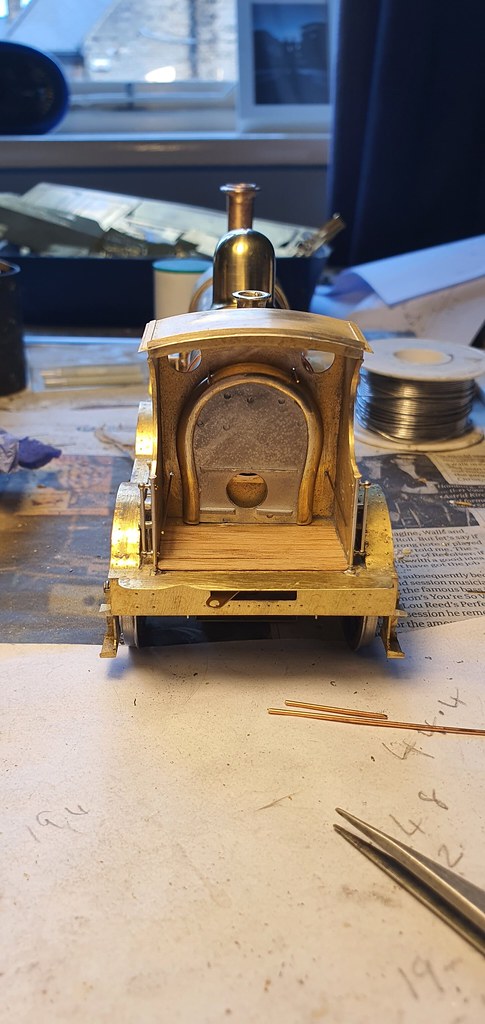
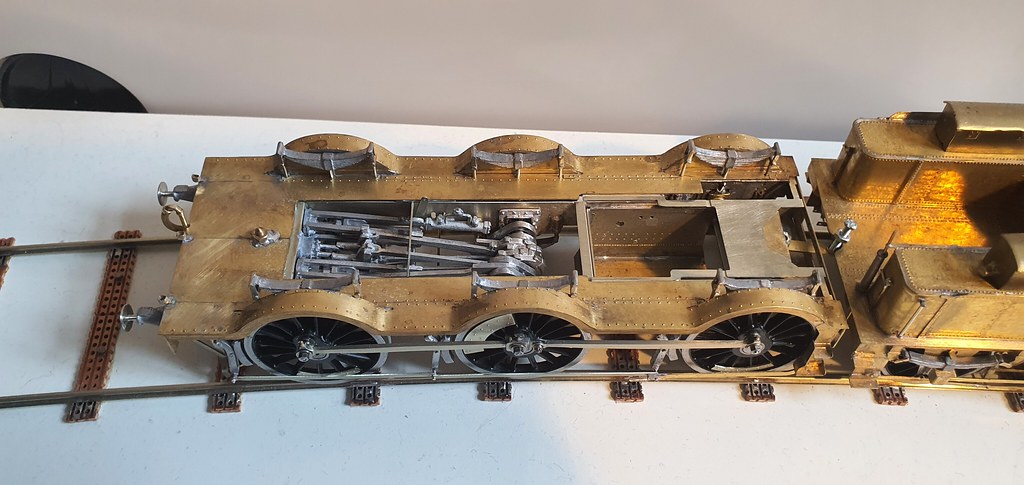
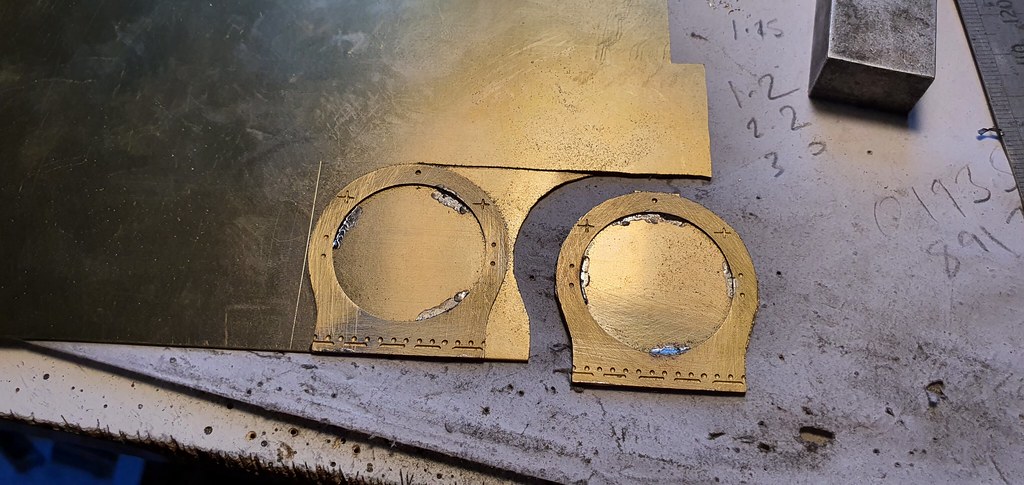
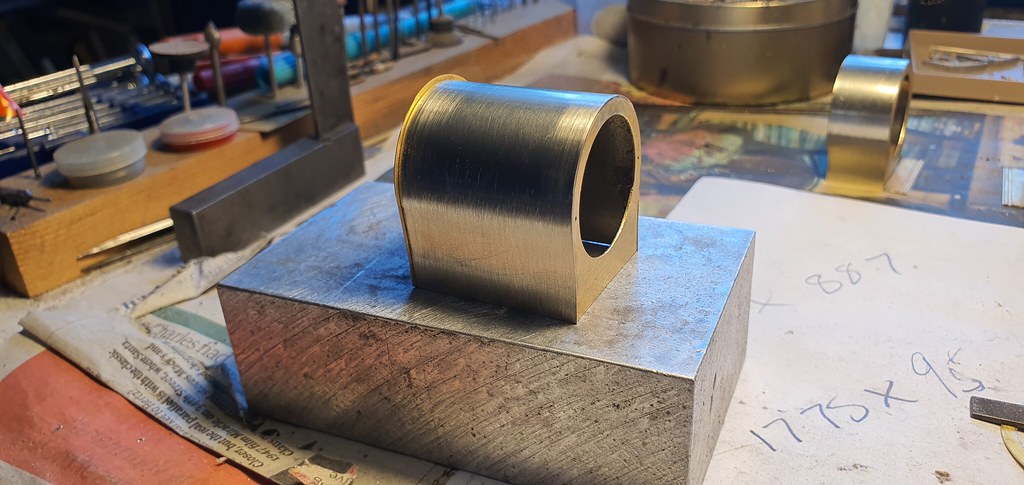
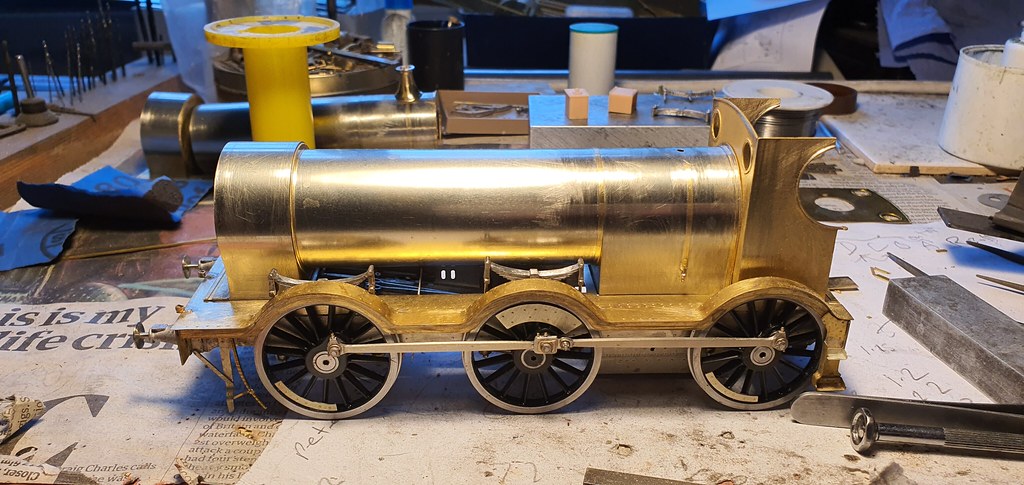
Then onto the locos. I built a Scorpio Queen last year and was very pleased with the kit. I assumed that this one would be of a similar quality, and so far it is. It has a million etches (or so) for all the various versions. The outer splashers for the BG version are feindishly difficult to form. The valances have to match the radius of the tyres of the wheels. It took ages! The kit is designed with a rocking beam compensation system which I didn't like the look of for coupled wheels. I decided to convert the dummy outside bearings to be the working ones, and leave the inner chassis as a dummy. This left me free to make a proper ashpan to hide the motor and fill with balast. It was quite tricky to modify cast dummy horn blocks to work effectively, but I lucked-out and the 3/16'' ID K&S tube I earmarked as bushes for the axles had an OD that was the same diameter as the horn cheek spacings in the outer chassis. I let short lengths of the tube into the dummy horn blocks and all worked fine. I made crude suspension from phosphour bronze wire and added pick-ups.


51155498529_449147c92b_b.jpg


51154714281_c63d92f041_b.jpg


51155819125_b6f69e563f_b.jpg


51154044562_acb286f256_b.jpg


51154714636_07bc2b99c9_b.jpg


51154945888_cefb2d9465_b.jpg


51155499194_3fc56b27c3_b.jpg


51155499349_dca7afd2a7_b.jpg


51155499394_faa45e1614_b.jpg


51155499459_e3ff5cf61f_b.jpg


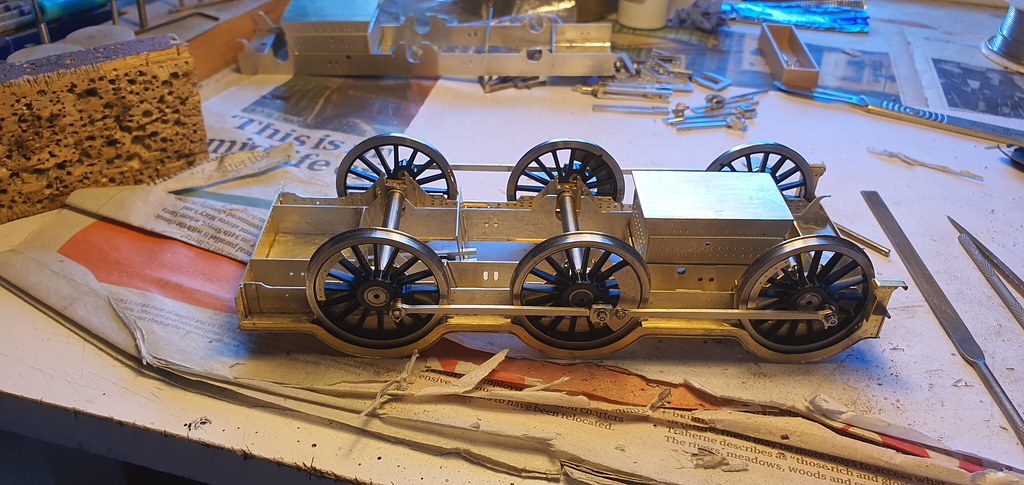
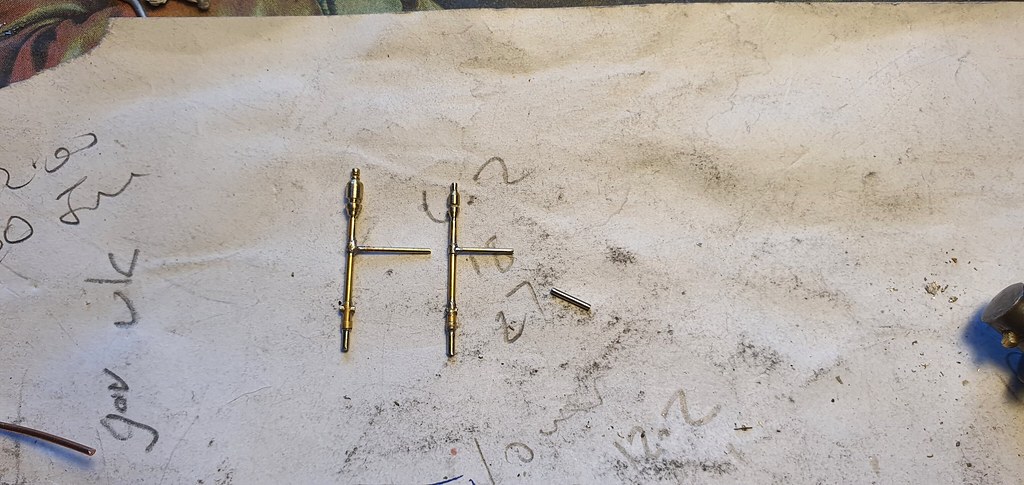
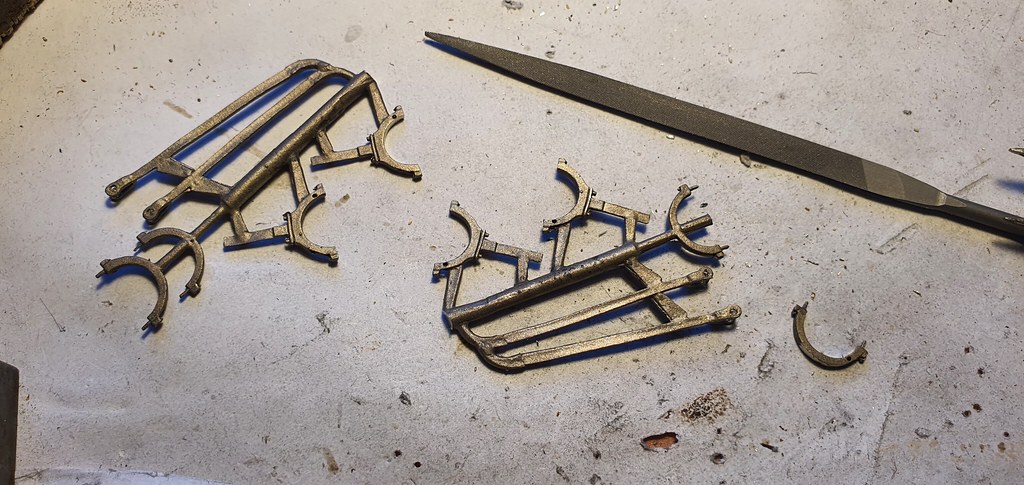
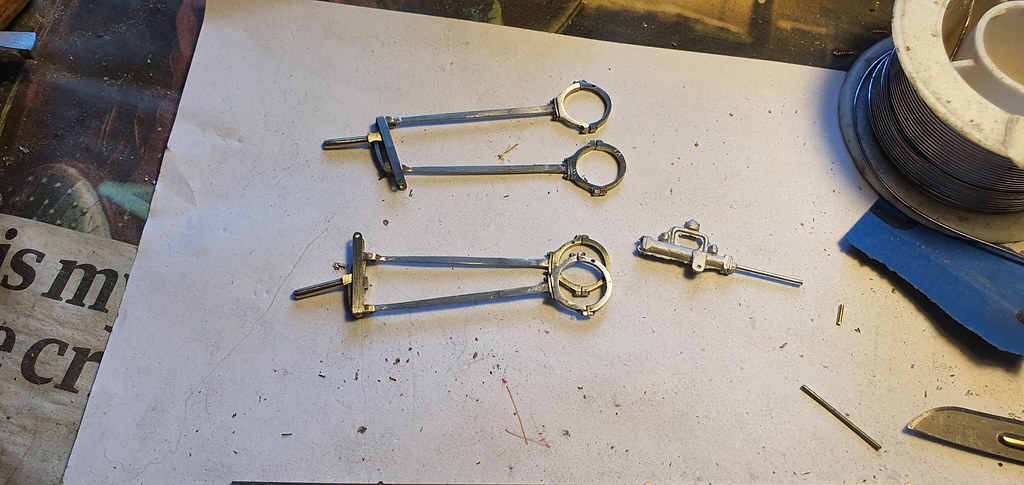
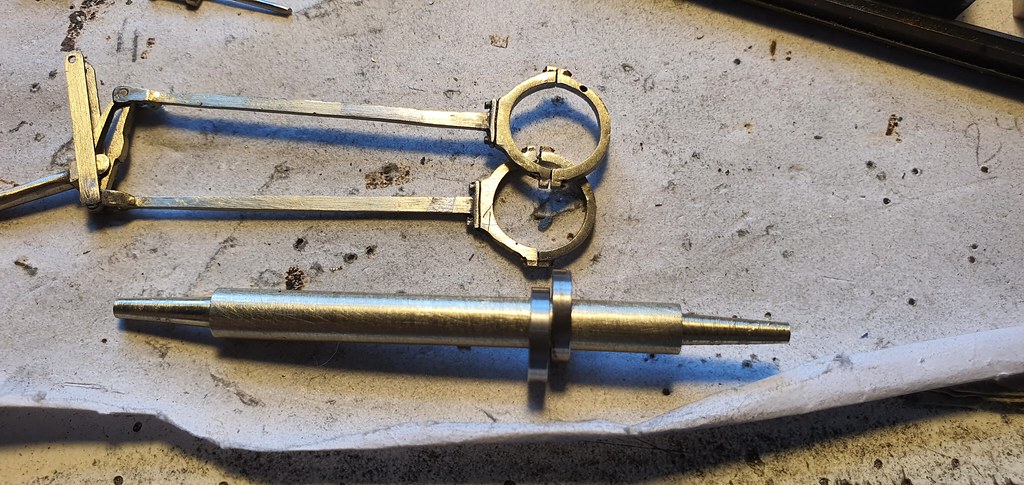
Currently I'm fettling Laurie Griffin inside motion parts. I'm copying the dimensions off the dummy cast set provided in the kit, what could possibly go wrong with that?
 
Last edited:

Nick Dunhill

Western Thunderer
Yeah I assumed that. ''Miles of bloody room here for the inside motion, no issues with the crank webs hitting the hornguides, Ha!'' But no! The inner chassis spacing is 26mm, same as FS so same old issues........
 

mickoo

Western Thunderer
Why is the inner frame so narrow, is that a by product of the kit or the real engines being built with an eye to converting to standard gauge later or a dual design for both gauges.
 

Nick Dunhill

Western Thunderer
The latter mate. Apparently they were built or designed as standard gauge locos when bits of the network were still BG. On the standard gauge locos the wheels were between the frames, and could be converted to BG by moving the wheels outboard.
 

Nick Dunhill

Western Thunderer
A quick catch up. I have done a fair bit to the valve gear this week. As mentioned above I have ordered a large batch of eccentric sheaves to replace the LGM castings (thanks Simon!) The cast ones have an OD of 9.8 mm and the eccentric strap ID is 9.0 mm. Therefore the eccentrics and/or straps need a lot of fettling to get a good fit, and it has to be done by hand so customer has to reconcile a big labour cost. The LGM ones have a flange cast on which makes them too thick so if you use the cast LGM valve guide the outer eccentric rods have to be dog-legged slightly to bring them into alignment with the sheaves. I ordered 100 which is enough for 25 two cylinder locos (in the last 12 months I've made 6 sets!) I'll have a few sets to spare if anyone wants some.


51165287608_753f924a22_b.jpg


So the week has been spent fettling rods and building cylinder bottoms and drain cocks and a few other odds and ends.


51165050051_e18bd8a99e_b.jpg


51165050081_199bd0af97_b.jpg


The way the inside motion is arranged in the loco results in eccentric rods that are near the maximum length for the castings. I took the approximate length from the dummy set in the Scorpio kit and, with a bit of advice from my dad (engineer, retired) they seem to be about right. I'll know when the eccentric sheaves arrive, but you can work it out from the throw.......I hope.


51165050136_5fb48cc8c5_b.jpg


51166150310_db5b73d4d2_b.jpg


51165050321_c754eeb261_b.jpg


Brakes next week, well on at least one loco. The pic of 1207 I have shows it running with no brakes on the loco :oops:.
 

Attachments

  • upload_2021-5-8_12-4-1.gif
    upload_2021-5-8_12-4-1.gif
    42 bytes · Views: 8

Nick Dunhill

Western Thunderer
It was fettling and fitting-up week in the Dunhill workshop. First the brakes, I had a choice of etched or cast brakes for one of the locos. One kit had both options but oddly the other kit had had the etchings removed from the fret. It was a bit of a moot point anyway as the other loco didn't have brakes, eek!


Both locos had springs and buffers so a day was spent listening to R4 and fettling many many springs, dampers and hangers. They required a lot of concentration to assemble and locate on the footplate. I found it was better to solder them up in-situ.


The buffers were decent castings but blind, drilling them out also required a modicum of concentration!


The pics below show the model with the dummy inside motion fitted.


51180825799_64c8f8bb4f_b.jpg


51180254883_e75b8cabbe_b.jpg


51181130055_69ce3af000_b.jpg


51180826089_e809964998_b.jpg


51181130075_07d1d8a4fb_b.jpg


51180826139_734a9d7aa2_b.jpg


Also this week a packet of machined eccentric sheaves arrived. They are a direct replacement for the cast ones in Laurie's inside motion kit. They are excellent and hopefully will make the assembly of the crank axle much less troublesome (see next week.) Thanks to Simon Dobson for making them for me.


51180254723_5135f8ee17_b.jpg


51180825784_5abbb6e140_b.jpg
 

Nick Dunhill

Western Thunderer
The week began by soldering up my crank axle. Care was needed spacing out the sheaves and the cranks and pre drilling the sheaves for a locating pin to hold them in place prior to soldering, but here's the result. I had to crank the chassis by hand as I don't have any motors/gearboxes yet.


51195118541_4dbae58d2e_b.jpg


51195893079_fd69650f58_b.jpg


See how aggressive a flux that Baker's fluid is! Cleans up OK though...


51195118591_56a90a3a15_b.jpg


This was a first, the motion went together first time and did so without any binding or jerkiness. Thanks again to Simon D for making the replacement sheaves (I have a few left if anyone wants some.)


The tender springs turned up and I was able to finish both tenders. Here they are for comparison.


51195184681_4354da6059_b.jpg


51195184861_9e279249a1_b.jpg


I looked at the pre-rolled wrappers for the boiler, smokebox and fireboxes. They were etched in 0.0015'' brass and I decided that it would give a better result if I substituted for 0.0010'' nickel silver, as it would be easier to bend, either by hand or slip rollers. Here's the way fabrication has progressed.


51196182840_67fa37d37a_b.jpg


51195893869_9114f15f67_b.jpg


51195330588_d62279bc11_b.jpg


51196183325_082e17ecb2_b.jpg


51195894444_acab29fed2_b.jpg


51196183410_b15b1afca0_b.jpg


51195894369_7086ec68a7_b.jpg
 
Last edited:

Nick Dunhill

Western Thunderer
So the next step was to solder the three components of the boiler together. I used the Scorpio boiler and firebox formers and they had alignment holes for some 0.8 mm brass rods. I had to enlarge one of the holes to 1.0 mm to get a bit of wiggle room but they pretty much aligned the boiler and firebox perfectly, then I started to add the boiler bands. I asked around but no one does a cast GWR firebox band tightening cleat (surprising as lots of GWR locos have them) so I had to make some from tube and wire. I fitted the safety valve and cover and made the last firebox band stop just where the brass cover touches the firebox top.


51211162265_e79553d4ff_b.jpg


51210300798_04361a4aaf_b.jpg


I had to put the boiler and smokebox on the loco check all was level and get the correct alignment. I made a brass ring from 1 x 1 mm brass square rod to represent the brass cover that appears on lots of GWR boilers to cover the fixing bolts. When I was satisfied all was well I tack soldered the join and finished the joins and bands etc. I have to say that the Scorpio formers are pretty accurate and all ent together without much tweaking. The etches in both Scorpio kits I have made have been of a good quality and fit.


The dome casting was a bit grotty but it came up well. if you look very carefully you can see where I have filled the worst holes with solder!


51209384857_4228f81be7_b.jpg


51210860009_32060c6db4_b.jpg


I did some other embelishments, such as the plate join and screws along the boiler top. There are also boiler band cleats along the bottom of the boiler but you can't see them in the photos.


51210860389_0743bfd4f0_b.jpg


The chimneys are cast in bronze but were wildly different colours, so much so that I thought one was a brass casting. I rang Pat Ennis and he assured me that the lighter colour one would darken if I wafted it over a gas ring. He was right! I suppose bronze is another one of those alloys, like brass, where there's not an exact stoiciometric mix. Must remember that for the future.


So here's a couple of shots of them mocked up for the camera. Just the cab interiors and boiler pipework and handrails to do.


51210301303_aea0315bda_b.jpg


51210301378_96a87a8a21_b.jpg


There's more photos of the build here; nick dunhill
 

Nick Dunhill

Western Thunderer
Ta. I've got to do the Rover soon. Have you made one, I assume it's ok? This one has been a bit tricky to make because of the odd shaped footplate and tender flares (always the bloody GWR flares that cause issues!) but the etches are very accurate though so that helps a lot.
 

Heather Kay

Western Thunderer
Have you made one, I assume it's ok?

I haven’t, but I know a man who's made several. ;)

Having chatted to the F7 guys, I’m told it looks daunting but if you follow the instructions build sequence it goes together well. I still didn’t think my skill set was up to the mark, but I reckon it should be a walk in the park for you.
 

Nick Dunhill

Western Thunderer
A shorter week's work due to the much welcomed sunny Sheffield Bank Hol. It doesn't really look like I achieved much this week but it's all been about the behind the scenes stuff. I've attached the cab and boiler/firebox/smokebox assemblies to the footplate. I think this model is unique in that it is the first model I have made (although thinking back this might also include an original Piercy B1 I built ages ago) where the loco is almost in one lump. The inner chassis is detachable but the outer chassis, footplate and body are one assembly. A problem for the painter to resolve! I did make the cab roofs and backheads detachable to hopefully help things along.


The instructions provided in the kit give fair warning that gaps will appear in front of the cab and footplate and front of the firebox. These were dealt with fairly easily. Some adjustments had to be made to the springs that are shoehorned between the cab sides and splashers, and a number of other small issues and adjustments were made. This is the state of play as I post.....


51227634617_f6af760700_b.jpg


51227641287_4f2b7e740d_b.jpg


One of the models depicts a loco that had the injectors and clacks on the boiler side and the other with the injectors under the cab and clacks (presumably) on the backhead. Basic physics might suggest that injecting cold water into the firebox water jacket might not be a good idea? Anyway the visible injector/clack pipework is also detachable.


51229411720_2cfa804a2d_b.jpg


The loco with the visible injectors also has the whistles on turrets in front of the cab. These have been scratchbuilt from tube and rod and will be attached to the firebox first job on monday morning.


51229418655_2ef2dfb8b2_b.jpg


I have also prepared the backhead castings with their cast brass surrounds and planked the cab floor.


51228562888_96aee2a9d8_b.jpg


One of the locos has tender mounted guide poles for the emergency communucation cord and I'm not sure where the bell for it would be. On the Queen class I built last year it was on the cab side. Is it in the same place on these locos, can any of you GWR buffs advise?


The last pair of jobs will be the backhead details and boiler handrails early next week. At that point the job will be delayed as I don't have any motors. I am 'patiently' awaiting deliveries from ABC.
 
Top