Gadgie’s workbench (EM)

Hornby 08 EM gauge conversion
  • Gadgie

    Western Thunderer
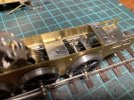
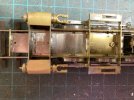
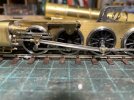
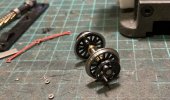
    A little more progress to report. I left the cranks attached to their sprues, which meant that fitting them to the axles and quartering was a little easier than it would have been otherwise.
    2CC0E3A6-763B-47DD-87D3-4B9B110EE881_1_105_c.jpeg

    Initial fitting of the coupling rods was somewhat troublesome. The chassis ran perfectly with the rods fitted the wrong way round, but when fitted correctly there was binding and tightness once per revolution. It turned out that this was being caused not by faulty quartering, but by a rough edge on the rivet at the rear of the coupling rods, which was shaving microscopic bits of black plastic off the central crank. Ten seconds with a file and everything was tickety boo.

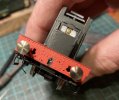
    Then I decided to loosen up the rather stiff screw coupling on the front bufferbeam. It promptly broke. I thought that the hook might pull out, but that broke off too. OK, I thought, I'll drill it out and replace it with a Lanarkshire Models hook. I started the hole in the broken end of the hook with a drill in a pin vice. I then decided to continue with a minidrill to save time. Big mistake. I had assumed the whole buffer beam was moulded in whatever metal Hornby use for their chassis. I was wrong. It is plastic, the drill slipped, and ended up with a nasty hole in the wrong place (at around 7 o'clock).
    B77AC67E-785F-4C73-B659-A514FDEDECB7_1_105_c.jpeg

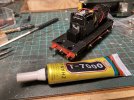
    After some judicious excavation with a variety of tools, I managed to extract the broken off end of the hook, and drill a hole in the correct place (by hand). A Lanarkshire hook has been duly inserted, and secured (so far) with T-7000 adhesive. I bought this a while ago from eBay because my son had dropped his phone (sigh), and it was recommended for fitting a new phone screen, which is still in place. The glue is very strong, dries quickly, and being black, is fairly unobtrusive. It does string a bit, and may contain nasty chemicals, but I quite like it for jobs like this because it also acts as a filler.
    6A6B2F34-9511-43BD-B62F-49EC2F962B4D_1_105_c.jpeg

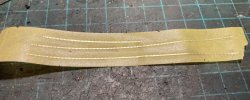
    So the next jobs are fitting hinge straps, and renumbering. Of course one option would be to buy a replacement body -- Hornby do a version of the 08 with hinge straps -- but I have decided to go with the Tim Shackleton approach, using etched riveted strip. These strips are often a bit of pain to paint, so I have attached them to some masking tape to prevent them from being blown away by Halfords etching primer. I think this might make it easier to cut them to length, too.
    525A7FA9-CE13-4D6F-A0A9-AE77A0BC56F5_1_105_c.jpeg

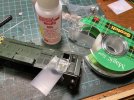
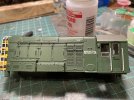
    Next job was removing the old number and BR logo, since a more diligent search of Flickr has also turned up a picture of D3455 as 08378, but still in green livery, with a BR crest on the bonnet doors rather than the cabinet as in the Hornby model. I came across a video tutorial recently describing removal of printed numbers using microsol and magic tape. I'm delighted to say it worked very well, with the big advantage that no abrasive is required, so the paintwork stays nice and smooth. Complete removal did require a few applications of microsol and tape, but this methods seems much better than the alternatives.
    C68BA100-2E23-4CE6-9736-A74B8D97F410_1_105_c.jpeg

    FB04D92A-7789-40AE-8BB8-FCB8E3C6FB21_1_105_c.jpeg
     
    Bradwell WD
  • Gadgie

    Western Thunderer
    Summer has been and gone with its many distractions, and for me autumn is always a good and productive time of year for modelling. About a year ago I started work on a Dave Bradwell WD kit. It is intended to be 90016, which spent some time at Tyne Dock, and was photographed banking iron ore trains up to Consett. Something of a yardstick is my model of 90074, a much photographed prototype, which is an EM’d Bachmann example, with various modifications including a later (Doncaster) firebox. It runs beautifully, will pull pretty much anything, and looks OK unless you start zooming enough to see the chunky plastic.

    08D702D6-05BE-4AC2-BAA4-94B6DA012581.jpeg
    I started documenting my build of the Dave Bradwell kit on RMweb, but of course the photos have all vanished. I don’t intend a detailed recap here. Suffice to say that the kit is uncompromising, time consuming and immensely satisfying. I have also been inspired and occasionally forewarned by Ian_C’s account of building the same kit over here.

    The current state of play is a nicely free-running chassis.

    FB919D6B-2210-44DA-9DBC-A9B028308DBE.jpeg

    A footplate.

    D8F6CDCA-BDD4-46E3-A113-75F4C18E01CA.jpeg

    Some upperworks, and a tender.

    8F23C8D1-AA01-4F7D-ABF0-3A02FA57B379.jpeg

    I decided on a motor in the firebox rather than the tender, so have fitted a High Level gearbox driving the third axle. I opted for CSB suspension rather than individual springing, based on the diagrams in the ever-informative CLAG website. The hornblocks are High Level, regular ones on axles 1, 2, and 4, and narrow ones to accommodate the gearbox.

    F6FF4158-DDB0-4D87-9989-88EE40043A70.jpeg

    So far, clearances seem OK. There’s about 10 thou between the recessed crankpin bush on the front axle and the back of the crosshead. It’s not apparent from this photo, but the clearance between the crankpin on the number 2 axle and the connecting rod was also quite tight. I am a little concerned about going round bends; there’s some side play in axles 2-4, but the wheels are very close to the frames. We’ll have to wait and see if this results in fried DCC decoders.
    7304F72B-C6AB-411D-9257-6908C4419439.jpeg

    I’ve used Markits deluxe crankpin bushes with 12BA screws. I find this a much better option than AGW crankpins, not least because the whole bearing screws onto the pin using a Romford screwdriver.

    0C1022AD-290F-475B-A417-F187BA588A7F.jpeg

    Next jobs are fitting the valve gear, and the brakes. Two of my least favourite tasks. But it would look a bit daft without them.

    Richard
     
    Last edited:
    WD valve gear
  • Gadgie

    Western Thunderer
    I felt ready to begin assembling the valve gear this evening. A grumpy day at work dealing with a series of annoying and unnecessary administrative tasks, followed by a cycle ride home (uphill) in the pouring rain, and an hour helping my neighbour fix an errant gutter by torchlight, seemed somehow to produce the right level of calm.

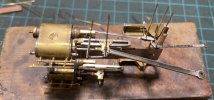
    So here is the port side, partly assembled with outward pointing lace pins to check clearances and free movement. All appears to be well. The tricky bit was ensuring enough room in the valve guide for the combination lever and valve rod to move freely. It would have been much easier to open out the castings before fitting them in place. My grandfather’s rather nice set of riffler files came to the rescue, but it was a tricky and time consuming job, made easier by some favourite Waterboys tunes.

    17F9D7E5-42ED-4DCF-8E11-3718174E608E.jpeg

    Richard
     
    Bogie Bolster C
  • Gadgie

    Western Thunderer
    Having exhausted my stock of Pipe wagon kits, as well as the odd Tube, it was time for a change and an agreeably damp bank holiday Monday gave me the opportunity to make some progress on a Bachmann Bolster C conversion based on some of Justin Newitt’s wonderful bits and pieces.

    Back in 2018 I bought a pack of four Bachmann bolsters, and set to with one of them to turn it into a diagram 1/474 (or 1/477) wagon using Justin’s cast bolsters and underframe detailing etch, running on a pair of Cambrian BR plate bogies. This turned out OK, and was described in the other place, but of course the photos have all gone.

    IMG_2248.jpeg

    So after 5 years I decided to embark on the next one. The question was, could I remember enough about what I had done. This is the starting point.

    IMG_2237.jpeg

    The first step was a rather brutal removal of the original bolsters using cutters in the first instance, then a craft knife and chisel to remove the last vestiges. Very carefully.

    IMG_2238.jpeg

    Until the new bolsters sit nicely.

    IMG_2240.jpeg

    Parts of the underframe were removed with a razor saw so that the new brake gear could be fitted. The details are covered in detail in the Rumney Models instruction sheet for the replacement levers and vees, so a photo will suffice here.

    IMG_2241.jpeg

    Fitting the plates that support the bogies was more challenging. Initially the wagon rode about 1.5 mm too high, and eventually I remembered that in the first wagon I had removed a little plastic from the pips on the bogie plate. A repeat performance reduced the ride height, and, pleasingly, the plates were firmly attached to the underframe using MEK. Before fixing the underframe to the body, screws were attached with epoxy.

    IMG_2243.jpeg

    Overall, quite a quick job to create an interesting variant of a common RTR wagon. Tonight’s task will be to fit the bolsters and pins (they are still loose), and worry about coupling hooks. The buffers are pretty good representations, and so I’m not going to change them.

    IMG_2244.jpeg

    Then I’m going to have to think about painting. And decide what to do with the remaining two bolsters. I have another set of bolster castings, so there maybe a repeat performance, hopefully before another 5 years are up. In the interest of variety the other one may retain the original bolsters and bogies.

    Richard
     
    Pipes again
  • Gadgie

    Western Thunderer
    The first Pipe wagon has now been completed. I was rather taken with the unpainted wood, japanned metalwork and primed floor scheme adopted by Overseer for his excellent 7mm model, so as I had some Cambridge Custom Transfers for B740000 with the ‘Empty to Stanton Gate or Ilkeston’ branding, I rather shamelessly copied it.

    IMG_2271.jpeg

    IMG_2256.jpeg

    It is looking a bit more battered; my models aim for late 1950s to early 1960s condition. My guess is that B740000 would have been fitted with vacuum brake at some point in this period, so is depicted ready for a little sprucing up.

    The vacuum braked Pipes are painted, and awaiting decals/transfers.

    Richard

    (Edited for typo)
     
    Tube and Pipes
  • Gadgie

    Western Thunderer
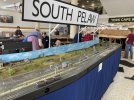
    Adding to Pete’s anxiety … here are some more wagons to cram into the South Pelaw fiddleyard. All need some weathering.

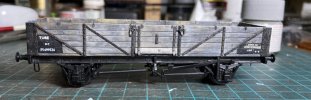
    First up is an LMS Tube, seen unpainted on the previous page, and finished like this one using some resurrected Woodhead transfers that have been lurking in my stash for some 30+ years.

    IMG_2344.jpegIMG_2345.jpeg

    Running numbers were a custom set made up by Steve at Railtec, which arrived astonishingly quickly.

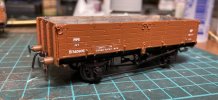
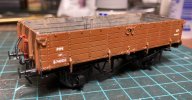
    Next are a couple of Pipes, aiming to reproduce this one and this one. Again, running numbers from Railtec, and a variety of others. I’m a bit frustrated that the Empty to Cargo Fleet branding doesn’t quite match, but hey ho.

    IMG_2349.jpeg

    IMG_2348.jpeg

    As well as some weathering, I also plan to highlight the internal aspect of the stanchions between the side doors.

    But all this, the WD, 03, B1, K1s, and Q6s, the enormous stash of wagon kits, and the 1/48 fast jets, will have to go on pause for a while. The reason is that we are moving house, and the workshop is being packed up and taken to my mum’s house for safekeeping.

    On the plus side, there is space for a workshop in the new place. Even better, it will have natural light, which will be nice after nearly 10 years in the cellar. Better still, there will be space for a layout. Exciting times, as long as everything works out OK with the move.
     
    York 2024
  • Gadgie

    Western Thunderer
    Don't worry about it.... You all looked run off your feet.... Caught up with Duncan around 3pm and he looked zonked....
    It was a tiring long weekend, but fun too. I’m not surprised Duncan was zonked — he’d just come off a long shift as signalman. As on the real thing, this is a demanding and busy role, and critical for the avoidance of disaster.
     
    Last edited:
    BR standard brake vans
  • Gadgie

    Western Thunderer
    Regarding the Airfix brakevan in post #71 above, I note that you’ve shaved off the handrails and replaced the roof with a thinner plastikard one. Will you be glazing it?
    Tim T
    That is the plan. Following in the footsteps of Geoff Kent in vol 3 of The 4mm Wagon, I’ve filed a rebate in the back of the inner ends leaving a window bar and frame thickness of about 0.7 mm. It would have been nice to go a bit further, but the ends were becoming a bit fragile, and I decided to stop there. I’ll add glazing after paint, and probably glaze the duckets with Kristal Klear.

    IMG_2735.jpeg

    I’ve had a marathon session to fit handrails today. This one is going to be one of the early lots, with two part vertical handrails and horizontal end handrails that fit in between the two parts. These were awkward to fit and looked odd, because the handrails slanted inwards towards the ends. Eventually I found evidence that these handrails were actually kinked to run parallel to the concrete end weights, some from the photo collection of preserved vans on WT, and more of from this fabulous collection of photos and recollections on Flickr.

    The rest of the van is almost ready for paint. Looking at these photos though, I realise I need to add the door safety rails.

    IMG_2738.jpeg
    IMG_2732.jpeg

    Richard
     
    Barnard Castle, and phantom incursion
  • Gadgie

    Western Thunderer
    While I have made some progress on the tank wagons in recent weeks, I have given in to my stash of aircraft kits and so they have been evicted by a 1/48 Phantom FGR2. One of my formative experiences as a small child was being taken to air shows, and I can recall hiding under a chair as one of these terrifyingly noisy machines went into a vertical climb directly above RAF Valley sometime in the 1970s. So I’ve been enjoying making one.

    But today I’ve been to visit my friend Richard Nice with the aim of learning how to operate his model of Barnard Castle, which is the successor to Stainmore Summit and will be appearing at ExpoEM north in a few weeks time. It is an interesting station layout, with a single through platform face on the busy, and double track, Stainmore route. So there is plenty of opportunity for conflicting moves and general mayhem. Fortunately there are working signals, which are interlocked with the points.

    A couple of not great photos. The first shows the platform and multiplicity of goods loops.

    IMG_3263.jpeg

    The second shows off Rich’s scenic work and the magnificent (and working) gantry at the eastern end of the station,

    IMG_3264.jpeg
    Do come and say hello at Wakefield, and before that we are taking South Pelaw to Railex NE. Hopefully the weather will have cooled off by then.

    Richard
     
    Dog’s breakfast
  • Gadgie

    Western Thunderer
    The Phantom has gone away for the time being, and work on various wagons has resumed over recent weeks. There are now three 35T tank wagons awaiting a warm day so they can be painted. The main topic of this post however, is a package of four Heljan Dogfish that I picked up ludicrously cheaply at Railex NE. I’ve wanted to do a deep dive into Engineers’ wagons for a while, and this seemed like an excellent way in.

    You know there is a but coming … and you are right. They are lovely models in many respects, but conversion to EM is not straightforward as the Heljan axles are shorter than Gibsons so a drop in replacement doesn’t work. I ended up drilling all the way through, and inserting some of my dwindling stock of Romford shoulderless bearings, they will pass muster as roller bearings I think. On three of the wagons, the flimsy plastic handrails were broken (hence the bargain price), but that was easily fixed with .5mm wire. The coupling mount was awkward to remove, but I prevailed in the end. Then it was fairly straightforward to fit couplings, vac pipe, and lamp irons on the correct side.

    IMG_3446.jpeg

    At this point several potential compromises start to emerge. Some have been critical of the way the stanchions look, and in MRJ 163 Steve Hall replaced them with plastic section in his model. I can live with the Heljan mouldings. I can just about live with the rather undernourished springs and axleboxes, but the other three are going to have replacements. But could I live with the missing rivets on the solar and buffer beam? I thought I could, but then realised I couldn’t. I tried some Railtec rivet transfers, but these were a bit weedy, so this evening I went down the tiny cubes of plasticard route. It went surprisingly well, with both ends and one side completed without major drama, helped along with some chilled tunes from the Peatbog Faeries and a glass of red. The next question is whether the handwheels should stay or not …

    IMG_3449.jpeg

    As usual, I’m left wondering whether this is a good use of time. Should I go further? Will anyone apart from me actually notice, or care? I suppose at the end of the day I find this kind of thing deeply relaxing, and that makes it a good thing. And WT is a great place to indulge in group therapy for those of us afflicted by fear of compromise :)

    Richard
     
    Cats and dogs
  • Gadgie

    Western Thunderer
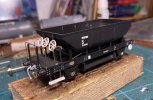
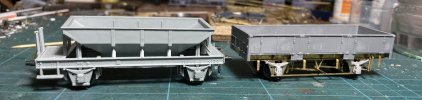
    A bit more progress over the last couple of evenings. The hopper is (at last) in place. This was tricky to do without distorting the chassis, so was done by placing the chassis on the inverted hopper, as indicated in the instructions, and fixing one joint at a time. It took ages to get right. However, nothing bad happened, and the wagon still sits nicely on my sheet of glass.

    It was hard to see how the three small stanchions on each side could be made to lie adjacent to the ribs on the hopper, so I chopped them off and replaced with plastic T section of unknown origin.

    IMG_3460.jpeg

    Brakes etc. next, and I’m hoping a package of lovely etched handwheels will arrive from Will’s workbench shortly. So far so good.

    Richard
     
    Painted fish
  • Gadgie

    Western Thunderer
    Well as promised in the previous post, some painting and decaling (is that actually a word?) has taken place. No weathering yet, but that will come. Decals are a mixture of Old Time Workshop, Railtec, and restored Woodhead. Here are the first two Heljan Dogfish. The olive green one has kept its Heljan numbers.

    IMG_3641.jpeg

    The Will’s Workbench hand wheels are very fine. Here is the first Catfish, and a vacuum fitted Grampus.

    IMG_3642.jpeg

    Meanwhile, there are some more items of departmental stock taking shape on the bench. Another Catfish, a Grampus on a (lovely) Rumney Models chassis, and a 3D print of an LNER Ballast Brake purchased from eBay — which is very fine, but lacking brakes. I may rebuild beneath the solebar.

    IMG_3644.jpeg

    IMG_3645.jpeg

    Richard (edited to include photos … doh!)
     
    Ballast brake New
  • Gadgie

    Western Thunderer
    So I decided to rebuild the 3D printed ballast brake below the solebar. The truss rods and steps were quite wobbly, and the axle boxes not quite right. A few minutes with a damp razor saw (I don’t think resin dust is good to breathe) achieved the desired result.

    IMG_3654.jpeg

    A 60 thou plasticard floor was cut out, and MJT W-irons glued in place. This was then screwed into plasticard cross members.

    IMG_3658.jpeg

    And, more by luck than judgement, the new floor is both level and at just the right height, at least compared to a randomly selected Catfish. One day I will make a buffer height tool.

    IMG_3657.jpeg

    Brakes, truss rods, axlebox and spring castings, and steps will be next.

    I’m wondering about adding some internal detail. According to Peter Tatlow’s book, these vans had a stove in each compartment, as well as storage boxes, a table, and, in some cases, beds in the larger space. I suspect any internal detail will be more visible than in, say, a BR standard brake van by virtue of the windows, though photographic evidence suggests these were typically quite filthy.

    Richard
     
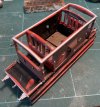
    Ballast brake New
  • Gadgie

    Western Thunderer
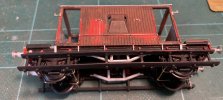
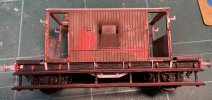
    The ballast brake now has a more complete chassis, with straight truss rods, axle boxes, springs, and brakes.
    IMG_3666.jpeg
    IMG_3667.jpeg

    I’ve also decided I can’t live with window frames bulging outwards, so these are being replaced with plastic strip.
    IMG_3665.jpeg
    Paul Bartlett’s photos (thank you Paul!) show several different configurations of window frame, and I presume that the originals were replaced as they rotted, so some room for manoeuvre here.

    Next step will be, er, steps!

    Richard
     
    Top