Ian Rathbone's Workshop

Ian Rathbone

Western Thunderer
The first stage of cleaning, as part of construction, is to physically scrape away excess solder and any green or white deposits from excess flux using whatever suits the situation - scalpel, fg brush, dental scraper etc. When I consider it ready for painting the next stage is to use a detergent to thoroughly clean it. I use a floor cleaner as it has no lanolin in it. A detergent is a ‘wetting agent’ in that it reduces the surface tension of the water, allowing it to get underneath dirt and wash it off. It is also alkaline so may help neutralise an acid flux. I use an ordinary 1” paint brush to apply a strong solution. The brush is quite stiff but its bristles are long enough to avoid damage to lamp brackets etc. A good rinse follows.

The next stage is dry the model and further check for foreign bodies. I then brush on a neat limescale remover which will remove the tarnish and clean the brass. Now the brass does not need to be shiny, I do this stage so that any further foreign bodies show up better. An alternative for this stage is to use ‘Barkeepers Friend’ which comes as an abrasive powder that cleans the brass but leaves a dull finish (but also needs careful washing off). Rinse again.

Finally a check for hard water deposits, wipe over with cellulose thinners (or white spirit) to remove any finger grease, and that’s it. Gloved hands from now on.

Ian R

PS. There is a good book that I know of.
 

sjp23480

Western Thunderer
Ian,

Thank you so much for explaining your process.

You have a couple of extra stages to my existing process.

I use a suede brush (with brass bristles) to do the initial cleanup followed by a good scrub with a toothbrush and Ajax powder (is this still avialable?). Which I guess this is similar to your limescale remover - but like barkeepers friend, it needs to be thoroughly rinsed off.

I haven't rinsed with cellulose thinners. That will be a new stage in my future process as I have noticed some issues with paint adhering, which may be due to my mucky paws and not handling with gloved hands.

Thanks for your reading recommendation - is this your Wild Swan book? I will look out for a copy.

Thanks again,
Steve
 

Ian Rathbone

Western Thunderer
Following on from my last Scot post. I found a few more spots needing attention on various bits so it was a rub down and partial re sprays, then a further 24hr drying time.

The next stage was painting the cab roof and smoke box, in isolation. Why? The principal reason is that the cab roof, being basically rectangular, is easy to mask from the green. Why the smoke box, well having mixed up some black paint for a small cab roof there was enough left over, and the smoke box is easy to mask off too.

After another 24hrs curing time I masked off the cab roof and smoke box, and sprayed the rest of the loco superstructure plus the green parts of the tender, splashers, valances and sand boxes. Painting in this order makes for easier masking. Meanwhile I finished the backhead and gave it a first coat of brushed enamel black.

24 hours on and we have this, all green parts of the tender and footplate unit masked off -

IMG_7777.jpeg

Finally I mixed a large quantity of black paint and sprayed all other parts. Well, except for the cab interior, which is difficult to spray. That will be a gentle brush on job while listening to some smooth music, very therapeutic.

IMG_7779.jpeg

The buffer beams will need a grey undercoat before the red goes on, and the cylinders and motion bracket will need tidying up.

Ian R
 

Ian Rathbone

Western Thunderer
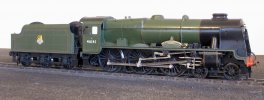
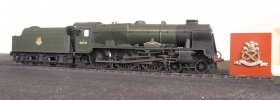
The Scot is cosmetically complete. The chip I put in, in order to run it at the Warley MRC open day, was kaput so it has not run beyond my 3’ test track.

IMG_7827.jpeg


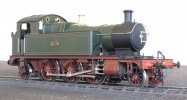
Also during December I did my fourth partial repaint of a Masterpiece early GW 45xx. They only made a few of these (single figures) and I know Warren has done one, so there are not many originals left!

IMG_7804.jpeg

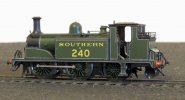
In 4mm I painted another ex LBSC D1, built by Mike Edge.


IMG_7802.jpeg

And, a first for me, a wagon! As a favour for an 82G colleague.

IMG_7818.jpeg

Ian R
 

Ian Rathbone

Western Thunderer
Since my last post my Scot has gained a new chip and, after some adjustments to the bogie, belted around Bucks Hill with seven coaches in tow. I managed a phone snapshot -

IMG_20250426_161656_760.jpeg

A few other things have emerged from the workshop, first a Fowler 2-6-4T in early BR livery with the lower profile bunker lining and PC set below the number. The valance lining on these is a bit of a challenge as it goes in and out as well as up and down.IMG_7902.jpeg

Next a straight forward Brit. It is as supplied to the Western Region from Crewe so has red backed name plates and trademark black rims to the buffer housings. This engine never received the WR modified smoke deflectors.

IMG_7900.jpeg

Both the above were built by James Bryan.

Ian R
 

Ian Rathbone

Western Thunderer
A few recent paint jobs, and not so recent. First a nice crimson Duchess, lined in gold and red, built by Rob Bishop.

IMG_7897.jpeg

Next a caricature of an A4. This is a grp body on a Bassett Lowke chassis, the loco is not too bad but the tender bears little resemblance to the real thing. It came to me in BR Blue, which I couldn’t strip off, so much sanding and cursing.

IMG_7916.jpeg

Next a 4mm TPO built by Martin Needham from his own etchings. I painted the basic body shell before it went back for finishing. He recently emailed me his photo of the completed coach (now available as a kit).

image0.jpeg

Most recent, finished today is this LNER C6, scratch built by Bill Davis.

IMG_7937.jpeg

Ian R
 

Bulldog3444

Active Member
I have a brief correction on behalf of Martin Needham (who isn't on WT) concerning the terrific Great Western TPO shown in the post above.

To save disappointment Martin has asked me to point out that the TPO is not available as a kit. There had originally been thoughts of doing so, but it was then realised that there would need to be amendments to the artwork, so the idea wasn't progressed.

Ian Harrison
 

Ian Rathbone

Western Thunderer
I built this engine 31 years ago for a customer. Before it was painted he had it back to test, but also had it grit blasted. Now, it’s a Mitchell kit and all the external skin is half etched so the grit blasting distorted the paper thin brass. I did what I could to remedy it and then painted it and duly delivered it. Since then it had three owners, got some weathering, different tender wheels, milled rods, was converted to American pick-up by shorting the wheels on one side, and had a BR emblem placed over the original GW shirt button. Some years ago I bought it back and started the long process of rebuilding it, alongside all my other projects.

I acquired new etchings for the firebox and smokebox, and the tender body. The boiler was cut from brass sheet using an original as a pattern - this gave me a boiler without oversized etched boiler bands. I also acquired a cast motion bracket, eccentrics and expansion links so I could simulate a little of the inside motion. This took me about 9 months to work out and execute. So, over about six years I’ve been rebuilding it, an hour here and an hour there.

IMG_0028.jpegIMG_0022.jpegIMG_0024.jpeg

The tender is riding a little high, I think its new wheels are larger than the original, so more mods to come.

Ian R
 
Last edited:

Ian Rathbone

Western Thunderer
I’ve been painting a mixed bag of GWR coaches recently, l’d forgotten how long they would take. The Concertina took two weeks - one colour per side per day plus the interior. I also had to make up the corridor connectors, only 22 pinned joints per coach!

A 12 wheel Restaurant Car

IMG_0028.jpeg

A Concertina Brake Third

IMG_0010.jpeg

A four wheel TPO van in pre 1905 livery. The squiggle in the centre panel is an over-the-top VR cypher.
IMG_0025.jpeg

And, finally a Dia. H16 Restaurant. I’ve never seen a photo of the prototype.

IMG_0024.jpeg

Ian R
 

Pete_S

Western Thunderer
I’ve never seen a photo of the prototype

There's a mediocre shot of 9540 at Swindon in Russell's Coaches Appendix Vol 2 (Fig 159, p.64) allegedly taken pre WW1, although I have doubts on the date.
The only thing I can see different to your excellent rendition is the seat allocation (30) that's in the endmost cream panel. When this was introduced I've never been able to nail down other than 'sometime in the Lake era' i.e. post 1912.

Pete Speller
ex-C&W Dept GWS Didcot.
 

Ian Rathbone

Western Thunderer
I have just finished painting this P4 gauge L11, beautifully built by Martin Finney from his own kit. Sadly he was unable to see it in its LSWR livery. It will be returned to members of the Semley group for completion.


IMG_0008.jpeg

This is not his last loco as there is one more to come to me.

A couple of years ago I painted this Invalid Saloon for him, again built from his own kit - it was just a set of bits then so I couldn’t photograph it. I have it back for colour matching for another coach of his that I am painting. I can paint the wheels now I’ve got it.

IMG_0044.jpeg


Meanwhile I have this to paint, a 7mm NER 0-4-4T ‘BTP’, later LNER G6. A strange class of engines built in batches at different places, and with four different wheel sizes and many other detail differences. The kit was built by Mike Edge.

IMG_0045.jpeg


More to follow.

Ian R
 

Ian Rathbone

Western Thunderer
So, I stripped it down and gave it a wash with a floor cleaning solution, a good rinse and dried with a hair dryer and air brush. I blackened the tyre faces and masked the treads with tape. After an overnight rest on top of the central heating boiler I masked the motor/gearbox and then sprayed a red oxide etching primer.

IMG_0050.jpegIMG_0051.jpeg


The brake tie rods, which were loose fitted, are held by the tweezers.

More later.

Ian R
 

Daddyman

Western Thunderer
Interesting to see the springs behind the splashers on the BTP - so rarely fitted by modellers (understandably). How has Mike done it?
 
Last edited:

RichardG

Western Thunderer
Top