7mm Loose Ends

Dog Star

Western Thunderer
To make ride height adjustment a little easier, a couple of notches indicate midpoint, helping set the ride height...

Now that is a nice touch and one which I hope other kit designers will plagarise.

Thank you for that idea.
 

Dog Star

Western Thunderer
Just checked with your photos under the heading Bogies in Wonderland... the bolster of the Commonwealth bogie is very, very, similar to the Gresley bogie bolster. The photo of the CW parts shows the ring, on top of the bolster, which is the only contact point between bolster and floor moulding. What a pity that NQLTRT has not produced a representation of a prototype bogie pivot casting (bolted to the underneath of the transoms of the underframe).

regards, Graham
 

28ten

Guv'nor
Slightly frustrating day today looking after sickly kids :( anyway thinking time is never bad and I thought to hedge my bets I would etch two lots of horn guides with different wire spacing. There will also be a second set of 'sidepods' and ends to fit easybuild MK1 sides should anybody wish to attempt fitting them.
guides.JPG
 

28ten

Guv'nor
Just checked with your photos under the heading Bogies in Wonderland... the bolster of the Commonwealth bogie is very, very, similar to the Gresley bogie bolster. The photo of the CW parts shows the ring, on top of the bolster, which is the only contact point between bolster and floor moulding. What a pity that NQLTRT has not produced a representation of a prototype bogie pivot casting (bolted to the underneath of the transoms of the underframe).

regards, Graham
The bolster fitting to the resin floor, obviously once you start looking at sprung bogies the thought of reducing rock n roll needed for rigid bogies comes to mind. iirc easybuild supply an aluminum space which the bolster acts upon, but there isnt much contact area.
 

28ten

Guv'nor
I wasnt in the mood for bolsters :)) so I thought I would try and get to first base with the Wessie cabs, there is quite a bit still to do, like getting the drivers hands on the controls:) and it all needs blending, but its going in the right direction.
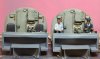
IMG_0767.jpg
 

28ten

Guv'nor
Its been a rubbish week for getting anything done, but i managed to solder the brake rods to one bogie :rolleyes: I know Dan is horrified by this but I use a milled brass strip soldered across all the brake gear. Two reasons for this - the rod is gives a nice straight line, and secondly it is much stronger. Once the bolster is on and its painted nobody has ever noticed;)
Its always a big challenge to make a model sufficiently robust for regular handling, and the bogie is one of the places that does tend to suffer and broken/missing/crooked bits look terrible. if im feeling really belt and braces I attach a cross piece between the outer brake hangers, its invisible once the bogie is in place, but it adds a lot of strength.


IMG_0784.jpg

IMG_0785.jpg
 

Phill Dyson

Western Thunderer
I know Dan is horrified by this but I use a milled brass strip soldered across all the brake gear. Two reasons for this - the rod is gives a nice straight line, and secondly it is much stronger.

While I admire the superfine detail of some modelers :bowdown: I also very much like usable working models with the inevitable compromises that they need to work well IMO :):thumbs::thumbs::thumbs:
 

28ten

Guv'nor
While I admire the superfine detail of some modelers :bowdown: I also very much like usable working models with the inevitable compromises that they need to work well IMO :):thumbs::thumbs::thumbs:
Having built several, i can safely say the thin etch does not stand up to a lot of abuse, and its even harder to get them all to line up.
As i said its been a crap week and i have noticed something else that needs doing ( sorry about the shaky phone shot)
all the seats have moulding marks and i need to find a way to fill them that wont require sanding every damn seat, as there is over 100 seats to do...... it might be xmas 2015 finishing them at this rate
IMG_0786.jpg
 

mickoo

Western Thunderer
Stick a piece of 5thou plasticard, the same width of the seat between the armrests, over the holes and blend with the seat where it folds into the headrest? Tedious but not as much as filling and sanding
 

Dog Star

Western Thunderer
Stick a piece of 5thou plasticard, the same width of the seat between the armrests, over the holes and blend with the seat where it folds into the headrest?
There is a tendency for thin plastikard sheet - and that means five and ten thou - to "sink" into hollows over time. So if going this route then smear Milliput into the depression before fixing the plastic sheet.
 

Phill Dyson

Western Thunderer
First I make sure you can see them through the glazed windows of the trial assembled coach (Preferably with fully painted interior as this will help darken the interior). If they do show I would be tempted to glue paper over the effected cushions with PVA & paint once dry :)
 

Alan

Western Thunderer
I agree with Phill, check that it will be seen when in the coach. Also I don't know if you are going to put passengers into your coaches, if you are that will take the need away from doing some of them.
 

28ten

Guv'nor
I agree with Phill, check that it will be seen when in the coach. Also I don't know if you are going to put passengers into your coaches, if you are that will take the need away from doing some of them.
Passengers? no way am i painting that many :))

I think i shall try some of this http://www.creativemodels.co.uk/perfect_plastic_putty-p-28808.html its water soluble so I should be able to smooth it easily.
Paper soaked in pva is a good idea Phill :thumbs:
 

djparkins

Western Thunderer
Its a fairly common problem that you also get in some etched kits unless the designer has used an inner skin for the partition

Ah Well Cynric - not all designers are the same! Can I ask why the seat cushioning seems to slope downwards towards the front of the seat? - it would be quite dodgy travelling on those, especially with your back to the loco! The central arm/headrests seem to be the wrong shape for Mk.1 stock of that era.

Regards,

DJP
 

djparkins

Western Thunderer
Passengers? no way am i painting that many :))

I think i shall try some of this http://www.creativemodels.co.uk/perfect_plastic_putty-p-28808.html its water soluble so I should be able to smooth it easily.
Paper soaked in pva is a good idea Phill :thumbs:

Why not paint them using one of the Tamiya texture paints as an base colour. You can apply a second coat very quickly after the first and it would hide that. Then you also have a textured [upholstered] surface on which to paint them in the correct finishing colour.
 

28ten

Guv'nor
Ah Well Cynric - not all designers are the same! Can I ask why the seat cushioning seems to slope downwards towards the front of the seat? - it would be quite dodgy travelling on those, especially with your back to the loco! The central arm/headrests seem to be the wrong shape for Mk.1 stock of that era.

Regards,

DJP

They represent well worn seats in NSE days :)
I do like the inner skins, they solve a lot of little problems.
 

28ten

Guv'nor
I need to make sure all the buffers and kaydees line up for these coaches, so its jig time. Very simple, the holes are the correct height and spacing, I could probably turn something to fit the holes, but its pretty self explanatory. I would imagine something similar would work for auto couplings.
IMG_0794.jpg

In action IMG_0795.jpg

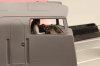
A quick couple of shots showing the crew being test fitted. The effort to sand the window surrounds was worth it imho
IMG_0797.jpg

IMG_0798.jpg

Finally showing the bogie. the rods just clear the valance, but there is further work for Mr Proxxon to remove some of the brake casting IMG_0800.jpg
 
Top