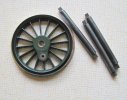
LSWR G6 0-6-0 tank engine

michael mott

Western Thunderer
I'm surprised that no one has said anything about the madness of me turning down a piece of bronze from 2.414" down to 1.765" and skimming the inside too. Maybe people just thought it :).
Jon when it comes to solving our problems in the model world I am of the opinion that whatever works is the right way for each of us. So I am not surprised that we don’t think you are mad……join the club
Michael
 

Jon Nazareth

Western Thunderer
Well, I paid my money and I took my choice. I chose RAL 6009 Fir Green instead of RAL 6012 Black Green and, to my eyes, it’s too light, heigh bloomin’ ho .

Jon
 

Yorkshire Dave

Western Thunderer
Don't despair or order another green yet. :)

Try a sample piece with a matt black primer and then the fir green. This may darken the green as the matt primer will not reflect light back through the top coat.

If you use a gloss black primer this will intensify the colour as it reflects the light back through the top coat - which I assume is not what you want.
 

Jon Nazareth

Western Thunderer
Dave
I’ve already painted the wheels, not an easy thing to do. Cast wheels are much easier to deal with as most of the paint buildup is machined away.
What I intend to do now is to follow your advice and try a few experiments. I have some Halfords Matt black which I can use as a primer. If that doesn’t work, I’ll have buy a tin of proper black primer.

Jon
 

Jon Nazareth

Western Thunderer
The spokes and middle of the wheels are painted green but the wheel rim is painted black. There was an article in the Model Engineer magazine called, Art and Engineering: Painting and Lining Models. It was written by Ashley Best and he painted his tyres by mounting the wheels in the lathe. I thought that I still had the set of articles but I can only find Vol. 207, No. 4407 1-14 July 2011. I think, but am not entirely sure, that the articles are in magazines Nos. 4404, 4405 and 4406. I've looked on ebay but the contents of the individual magazines are not listed. If anyone knows of these articles or can point me in the direction of the right magazine that contains 'Lining Wheels', I'd very much appreciate it.

Jon
 

mswjr

Western Thunderer
If it is of any help, When i did this on a 5 inch gauge loco , I cut out some thin plasticard with a circle cutter ( e bay ) , placed this on the wheel, and spay painted the rim in black, when dry i put them in my lathe, and lined them with a small brush whilst resting on the tool post. It was easier than expected.
 

Jon Nazareth

Western Thunderer
As the axles will be the only exposed steel items on this loco, I was going to paint them. Until, of course, I realised that if I did that, they wouldn’t pass through the bearings. How do other builders treat their axles?

Jon
 

Jon Nazareth

Western Thunderer
Following on from the discussion on preventing axles going rusty in the Questions or Queries section.

I found the article on simple copper plating on the net. If anyone is interested, by typing, High Quality (and safe) Copper Plating, the article will come up. It is under the heading of Autodesk Instructables written by A Steingrube. Interestingly enough, he doesn't mention plating on steel. maybe the scientists on this forum could add something here.

I did use this method a very long time ago to plate a chimney cap. The base material was brass and it came out really well.

Jon
 

Jon Nazareth

Western Thunderer
Here I managed to paint the rim of a wheel well, I painted all six wheel rims but this is the best one. I've also blackened the axles and darkened the brass inserts with the same gun blue. I tried cutting out a disc to fit the wheel as a mask but then I had to cut a hole in the disc so that it sat flat on the wheel. The second hole was because the centre of the wheel is raised. That idea didn't work and so, I mounted the wheels one at a time in the three jaw using soft jaws on the lathe. I then put the lathe into back gear and started her up but in reverse and painted the rim that way. The first two attempts didn't work and I ended up using white spirits to remove the enamel paint.

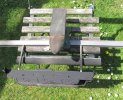
I also painted the outsides of the frames in green. This is How I applied the black primer, in the garden on a very hot day. As it was so hot, I thought that the paint wold have dried off/hardened off enough for it to take the top coat, WRONG! The two layers of paint melded slightly and reduced the finish on the green to a semi satin. I decided to leave it like that as it would all be sprayed with a matt varnish later on. Which brings me onto another matter. It has always seemed a shame to me that if using transfers, they are always applied over a gloss finish and then, because we don't want the transfer backing to show, we spray over with a matt varnish which hides it. Maybe not for wagons and the like but, Locomotives were always outshopped, I think, in a gloss finish and it seems a shame that we can't do the same ourselves and still have the transfers looking as if they have been sign written by hand. Maybe there is a way but, I've not come across it, yet. Can anyone out there answer this question?

Jon

IMG_5430.JPGIMG_5420-001.JPG
 

Paul Tomlinson

Western Thunderer
Jon, we apply transfers over a gloss finish to avoid the "silvering" under the carrier film - there's nothing to stop you then overpainting in gloss varnish - either an overall sprayed coat, or hand-applied by fine brush to only the lettering, if you want to show some "relief".
But have you thought about getting a pro to paint the lettering? I remember some freelance stock in MRJ, lettered by Alan Brackenborough, which IMO looked very fine indeed.
 

Mike W

Western Thunderer
Alan Brackenborough was surely the expert at lettering and I've never seen his equal. I prefer the old varnish fix transfers or methfix if you can get them, but I know my limitations and prefer to get the job done. It would take a professional minutes to apply them and varnish.
 

Jon Nazareth

Western Thunderer
I have looked in my books to no avail. Can anyone tell me, please, how wide and how thick boiler bands were?

Jon
 

NickB

Western Thunderer
On the T3 class, they were 2 x 3/16 in. I don't have exact dimensions for the G6, but same designer, same works, etc. Hope that helps.

Nick
 

NickB

Western Thunderer
Paul,

No apology needed! Different companies had different practices, Nine Elms had a habit of building things "heavy" (doubtless to the anguish of the civil engineer who had to cope with the axle loadings).

Nick
 

40057

Western Thunderer
Haha - as long it's a Gallic shrug...


The problem with colour is it's so subjective and the descriptions are based on what the viewer saw/perceived in the lighting conditions at the time.

Even more difficult with pre-grouping colours as there's no-one around today who can remember. The closest we are likely to get is from early preserved steam locos such as Gladstone and including those by preserved by British Rail in the 1950's and 60s which would have been repainted in their workshops by people (albeit elderly) who had worked on the railways from the pre-grouping days. Later colour matching would be to those samples.

At the end of the day I'd go with what looks right to your eyes.

I'm afraid I'm one of those modellers who looks a several colour photos (and colour plates for pre-group) knowing there will be a tolerance for processing and computer imaging and just make it up from there. Since most of my locos and rolling stock is weathered no-one will know. On the other hand it sure fire gets the pedants going - much to my amusement :D.

There’s no-one around who can remember. True, but the models made at the time still exist, at least many of them do. I am always surprised that this contemporary record of liveries is widely ignored, including by modellers. I would suggest it’s amongst the best information available.

Some questions, of course. Was the colour on the model right in the first place? For good quality contemporary models such as those by Bing for Bassett-Lowke, I would trust the manufacturer to have generally got the colour correct. There will have been mistakes, for sure, as there are in some modern models. But getting a paint sample from the railway company to match is likely to have been easy, and the railway companies were generally only to happy to have models of their trains sold to potential travellers. Getting the colour wrong would surely affect sales of the model, so there was every incentive to get it right.

Has the colour of the paint changed over time? Possibly, faded for example if the model has been left in sunlight. But it is usually obvious if there has been significant fading. What about the effect of varnish? This can have a dramatic effect as it will have darkened and yellowed over time. But look underneath the model. There is every chance of finding some paint that did not get varnished, probably hasn’t faded either — so is very likely the authentic colour.

I bought the Caledonian liveries book. A huge and lengthy discussion of what colour blue was used. Contemporary exhibition models are referred to, but not the regular models made by Bing, Leeds Model Company (LMC) etc. When I needed ‘Caledonian Blue’ for repainting a model I chose a colour matched to paint on the underside of a Bing model and an LMC model, both made in 1921/22 and both the same shade. My loco is a much darker blue than is often applied to modern models. (Models made in 1921/22 will have copied the paler blue used after 1906, but it’s still not ‘pale blue’).

I don’t believe there was a contemporary commercial model wearing the livery for the loco in this thread. But the principle I think is sound. Look to the models of the day for livery guidance. Some of them will be in paint supplied by the full-size railway company, or from the same supplier as was used by the full-size railway company. It doesn’t get more authentic than that.
 
Top