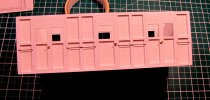
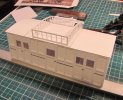
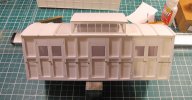
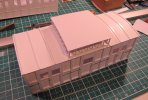
LSWR Passenger Luggage and Break Van C1859

Jon Nazareth

Western Thunderer
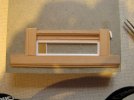
I've finished the jig and the first piece of framing is in place ready for the oven. I have done this before in the oven but can't remember what to set the oven temperature too nor the time. Can anyone suggest a temperature and time?

Jon
 

simond

Western Thunderer
Jon,

given that boiling water softens styrene sufficiently to form, I’d be aiming for 90-100C.

I think that the necessary time would depend on the thickness, ideally, you’ll want the internal temperature to be fairly close to the outside temperature so it doesn’t build in stresses. I think you’ll have to try it to see.

Put your results on here - it’ll help others, and you’ll be able to find them next time!

good luck!
Simon
 

Jon Nazareth

Western Thunderer
Here is the result after three attempts. My oven is a fan oven and starts at 150. I started with 150 for 10 minutes but it wasn't for long enough and didn't work. I then tried it for 15 minutes at the same temperature but not quite there. Finally 150 degrees at 20 minutes did the trick although its a little twisted. That may have been because I didn't fit the styrene in place properly. I'll have another go tomorrow to make sure all is okay before I use the rebated parts.

Jon

IMG_5248.JPG
 

simond

Western Thunderer
Jon,

don’t know if your cams are pressing directly on the plastic, but try a slip of greyboard or other card to spread the load, perhaps?
 

Jon Nazareth

Western Thunderer
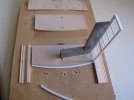
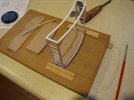
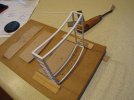
I've made a start on assembling the side windows of the lantern. I made up a little jig to hold the parts as squarely as I could get them while applying tiny amounts of mek-pak. Once dry, I lifted the sides from the jig and applied for fluid to make sure that everything was fixed. The piece of brass is a spacer that I should have made a little smaller and then the glazing bars would have been equally spaced. The second picture shows the components of the sides of the lantern assembled. I now have to work out how I'm going to fix the glazing bars to the curved pieces and those to the sides.

Jon


IMG_5262.JPGIMG_5264.JPG
 

Jon Nazareth

Western Thunderer
More work on the lantern.


IMG_5268.JPG
I shortened the length of the original former/jig and glued on two pieces of wood to act as locators for the sides of the lantern. In this picture the side of the lantern is placed in the groove and the first curved lantern member aligned and spotted in with a tiny drop of Mek-Pak. The square is there to keep the side upright.


IMG_5269.JPG
Here the side has been moved forward and a second roof member is lined up and spotted in with a tiny drop of M-P. The square is to hold everything down.

IMG_5271.JPG
The third component is positioned, the frame set back and the joint spotted with M-P.

IMG_5272.JPG
Once again, the whole thing has been moved forward and spotted with M-P. I only weighted the frame if it looked out of line or may have been in danger of falling over. Irrespective of the tiny amounts of M-P that were applied, the frame still stuck to the jig and had to be prized off. This was all a bit annoying but, I don't think that there is a substance that it wouldn't have stuck to. When the various joints had dried and could be safely lifted, I then went around the frame with more M-P in order to strengthen the joints. The glazing bars for the ends will be the next job.

Jon
 

Jon Nazareth

Western Thunderer
Fiddly or what!!
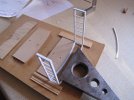
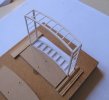
I placed the frame in the jig just to hold it steady because it was so light that it kept moving about. I was going to use the drawing of the end stuck down on the jig as a guide but this proved to be inaccurate. With the first end that I tackled, I fixed the centre glazing bar and fanned out from that. That one sentence took seconds to write but that first end took hours. The second end, I cut a spacer and worked from the outside in. It still took a good few hours but a lot of that time was taken up with cutting the bars to length. To fix the centre bar equidistant, I measured and cut another spacer and used that. The whole doesn't look too bad even if I do say so myself.
There's a bit of filling to do and then a good clean up of the whole.

Jon

IMG_5274.JPGIMG_5275.JPG
 

Jon Nazareth

Western Thunderer
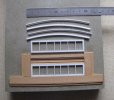
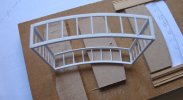
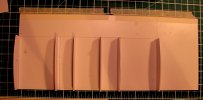
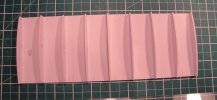
I'm trying a different way to make a roof for the brake van. I've scored a sheet of styrene of a size that will drop in between the sides and then stuck these curved, for want of a better word, ribs onto it. They are spaced oddly to avoid the window openings. If I'd have given it all more thought, they would have been shallower and evenly spaced. I'm going to use a piece of .75mm thick styrene sheet for the roof. I was going to use .5mm but I think that the slightly thicker piece will be more self supporting. All that I have to do now is find something with a gentle curve to form the roof on before it's fixed in place. Tomorrow, I'll remove the tape and snap the former along the score lines, hopefully. And, yes, no forward planning has taken place at all! :D

Jon

IMG_5280.JPG
 

Jon Nazareth

Western Thunderer
I tried a dummy run this morning only to find that I'd made the ribs too tall! I snapped them off to reduce them and while doing so, I decided to make a few more. It does look a lot neater this way but the proof of the pudding will be tomorrow morning when I check to see if it fits.

Jon
IMG_5281-002.JPG
 

simond

Western Thunderer
For styrene roofs, I have an old tin that contained a bottle of something golden and warming :).

I use a pair of MrsD’s laddered tights, which live in the tin when not being used, to hold the cut plasticard to the tin. The tin has a seam, which provides a useful vertical edge against which to align the plasticard. Boiling water in the tin and poured over the plasticard, wait for it to cool. Job done. Might need to adapt a bit for larger scales, but same principle should see you right.

if you can get it curved a little bit tight, before you stick it to the ribs, it’ll work well.

hth
Simon
 

Jon Nazareth

Western Thunderer
For styrene roofs, I have an old tin that contained a bottle of something golden and warming :).

I use a pair of MrsD’s laddered tights, which live in the tin when not being used, to hold the cut plasticard to the tin. The tin has a seam, which provides a useful vertical edge against which to align the plasticard. Boiling water in the tin and poured over the plasticard, wait for it to cool. Job done. Might need to adapt a bit for larger scales, but same principle should see you right.

if you can get it curved a little bit tight, before you stick it to the ribs, it’ll work well.

hth
Simon
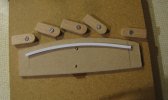
I’ve had a good look around the house but, I couldn’t find anything with a large enough diameter/radius that I could use. I did think that an old five gallon oil tin may have done the trick, if I had one. But then a lot of boiling water would have been needed.

Jon
 

simond

Western Thunderer
I suppose you could strap the plastic to whatever former you can find, and use a hot air gun, or do it outside and just pour the water on. What I found to be important was that the strapping provided an even pressure, string, for example, leaves lots of marks, and an uneven curve. Something like the tights - or elastic bandage - is much better.
 

Jon Nazareth

Western Thunderer
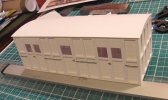
More work on the roof. I've cut out the glazing but that won't go in until the roof has been painted. The strips across the roof are made up from strips of styrene, a rectangular piece first .5 x 2.5mm and then a 2mm half round fixed on top of that. The roof on the lantern is made up from a piece of aluminium sheet with two ribs fixed with araldite to the underside and a sheet of drawing paper pasted to the top surface. I've just noticed that the lantern roof is not fully down and a gap is showing, jus in case someone has eagle eyes.

Jon

IMG_5285.JPGIMG_5286.JPG
 

Jon Nazareth

Western Thunderer
Will you be opening up a hole in the roof to let the light from the lantern to do its job?
Asking for a friend.
Michael
Hello Michael
The glazing will be blacked out and it won’t be possible to look down inside the van. Besides, I’ve had to put so much bracing inside to straighten up the walls that there wasn’t any room for internal detail like desk etc.

Jon
 
Top