Matt's workbench - current project: a potential change in modelling direction

matto21

Western Thunderer
I went away for a week with the family and a great time was had by all. What wasn't so great, however, was how much this derailed (pun intended) my enthusiasm and flow at the bench. Since getting back, I've struggled to get back into it, which is annoying!

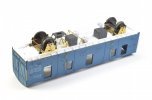
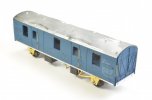
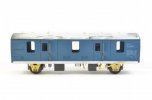
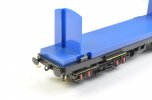
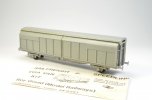
Despite this, I have pushed on with the CCT and fitted multiple, tiny plastic triangles to the solebars.

07 (1).jpg

I've also sanded down the very prominent roof ribs and fitted some more appropriate vents. Note the roof is actually moulded in transparent plastic.

06 (3).jpg

I've thought long and hard about the raised window frames. Despite being unprototypical, I'm keeping them in place. Removing them is more effort than I can face at the moment!

05 (3).jpg

Matt
 

matto21

Western Thunderer
Hi all,

Somewhat predictably I've lost all enthusiasm for my parcels projects, both SPV and CCT, so have done what all good modellers do - turned my attention to something different!

A few posts back I mentioned coaches. Once again I must reiterate that I'm no expert, but whereas before I had no interest, I do now.

I've started building up a small collection of Mk1's, but came to realise I can justify a few Mk2's as well - in particular the aircon variety.

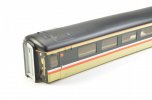
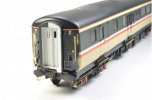
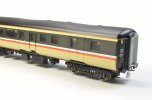
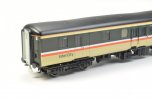
All my coaches will be blue/grey, however I picked up this intercity executive BSO at a bargain price from ebay. As an outlier, it made a good place to start practicing the modifications and details I intend replicating across all my Mk2's.

I initially looked at the Bachmann Mk2f's, but I'd need to remortgage the house just to buy a handful, even at used prices, so quickly settled on the Hornby Mk2e and f's. They're not as refined, but I have been able to buy a few at far more wallet friendly prices!

The first job was to remove the four lumps on the roof that are meant to represent the grab handles and replace them with wire:

BSO01.jpg

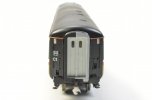
That done, I turned my attention to the bufferbeam steps. I pondered these for a while and considered leaving them off. But, having noticed them, I couldn't ignore them.

I read a thread where someone used some Stenson HEA steps, but in the end made my own from scrap etch folded and soldered together.

BSO02.jpg

A small detail, but hopefully worth the effort.

Lastly, I replaced the handrails with wire and added some cosmetic detail to the corridor connector (the outer one only).

BSO04.jpg

Please note that the body isn't clipped in place here.

I intend to repaint the body - the ends need patching up, as visible here - but I've also filled and sanded the moulding pips on the roof, and there's some scuffing on the bodysides too.

Matt
 

matto21

Western Thunderer
Small changes that make a big difference, and proper modelling to boot, Matt :)

Jon
Many thanks Jon, appreciate it!

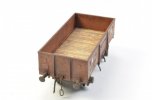
Limited time over the weekend with family duties and travelling back from the big smoke, however I found some time to finally finish the Parkside 13t wagon interior.

S.jpg

Also, I remember seeing these kits advertised in old copies of RM. I really wanted one but they were already unavailable by that time. So, when a lucky break on eBay turned up this built example, I couldn't resist for nostalgic reasons!

01.jpg

Matt
 

jonte

Western Thunderer
Many thanks Jon, appreciate it!

Limited time over the weekend with family duties and travelling back from the big smoke, however I found some time to finally finish the Parkside 13t wagon interior.

View attachment 213077

Also, I remember seeing these kits advertised in old copies of RM. I really wanted one but they were already unavailable by that time. So, when a lucky break on eBay turned up this built example, I couldn't resist for nostalgic reasons!

View attachment 213076

Matt

Congrats on your ‘win’, Matt. Looking forward to the finished version :thumbs:

Great finish on the open wagon, inside and out :)

Jon
 

matto21

Western Thunderer
Hi all,

My wife has been away with work leaving me on dad duties so progress has slowed right down. Having said that, the BSO has been repainted in full and transfers applied.

I wasn't going to bother doing anything to the printed on window bars, however decided to replace them with wire and I'm very glad I made the effort.

BSO007.jpg

BSO005.jpg

BSO006.jpg

Matt
 

matto21

Western Thunderer
A potential change in modelling direction:

Hi all,

I've long been aware of the OO/EM/P4 options, and have read all sort of information about the pros and cons of each over the years.

I've never been sufficiently motivated to change from OO but recently started wondering about it again. I found I was asking myself that given how much time and effort I (try to) put into my stock building, would changing to EM not be a good idea?

I subsequently joined the EMGS and purchased a B2B gauge and a length of track out of curiosity. I wasn't expecting much and I've never actually seen anything EM "in the flesh" before but I have to say that now I've compared the two, I can't unsee the narrow-ness of OO gauge!

P4 is, and would be, a step too far for me. While I appreciate its finesse, I can't say it's a viable option for me.

So, I stand on the verge of committing to EM. I'm sad to a point as I don't relish the thought of having to convert existing stock, especially some of those items where adjustments to brake gear etc will be difficult and destructive, but equally excited about this progression in my modelling.

IMG_20240524_181426_956.jpg

Matt
 

Lyndhurstman

Western Thunderer
Have fun, Matt. That’s Route 1. Although I work in P4, I do (still, after almost forty years of 18.83) have a small hankering for things that don’t need altering. There are some fine models in all three major 4mm gauges, and some excellent modellers too. Do what makes you happy.

Cheers

Jan
 

Hayfield1

Active Member
Matto

Looking at your posts on here converting to EM gauge will require nothing other than widening the gauge of your wheels, locos will be much the same if you model modern image

As for track, British Finescale turnout kits are simple to build, don't take very much time to build, best of all look very prototypical.

As you say 00 does look narrow gauge and sadly lets down some finely built models.

Just about to build a N gauge example for a contact. There is a tutorial video on the site and the builder films himself building a kit in just over 30 mins, having built an EM gauge example these kits are very easy to build with all the hard bits done for you
 

James Spooner

Western Thunderer
Matt,

Welcome to the band of EM modellers. One small suggestion, if I may? I have been modelling in EM for thirty years now but for much of that time ploughed a solitary furrow with little or no interaction with other modellers. A few years ago, perhaps two or three before Covid, I was asked if I wanted to attend an evening with my local EMGS area group. I did and have become a regular ever since. Apart from the friendships that come from a group like that, the different members all have a range of skills and knowledge which they are very happy to share and it has helped my confidence in modelling no end.

Nigel
 

Herb Garden

Western Thunderer
A potential change in modelling direction:

Hi all,

I've long been aware of the OO/EM/P4 options, and have read all sort of information about the pros and cons of each over the years.

I've never been sufficiently motivated to change from OO but recently started wondering about it again. I found I was asking myself that given how much time and effort I (try to) put into my stock building, would changing to EM not be a good idea?

I subsequently joined the EMGS and purchased a B2B gauge and a length of track out of curiosity. I wasn't expecting much and I've never actually seen anything EM "in the flesh" before but I have to say that now I've compared the two, I can't unsee the narrow-ness of OO gauge!

P4 is, and would be, a step too far for me. While I appreciate its finesse, I can't say it's a viable option for me.

So, I stand on the verge of committing to EM. I'm sad to a point as I don't relish the thought of having to convert existing stock, especially some of those items where adjustments to brake gear etc will be difficult and destructive, but equally excited about this progression in my modelling.

View attachment 216245

Matt

Matt,
I very much recognise the position you are in, as I was there 2 or so years ago.

The one thing I can say with all confidence is that it was so worth it making the change from 00 to EM. It is a daunting prospect all those conversions and new track but the look you can achieve is so much closer to the prototype.

But there is help along the way...

There are loads of conversion guides for RTR products on the EMGS website.

There's RTR track and limited points available from EMGS stores plus a range of kits for other point work

Most of the modern 00 models have wheel flanges that are finescale enough to match the EM profile so depending on the arrangement conversions can be quite easy.

Depending where you are based geographically there probably will be an EMGS area group who I'm sure will be very welcoming and supportive.

And finally there are plenty of us EMGS folks on WT who will be there to support. Speaking for myself you are most welcome to reach out for guidance or advice and I will endeavour to help all I can.

Crossing the Rubicon is worth doing!
 

jonte

Western Thunderer
Very pleased to read about your EM baptism, Matt, and may I wish you all the best with your venture.

I’ve dabbled with P4, and that’s about it, mainly because I find it difficult to commit to any single project as my multitude of threads will bear witness, rather than encountering hurdles that couldn’t be surmounted with a little faith, even for a modeller of my limitation.

I recall dipping my toe by purchasing a set of gauges, much like yourself Matt, with which I fashioned a turnout or two from simple PCB sleepers and lengths of bullhead from C&L, and it was a delight to see that they worked first time (the test consisted merely of me gently blowing a set of P4 wagon wheels across the frog and switch blades which rolled freely back and forth without any hint of the dreaded wheel drop). I then progressed to a turnout kit from C&L using butanone to ‘glue’ the chairs to the sleepers, which again, worked surprisingly well (although I preferred the robustness of the simple PCB version as the plastic kit developed a noticeable twist when moving the blades, although I figured that this would be eliminated once fixed down to the board. Sadly, I never got any further with a layout to test the theory).

I even got as far as rewheeling a wreck of a Bachmann pannier, bought cheaply of an internet auction site for the purpose, with Ultrascale wheels, which came ready fitted to their axles, which was surprisingly simple, despite the added complexity of resoldering the Bachmann coupling rods onto the wheels; but I needn’t have worried, an oil dipped section of fag paper assisting admirably. To my surprise it worked:


Seen here on a length of Peco flexi track cut in half then spaced to 18.83 using said gauge as I was out of track ( was this really a serious foray into P4? :rolleyes: ) Considering the wreck of a donor, use of an old DC controller and the fact I hadn’t even done the construction justice by attempting to oil anything prior (I was just too keen to see if it worked), I think it worked okay.

Then I went on to build a ‘sector plate’ based on that at Snow Hill, from an old door and bits n bobs lying around the modeling den, and gluing together a left and right hand paper template left over from the C&L kits mentioned earlier, upon which it was constructed. Surprisingly, that worked too, but has progressed no further from the image you see here:

IMG_0381.jpeg

Shane, really.

Anyway, apologies for hijacking your thread, Matt, but just to show that even the ‘odd mortal’or two (me, not you ;)) can at least broach the scale thang, and if you’re intending to use diesels as I suspect with your project, that should prove a little less daunting than the prospect of outside framed/inside framed, flexichas, shoe-horned horns, CSB/FBI/CID et al……

I guess you get the picture, Matt ;)

Good luck!

Jon
 

MartinWales

Western Thunderer
Welcome to the EM fold Matt!

As I am especially local to you, please feel free to contact with any questions you may have.

There's also Expo Summer in August too-well worth your time. Not only to meet others but see some wonderful layouts and stock up the workshop!
 

Pugsley

Western Thunderer
I modelled in EM for a number of years, I guess I technically still do as I've got some 4mm stock left and that's all EM. I sometimes wish that I'd committed to P4 for the full effect, but EM is definitely the pragmatic alternative. I think that there's the possibility that, if I had gone P4, I'd have got disenchanted with it as I'm not sure my skills were up to achieving the required tolerances.

It's worth it - the visual improvement in the track makes all the difference. I think you can get away with pulling the wheels out on a lot of modern models too, reducing the cost.
 

matto21

Western Thunderer
Hi all,

Thanks for all the comments and advice - it's much appreciated.

EM is certainly the pragmatic choice for me with, as above, the option to "adjust" the existing wheels a big help (both in terms of time, effort and cost).

Meanwhile, I haven't just been sitting here pondering - I have done some modelling too!

The Hornby BSO is on the finishing straight now. I've started the weathering and, while there's more to be done, it's getting there...I think.

BSO008.jpg

The underframe and roof need more work, but I'm going for "in-service", not falling apart!

BSO009.jpg

I think the Hornby Mk2E gives the Bachmann model a run for it's money!

Matt
 
Top