7mm Mid-Century mineral

Overseer

Western Thunderer
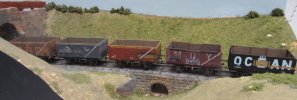
Mid-Century strikes me as a retrogressive appellation for a time when the world was looking to a bright future. Anyway I am starting this thread as a place to put my early 1950s mineral wagons. These are a distraction from other interests which started when I decided I wanted to try to replicate the dilapidated condition of coal wagons during the early years of British Railways. My other railway modelling interests had rolling stock in much better condition so much less scope for artistic interpretation. A couple of issues of Railway Bylines around 2000 had some nice close up photographs from multiple angles of typical wagons in service delivering coal, one was to Cheddleton Hospital and the other to Altrincham gas works. Some of the less common wagons have been seen on WT over the years as scratch builds but the bulk of the fleet is kit built and they have been more reclusive due to being unfinished. They are still all works in progress which get worked on when time and inclination coincide, but here goes. Still need to build an appropriate layout.

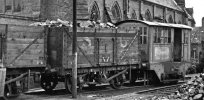
This is a copy of one of the Cheddleton photos which started this distraction.
SC Ched2.jpg

mc1.jpg
mc14.jpg

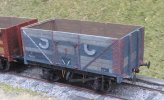
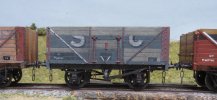
As a start, this is the ex Stephenson Clarke wagon. A Slaters RCH 1923 8 plank kit with POWsides and home made transfers. Still needs bottom door levers, top protection clips and finish painting.
mc3.jpg
mc8.jpg
mc9.jpg

More to follow.
 

Overseer

Western Thunderer
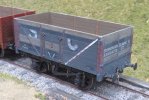
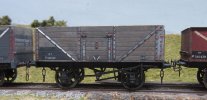
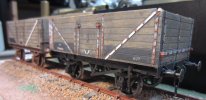
One of the other wagons featured in the same Railway Bylines article on the Cheddleton Hospital railway was an ex LMS RCH 7 plank wagon. This is still a work in progress and is the second wagon I have started to paint to match the photos. When I started building these wagons I knew very little about them and assumed that they were standard 1923 RCH standard wagons. They were, but with steel T verticals on the fixed end instead of the far more common timber. After I realised this I eventually worked out that Slaters sell a kit for the LMS 7 plank loco coal wagon with 2 fixed ends with the steel T verticals. So I bought a loco coal wagon kit and two standard 7 plank end door kits, One end was used for this wagon and the other for another, different, wagon which will follow. The two ends with wooden verticals were combined with the side door only sides to make a standard no end door wagon. Most of the LMS (and the LNER version) had three hole disk wheels so the wheels supplied in the kit were swapped over.
The ex LMS wagon appears to be in the remains of bauxite livery with unpainted replacement planks. I have scribed grain lines in the 'unpainted' planks before painting them. I find this helps retain the darker washes and adds to the finished appearance of the planks.
mc7.jpg
Plenty more fiddling with paint brushes required to finish this one. Needs rust, weathering on the bare timber and general distressing.
 

Osgood

Western Thunderer
A detail I have never consciously noticed before is the white strip above the iron strap - perhaps a case of simply assuming it will be the strap that is painted when looking at photos.
Were there any other examples I wonder?
 

Overseer

Western Thunderer
A detail I have never consciously noticed before is the white strip above the iron strap - perhaps a case of simply assuming it will be the strap that is painted when looking at photos.
Were there any other examples I wonder?
The standard position was on the iron strap but for some reason this one had been reapplied on the sheeting (planks). The photos show traces of white paint on the strap amongst the rust. It is the variations that add to the interest. Even with all the remnant previous liveries the simple BR application of numbers and tares in standardised positions visually ties the wagons together.
 

Overseer

Western Thunderer
After eating too much for the last couple of days it is Boxing Day and we will be heading down to the beach this afternoon.

With the other steel T verticals end from the LMS loco coal wagon I decided the build a steel underframe PO wagon as parts of one appeared in the Cheddleton photos. Instead of modifying the Slaters sides to have J shaped washer plates either side of the side doors I found a photo of another similar wagon online which matched the Slaters side, which may have been an ex Bolsover wagon. The sides need to be modified to reduce the height of the kerb rail along the bottom as steel underframe wagons only had timber covering the floor board ends without the overlap onto the underframe. The steel solebars are from Parkside, I can't remember how I ended up with a couple of spare solebars with springs. The ends of the headstocks also need to be modified to channel section. These wagons had 2 shoe Morton brakes instead of independent each side, modelled using Exactoscale brake shoes, and Ambis push rods and levers.

mc15.jpg
mc17.jpg

The original plan for a steel underframe PO wagon was to use the Parkside kit. This is of an 8 plank wagon and is quite a nice kit. The hinge detail is a bit undernourished compared with the Slaters rendition, and the axle boxes need a bit of work to improve their appearance. The problem is that the version of the RCH 8 plank wagon produced by Parkside was very rare. The only examples I have found were owned by Stephenson Clarke and they tended to have a fair bit of the livery still visible during the early 1950s. I didn't want to have too many SC wagons. I am still on the lookout for a suitable P number for this wagon but may end up painting in SC livery. The majority of the not very common steel underframed RCH 8 plank wagons had outside T verticals instead of the inside knees portrayed by Parkside.

mc19.jpg
mc18.jpg

If anyone has any suggestions for P numbers for the 8 plank wagon I would appreciate it.
 

Overseer

Western Thunderer
Thanks Ade, it is just a case of having a go and trying techniques. The first few may not result in the desired outcome but there is no loss in going over things and trying again.

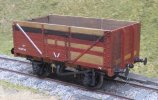
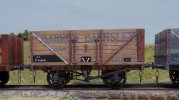
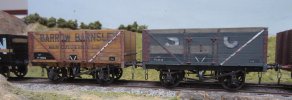
One thing I was keen to try was mechanical abrasion of lettering to show the body colour coming through instead of painting the body colour on top of the lettering. Slaters sell a preprinted kit of a Barrow Barnsley Colliery wagon and there are a few photos of these wagons during the 1950s. One is in John Hayes The 4mm Coal Wagon book and another is in the HMRS collection. They show different wagons in remarkably similar condition.

This is my interpretation. I need to take some more photos in different light as these don't look quite like the model.
mc13.jpg
mc12.jpg

The printed lettering was attacked with a fibreglass pencil. I decided to try using the Slaters brake mouldings instead of replacing them to see how noticeable it is. I did drill holes in the bottom of the brake blocks as they look a bit blank otherwise. The blocks are further from the wheels than I would like but that could happen in reality. I think they look ok, replacing the plastic safety straps with scale ones made form brass strip is a bigger visual improvement - still in brass in these photos.

Washes of white paint were used to fade the yellow before dark brown and black washes to dirty it. Still more to do to get it right.

Scrubbing off the lettering works with the older painted sides from Slaters but would not work on the more recent computer printed sides.
 

Dog Star

Western Thunderer
Scrubbing off the lettering works with the older painted sides from Slaters but would not work on the more recent computer printed sides.
Fraser, please explain why the lettering on more recent kits is not ameanable to your use of a scratch brush.

regards, Graham
 

Overseer

Western Thunderer
Fraser, please explain why the lettering on more recent kits is not ameanable to your use of a scratch brush.

regards, Graham
Graham,
Slaters used to spray paint the sides and ends in the base colour then screen print (or maybe pad print) the lettering. Both lettering and body colour is nice and thin. The recent ones, based on a single salt wagon bought a couple of years ago, are somehow computer printed as a single process so there is not necessarily any body colour under the lettering. The ink/paint is thick and looks pixelated. Overall I was very disappointed with the new production and would not buy any more of them. I will take some photos. I have one more of the old type prepainted wagons in the box to build sometime.
 

Overseer

Western Thunderer
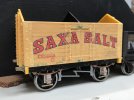
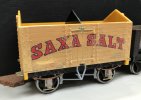
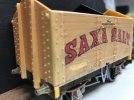
Further to the last post, this is one of the Slaters Saxa Salt wagons, after a yellow wash in an attempt to fade the yellow. The lettering is really thick, as is the 'paint'. The Non Pool lettering was badly out of registration on one side so I tried to scrape it away. Ended up taking it back to plastic and now need to fill the cavity before applying new Non Pool lettering.
ss2.jpg
ss3.jpg
ss1.jpg
It is probably salvageable but the texture means it needs to be viewed from a distance. Pity as the Slater s moulding is very nice. If anyone is wondering why I didn't buy the Dapol Saxa Salt wagon instead it was because that has the pre war lettering style and I would have needed to change the wheels etc anyway.

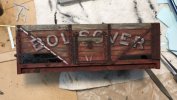
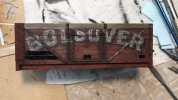
More on the fibreglass brush distressing is this guinea pig where it has been used to remove the red topcoat. One side is hand painted to match the well weathered example featured in a photo in MRJ issue 151. The other has POWsides transfers which are quite a different letter form, not sure why two different styles were in use on Bolsover wagons. Both sides are very much works in progress. I wanted at least one Bolsover wagon as I used to have meetings at Bolsover Castle while working for English Heritage between 1993 and 1995 and watched the colliery and railway being demolished.
bo2.jpg
bo1.jpg
 

Overseer

Western Thunderer
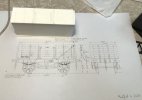
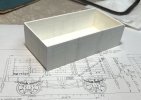
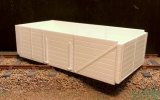
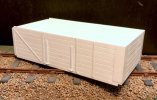
Another on the list of wagons I want to provide variety amongst the RCH 1923 wagons was started in a few spare hours today. An ex Midland Railway diagram 673 side, end and bottom door wagon. These had a 9'6" wheelbase, wide side doors and unusual vertical washer plates on the fixed end sides. All 1.5mm styrene so far, scribed for the planks. I am using Len Tavender's drawing of the related D607 wagons in 'Railway Equipment Drawings', modified by penciling in the diagonal strapping on the end door end.

mr6732.jpg
mr6731.jpg

No rush for this one now the basic carcass is assembled, I will add the strapping and bolts when I am in the mood.
 

Overseer

Western Thunderer
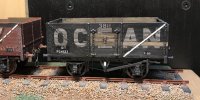
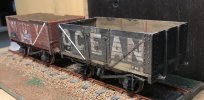
The Ocean wagon glimpsed in the first post has had a white wash followed by a dirty black wash to get some way to completion. I am aiming to achieve something like the condition seen in a 1954 photograph in the private owner wagon collection on the RCTS website - Private Owner Wagons. I bought POWsides transfers for this wagon quite a few years ago but not sure where they got to so I drew and printed some waterslide lettering to suit the wagon.

ocean1.jpg
ocean2.jpg

Rust and more colours to be added.

Predictably, having mentioned there was no rush I have added most of the strapping to the Midland D673 wagon. 5 thou for the corner plates, 10 thou for the strap work and 30 thou for the hinges and inside knees filed to a taper.

mr6733.jpg
mr6734.jpg
 

Overseer

Western Thunderer
After a long delay with too much work involved there has been some progress on a few wagons. Some of the bolts have been added to the Midland D673, more to do.

mr coal.jpg

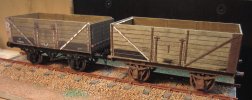
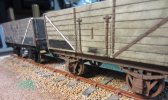
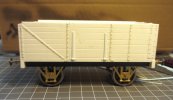
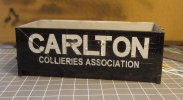
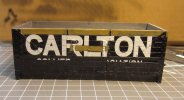
Another is an 8 plank RCH wagon in Carlton Collieries Association livery, or the remains thereof, based on an in train photo of one as P341574. They seem to appear in a number of photos and HMRS has a builders photo of one. A Slaters kit with home made transfers. The lettering is interesting as the letter shapes are quite non standard. The interesting thing is that the odd layout is not immediately obvious in the prototype photos. One side will follow the photo condition while the other will probably be in a bit better condition. Lots more fiddling to do to finish this one.

Carlton 8p2.jpg
Carlton 8p1.jpg
 

Overseer

Western Thunderer
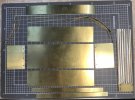
Instead of finishing the wooden (plastic) wagons above I felt like cutting up some brass to start a LMS diagram 1973 or 1974 copper bearing steel or wrought iron 20 ton loco coal wagon. There is a plan in place to replicate the additional angle irons fitted to the wagons early in their lives for use on the LMS loco coaling tower wagon hoists, but I will make sure it works before boring people with it.

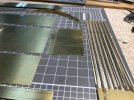
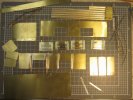
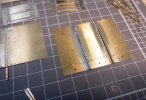
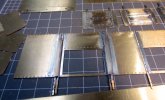
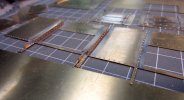
Just the major parts cut out using the guillotine and most of the rivets embossed. All the parts so far have been cut from a strip 150mm wide cut from the 300mm wide roll of 0.25mm brass shim. The curved pieces are the riveted parts for the T verticals and corner angles.

LMS d1974 IMG_4113.jpg
LMS d1974 IMG_4114.jpg
 

Overseer

Western Thunderer
Copper bearing? :confused:
Yes. Copper bearing steel is a generic term for weathering steels designed to form a stable oxide layer (rust) on the surface. Corten steel is one of the proprietary weathering steels developed during the 1930s and still in production, it has an alloy of copper, chromium and nickel in it. LMS ordered 500 wagons built from copper bearing steel to diagram 1973 and 500 built from wrought iron to diagram 1974 during 1936. Both drawings are the same apart from the material specified and would have been for corrosion comparison. There was a further batch in 1945 to D1974 but to a new drawing with RCH buffers and probably built from mild steel. Riveted construction avoided the difficulties of welding the copper bearing steel.
 

Osgood

Western Thunderer
Ah, copperbearing steel.
As read, I jumped to the bizarre notion that it was might be some kind of alternative to whitemetal axle bearings :rolleyes::))
Corten steel I have heard of, but not that it had a copper content.
:thumbs:
 

Overseer

Western Thunderer
Some progress has been made on the LMS diagram 1973/1974 mineral.

d1973 IMG_0697.jpg

The T verticals have been added to one end, simply one of the narrow rivet strips is soldered on, positioned on the scribed line, then the plain strip and the other riveted strip are soldered on, making sure enough solder flows to form the radius between the legs fo the T section. The thicker strips on the doors have also been added.
d1973 IMG_0703.jpg

The side verticals with the added angles to provide protection for the wagon when on the coming tower wagon hoists are the unusual feature of these wagons. The recent plastic kit in 4mm from Chivers just has solid blocks to represent these but that wouldn't work in 7mm scale. I wasn't sure if my idea to represent these would work but it has. I milled parallel slots in a length of 3mm thick brass, cut sections of them out and filed to size. The vertical of the T is thicker than the strip used on the end verticals as it represents the original T plus two layers of the added angles. I cut the ends of the T flanges back and filed the centre narrower at the ends to represent the unprotected parts of the T. I decided to mill the sections instead of assembling lots of separate parts as I think holding all the pieces in place while soldering would be difficult while this way is just like assembling the T sections on the ends.

d1973 IMG_0699.jpg
d1973 IMG_0698.jpg
d1973 MG_0701.jpg

Now that In have proven that it will work I need to find some time to finish it.
 

simond

Western Thunderer
Yes. Copper bearing steel is a generic term for weathering steels designed to form a stable oxide layer (rust) on the surface. Corten steel is one of the proprietary weathering steels developed during the 1930s and still in production, it has an alloy of copper, chromium and nickel in it. LMS ordered 500 wagons built from copper bearing steel to diagram 1973 and 500 built from wrought iron to diagram 1974 during 1936. Both drawings are the same apart from the material specified and would have been for corrosion comparison. There was a further batch in 1945 to D1974 but to a new drawing with RCH buffers and probably built from mild steel. Riveted construction avoided the difficulties of welding the copper bearing steel.

Thank you, Fraser,

that started a rabbit hole…


of which I have not yet plumbed the depths, as Googling such things at breakfast leads to lateness in the office!
 
Top