Nick Dunhill's workbench - Gladiator Kits LNWR 4-4-2T Precursor tank.

mickoo

Western Thunderer
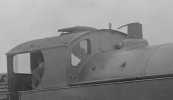
Nick, Dave is right, the etched part on the cab front should form the angle that bolts to the cab, it needs to be about 0.8-1.4mm greater diameter than your rolled boiler. The kit probably wasn't designed like (boiler too large and fitted over the raised bit) that but by luck it should just work and you'll have a prototypical flange.

It's hard to see but it is there, once your boiler is fitted then add a half width boiler band to the boiler to butt up against the raised bit on the front of the cab, LNWR seem to differ in that their clothing angle has a fillet to the inside corner and not a sharp crease like normal angles. solder the seam and dress with a round file will solve the problem.

Image.jpg
 
Last edited:

simond

Western Thunderer
still got your V85TT?

the big GS has to go at some point, maybe the end of the summer this year, I quite fancy a TT. (But then I fancy a Stelvio, a Mandello, an old Stelvio...)
 
Last edited:

simond

Western Thunderer
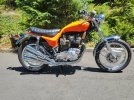
Wow, that’s a thing of beauty. And rare too. Looks immaculate!

I suspect it goes like a stoat on steroids, but what are the brakes like?
 

Nick Dunhill

Western Thunderer
One of the yokes has an alarming crack. It's really just a Rocket 3 with lower gearing. Good fun though, but does have max posing value. It's got those BSA/Triumph conical hub front brake that is somewhere between adequate and poor. Rear brake is good. There's a lot of Lucas though.....
 

Lancastrian

Western Thunderer
isn't that a bit like winning a walking race? :)
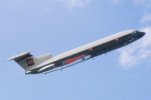
Ok, I'll rewrite the statement.....it held the record for the fastest sub-sonic crossing of the Atlantic by a commercial aircraft for 41 years. Beaten by 5 minutes in 2020 by a 747, which was assisted by Storm Ciara.
 
Last edited:

King Crab

Western Thunderer
I went in and out of Gibraltar on commercial flights several times.
The runway always seemed very small, and it included a public road across one end.
There was a bit of remedial sweeping up going on before take off and landings.....

PK
 

Nick Dunhill

Western Thunderer
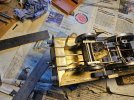
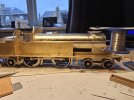
Well the over dramatic picture of the cab front (see last week's post) didn't become a problem. The boiler fitted over the raised former.....just!
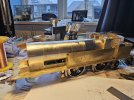
53650900700_c8f23da9d9_b.jpg

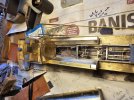
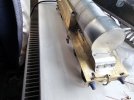
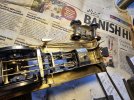
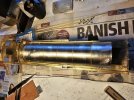
I spent the beginning of the week fitting everything up. First rolling the boiler and fitting the formers, and creating the firebox sides. I know it can't really be seen but it seemed more professional than to just cut a hole for the motor. I put a piece in for the front of the firebox, so that if anyone stares under the boiler with a powerful torch, that area of the boiler will be closed. There were some in-fill pieces to be added around the top of the cylinder block and smokebox rear area. I also added boiler bands, largely because I find it therapeutic, and the cleats at the bottom of the boiler. The L section infill piece between the front of the cab was made in the usual way. I scored the shape of the end of the firebox onto a sheet of thin nickel silver and cut it out. Then scored a line 1.2 mm round this, and carefully cut this out. This produced a thin horseshoe shaped strip of brass that I could solder to the end of the boiler. A thin boiler band was then soldered up to this to replicate the L section. Theres a cover plate at the top of the cab front, that partly covers the L section. I soldered this to the vertical portion of the L section. It'll eventually be soldered to the cab front, so no possibility of the painter breaking it off!
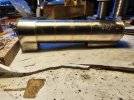
53650785734_67e10f80a7_b.jpg

I made wash out plugs, and then repeated the whole process again to make a second boiler assembly! Of course it was much quicker second time round!
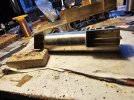
53650901215_0f5126fbbd_b.jpg

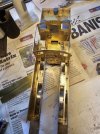
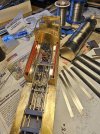
With the boiler fitted up it was time to close up the water tanks. I cut out around 30 panels to do this. The base of the water tanks are raised up 6'' above the footplate top, and the tanks have arc shaped splashers for the driving wheels let into them. If you zoom into the next picture you can see that I have not bothered to clean up my blobby soldering as it will be internal.
53649564457_cd7cf46cd6_b.jpg

53649564542_35d40491d4_b.jpg

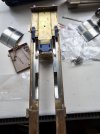
The inside of the tanks look a bit untidy, and you can see that I have added a couple of lead sheets inside the void for balast. (The client lives in a tropical climate and lines the lead to be painted with an acid etch primer to prevent any corrosion.) The underside of the model looks good though, and the tank splashers are worth the effort I think.
53649564582_5e8d9ca3a6_b.jpg

The remaining inner panels to close the tank are here ready to go, but I ran out of working week!

I should be able to get round to finishing the remaining details next week, now all the main structures are complete. I reckon I've used about 20% of the kit. I used the footplate, body sides, cab front and rear and bunker rear. Most of those parts were heavily modified though.
 

Nick Dunhill

Western Thunderer
53663631387_4156594dd3_b.jpg

The week began by closing the tanks. As you can see the RHS tank top has a tool pocket built onto the top of it. It is accessed by an inaccessible door on the footplate. The tool pocket was made from the kit etch for the tank top (it was too short for this purpose) so another part of the kit was used, so not all of the cost of the kit was wasted.

I then made the piano front for the valve chest. This was surprisingly difficult to make, it all had to be hand made. It doesn't open as the budgets were getting a bit squeezed by now.

53664737643_9b9b5d6169_b.jpg

Next up was all the plumbing for the vacuum brakes and steam heat. There was virtually nothing of any use in the kit for this. One of the kits had a very poor quality front vacuum pipe, but the other just had some generic hoses. Luckily LGM did a decent casting for the front vac pipes, the rest had to be handmade using odds-and-sods in my bits-box. Jobs like this burn up the budget, and ideally the kit would contain more parts that are useful.

53663631177_0c2813695c_b.jpg

53664860749_904cbfcab4_b.jpg

I then moved on to the pipework and handrails on the boiler. Again the castings provided were a bit inadequate. I had to make 4 elbows for the ends of the pipes. The pipes themselves are fashioned from 2.0 mm thin walled tube, as it was easier to drill and solder in the handrail knobs. The pipe down the RHS of the loco has some mini pipes and flanges that enter the smokebox. These were the last parts that I made this week. Care had to be taken drilling the holes for the elbow and mounting pegs for the pipes, then they had to be moved about slightly to make them horizontal and straight.....all good fun!

53663631312_7d130ae0eb_b.jpg

53664504106_73d9278a25_b.jpg

I should finish the locos next week, as there's not a lot left to do. I'm going to make a JLTRT 10001 as a palate cleanser next.
 
Top