34091 Weymouth
Western Thunderer
I've been working my way through the pdk 56xx kit that I purchased last year when it was released. I had intended to make a start over Christmas but various things got in the way. I'm building this in 00, I've decided to stick with 00 now if I am to actually get any kind of layout off of the ground.
As with most of the pdk kits they have a no nonsense approach with kits that build well. I've made many of them & they are excellent models & value for money.
To start with I built up the chassis, the kit comes with the option of twin compensation beams which is a foolproof design & aids good running. The chassis offers 00 & separate EM spacers for the modeller. The chassis has a fold up set of frames with 3 separate spacers to fit to make a solid set of frames to build upon.
If your reading this & thinking of making a kit for the first time I can highly reccomend a pdk. In 00 you don't even need any chassis jigs etc to make it.
Within a couple of hours of starting I was already at the rolling chassis stage with the footplate added.
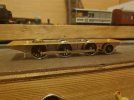
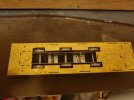
The spring for the compensation beams just needed teasing out a little to give a good friction fit to hold the beams in place. At this point I called it a day.
The next little session I had was to form the curve on the front tank & add the overlay & tank top. Silly me missed cutting out the doorway so I had to do this in situ whilst retaining the door on the tank cab former. The smokebox saddle was also fitted to the frames & I cleaned up the cab front & back & plonked it in place. The part fit on this kit is superb it literally falls together & has been a real joy so far to build.
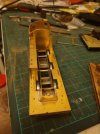
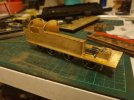
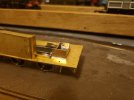
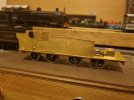
The final session to press I had yesterday evening & repeated the tank stage firstly & got both of the sides completed with overlays. The instructions tell you to fit the tank inners first & then form the overlays & solder on afterwards. I formed the pair & sweated them together before fitting them too the footplate. This meant I could get the curve at the front perfect on each part.
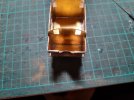
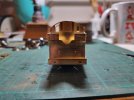
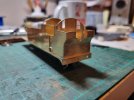
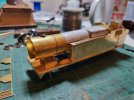
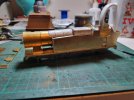
Once this was done I soldered up all the parts to the footplate. The cab is designed so it tabs into the sides aswell as the footplate floor so it goes together squarely with ease. I finished up doing the bunker with its former & overlay to finish the session off. After a good clean up I couldn't resist sitting the boiler pieces on the model to get a feel for the loco.
I shall keep you posted on progress,
Music in the workshop came courtesy of God himself with yet another corking track.
Cheers
Si
As with most of the pdk kits they have a no nonsense approach with kits that build well. I've made many of them & they are excellent models & value for money.
To start with I built up the chassis, the kit comes with the option of twin compensation beams which is a foolproof design & aids good running. The chassis offers 00 & separate EM spacers for the modeller. The chassis has a fold up set of frames with 3 separate spacers to fit to make a solid set of frames to build upon.
If your reading this & thinking of making a kit for the first time I can highly reccomend a pdk. In 00 you don't even need any chassis jigs etc to make it.
Within a couple of hours of starting I was already at the rolling chassis stage with the footplate added.


The spring for the compensation beams just needed teasing out a little to give a good friction fit to hold the beams in place. At this point I called it a day.
The next little session I had was to form the curve on the front tank & add the overlay & tank top. Silly me missed cutting out the doorway so I had to do this in situ whilst retaining the door on the tank cab former. The smokebox saddle was also fitted to the frames & I cleaned up the cab front & back & plonked it in place. The part fit on this kit is superb it literally falls together & has been a real joy so far to build.


The final session to press I had yesterday evening & repeated the tank stage firstly & got both of the sides completed with overlays. The instructions tell you to fit the tank inners first & then form the overlays & solder on afterwards. I formed the pair & sweated them together before fitting them too the footplate. This meant I could get the curve at the front perfect on each part.


Once this was done I soldered up all the parts to the footplate. The cab is designed so it tabs into the sides aswell as the footplate floor so it goes together squarely with ease. I finished up doing the bunker with its former & overlay to finish the session off. After a good clean up I couldn't resist sitting the boiler pieces on the model to get a feel for the loco.


I shall keep you posted on progress,
Music in the workshop came courtesy of God himself with yet another corking track.
Cheers
Si
