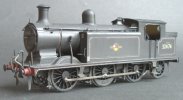
7mm SERKits SECR O1 Build

PaulR

Western Thunderer
Hi Everyone,

I started building this 7mm loco about a month ago and it's probably going to take all winter. It's by far the most challenging kit I've built although I have every reason to believe that it's well designed and the instructions look very comprehensive. The aspect that is particularly new to me is the cast resin boiler, a material that I'm unfamiliar with.

Most SERKits kits are for the South Eastern Railway era so I'm going off-piste a bit here by building it as the Wainwright rebuild running in the mid-1930s. Dan Garrett was able to provide all the parts for this version though, so it's down to me. I've decided that if I post a thread on it, I'll be more inclined to get on with it and to do my best - well, that's the theory anyway!

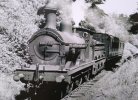
Here's my chosen loco - 31048, but I'll be building it as SR 1048 in unlined black and can't wait to get stuck in!
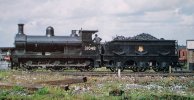
01 31048 2.jpg

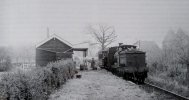
And here she is on the KESR in 1952.

O1 1048 KESR 1952 3.jpg

At the moment I'm working on the loco frames - I'll post photos in the next few days.
 

PaulR

Western Thunderer
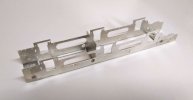
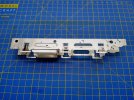
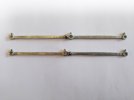
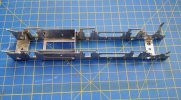
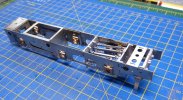
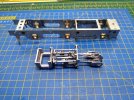
All the etchings are nickel silver and look very elegant. Does anyone else thing that sheets of etchings are a work of art? It almost seems a shame to cut into them, but the satisfaction lies in the knowledge that with care they can be turned into a detailed three dimensional model. Here is an early photo of the loco frames and another after some initial work has been done, fitting the firebox sides which also include the two rear hornblocks. These are located with brass rods through the frames which are then removed.

27-07-23.jpg


04-08-23 2.jpg
 

Bullhead

Western Thunderer
Paul, I share your views on etched sheets and have been known to get unbuilt kits out just to enjoy them in the flat.
Will be following this with great interest having long admired the class in late KESR days. A 4mm version is on my shopping list. Good luck with the build, Peter
 

PaulR

Western Thunderer
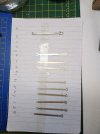
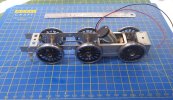
The front hornblocks are fitted separately and I don't have the confidence to fit them without reference to the coupling rods, so I made these up next. There are a lot of parts, three or four to each rod, so I carefully ordered them to make sure they were soldered in the right order. The resulting rods certainly look the part and I was able to use them in a jig to get an accurate measurement. The axles will be spring assisted.

06-08-23 1.jpg 11-08-23 1.jpg

12-08-23.jpg
 

PaulR

Western Thunderer
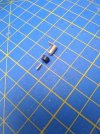
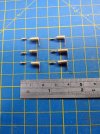
An interesting stage in the build is making your own plunger pick-ups. A plastic sheath is provided to shield the frames from the electrics, and some brass rod and tube. I shaped these with files, fixing the parts in a mini drill turned sideways. The results are small and pleasing. A length of spring is provided which will gently press the plunger against the back of the wheel. I'm yet to be convinced that my particular efforts will all work efficiently. If not, I have some Slaters plunger pick-ups in stock. They are fiendish though and were fun to make.

14-08-23 1.jpg 15-08-23 1.jpg
 

PaulR

Western Thunderer
The hornblock tabs were tapped for 12BA bolts and the frames set up to check basic running. I had an old ABC Mini gearbox with a dodgy motor, so I cleaned it up and returned it to have a new motor fitted. It fits in nicely and hopefully will be enough for my purposes, hauling short trains or shunting a few wagons.

24-08-23.jpg
 

PaulR

Western Thunderer
I'm very aware that all I'm posting is photos of model locomotive frames, so by way of contrast I'm going to add one of my very favourite images, which is currently on my laptop home screen (even in preference to my gorgeous granddaughter!).

It's an O1 at Frittenden Road on the K&ESR in November 1953 - in the last weeks before closure. It was taken by SC Nash and I don't have copyright (hope that's OK). The loco is 31064. It oozes with the atmosphere of a late autumn day, and the oast houses in the misty background. I challenge any of a romantic nature not to be moved by it!

IMG_20221118_073725373_2.jpg
 

Northroader

Western Thunderer
I think with the plunger pickups which have a spring fitting inside a plastic bush, you have to be in and out with a soldering iron very quickly, or the heat runs far enough to melt the spring into the bush. So have the tags on the plunger ready tinned, also the wire leads off to the motor, then a very quick dab with the iron. With the Slaters pickups, I’ve found you can assemble the unit outside the frames, with the tag ready tinned, and those little nuts on the plunger spindle really tight (you can never get at them once they’re between the frames) then the feed wires brought through the holes in the frames for the pickups, soldered on with a quick dab, and it’s possible to feed the unit back into the frame hole from the outside all made up.
Nice photo of the KESR.
 

AJC

Western Thunderer
I'm very aware that all I'm posting is photos of model locomotive frames, so by way of contrast I'm going to add one of my very favourite images, which is currently on my laptop home screen (even in preference to my gorgeous granddaughter!).

It's an O1 at Frittenden Road on the K&ESR in November 1953 - in the last weeks before closure. It was taken by SC Nash and I don't have copyright (hope that's OK). The loco is 31064. It oozes with the atmosphere of a late autumn day, and the oast houses in the misty background. I challenge any of a romantic nature not to be moved by it!

View attachment 196009

Not many stations where the back of the platform was marked with privet - bucolic, even for one of Colonel Stephen's enterprises!

Adam
 

PaulR

Western Thunderer
I think with the plunger pickups which have a spring fitting inside a plastic bush, you have to be in and out with a soldering iron very quickly, or the heat runs far enough to melt the spring into the bush. So have the tags on the plunger ready tinned, also the wire leads off to the motor, then a very quick dab with the iron. With the Slaters pickups, I’ve found you can assemble the unit outside the frames, with the tag ready tinned, and those little nuts on the plunger spindle really tight (you can never get at them once they’re between the frames) then the feed wires brought through the holes in the frames for the pickups, soldered on with a quick dab, and it’s possible to feed the unit back into the frame hole from the outside all made up.
Nice photo of the KESR.

Thanks for that advice Northroader - I'll be very careful. I'm keeping my fingers crossed with it, but if it all goes 'belly up' I have a set of Slaters ones in reserve. Either way, I'll do my best to be brief with the soldering iron. It's going to be a hairy moment - or rather, six hairy moments!

Paul
 

PaulR

Western Thunderer
Anyway, back to photos of loco frames. Having set up the hornblocks and checking that everything is in its place, the next task was to build the dummy Stephensons valve gear. These are whitemetal parts and as an engineering dummy myself, putting it together was quite instructive. Once again, the instructions were comprehensive and it all went together well after the usual cleaning up of parts which whitemetal requires. Here is the first stage set temporarily in place. Once it has all glued up solid you cut away a section underneath to enable free movement of the front axle.

05-09-23 3.jpg
 
Last edited:

PaulR

Western Thunderer
Here's the finished set up.

14-09-23.jpg

At this stage the instructions suggest painting the frames and valve gear so it is all currently in the paintshop. Due to space constraints, 'In the 'paintshop' means putting everything else away and setting up my airbrush and extractor on the bench. I'm painting the wheels at the same time. I've chosen satin black.

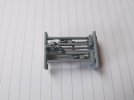
There was an added bonus to constructing this valve gear. I have a 7mm Roxey Mouldings E4 which I build nearly twenty years ago. It has always had an embarrassing gap under the boiler. I've made up an impression of valve gear out of Plasticard, copying the set for the O1. It's truncated because only a small area is visible and it needs to fit around the axle and plunger pickups. It might look a little crude but I hope that after painting it will give the impression of some serious gubbins between the frames - I'm afraid I'm not very scientific about these things. When it's finished I'll post a photo.

E4 valve gear 2.jpg
 
Last edited:

PaulR

Western Thunderer
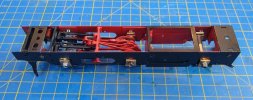
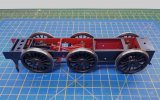
This posting brings me up to date so from now on progress will be contingent on modelling opportunities as set against life's other pressures - and my mojo. Actually, my mojo is in great shape at the moment and I'm loving working in 7mm again.

25-09-23 3.jpg

25-09-23 6.jpg

Before setting up the frames I want to add weathering to the outside of the frames so that I don't have a struggle behind the wheels later. There is also piping, brakes and sandboxes to add which need a consistent weathered finish. Although the instructions are leading me to get the loco running at this stage, I'm reluctant to commit before these things are added and painted. I need to think about this; it's the joy of these projects!

I've also decided to start working on the tender frames so that they can be weathered at the same time for consistency.

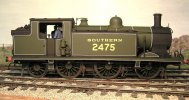
Firstly though, I've already taken a side-road because I've stripped down my old Roxey E4. After twenty years the undercarriage was filthy! I've given it a good clean-up and along with all my 7mm locos, I'm converting it to DCC with sound. This model is a little crude by modern standards but I'm very fond of it and there are some upgrades planned. It has an important future on my planned layout.

P6260007.JPG
 

Scanlon

Western Thunderer
Paul, 2475 looks fine. Fellow modellers tell me never revisit an old model other than installing DCC etc. This is my E4, (3)2474!
32474 E4-a.jpg
My first build and while the lining is rough and ready I have no plans to update the loco. This is an MSC kit with a Roxey boiler and smokebox saddle.
Thoroughly enjoying your build of the 01.
Roger
 

PaulR

Western Thunderer
Paul, 2475 looks fine. Fellow modellers tell me never revisit an old model other than installing DCC etc. This is my E4, (3)2474!
View attachment 196884
My first build and while the lining is rough and ready I have no plans to update the loco. This is an MSC kit with a Roxey boiler and smokebox saddle.
Thoroughly enjoying your build of the 01.
Roger

I like that Roger, thanks for sharing. I think these are wise words and I will heed them. Cosmetically, I'll do a few tweaks like making the whistle a sensible colour and some more subtle weathering. I've always thought that a loco which moves smoothly but is slightly crude has a much more convincing quality than a beautifully finished one which moves like a dog!
 
Top