AdeMoore
Western Thunderer
Chris, Mike and Brian on my new members thread indicated they may be interested in seeing what I’m up to on the bench. (It’s an old School desk!).
I will start by saying this is pretty ambitious as a first build. I’ve not built anything other than a Parkside wagon a card station kit free with a mag, and a scratch over bridge before that’s it, 20 years ago.
Quick background I made a layout for my son now 26, expanding on a TTE set 19 years ago maybe. After a year or so it was mothballed and the stock and bits boxed. Last autumn I got pretty ill just an escalation of reactive arthritis I’ve had all my adult life. So getting out and about was becoming difficult. With an interest in model railways rekindled, I think due to something that came up on my timeline on FB, I started browsing eBay as my main interest is S&D I eventually won a West Country loco. Then I started browsing RMweb when I found that, Jack my son got the baseboards out the loft for me, said he wouldn’t want them in his house.
So I put it together after being allocated the spare room. Next I got double pneumonia and had a stay in intensive care etc. On returning home to further recover I thought all this spare time I’ll commence the No.5 build I dreamt of 19 years earlier.
I had bought many items then from Challis Models in Shepton Mallet for the build. I couldn’t find all my MRJ articles on the 7mm build but putting out a call on RMweb Dave Sutton came to my rescue.
I always had the notion I would reduce the drawings by photocopier and so it proved.
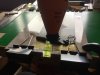
Now first off Dave Sutton wanted to build one himself so set about a plastikard mock up ready for some etch drawings he was producing. He mentioned the axle centres at 24mm I measured my photo copy I had 19mm what I should of done is mark 7mm on the sheet and made sure it measured 4mm coming off the photocopier. I’ve now read I should reduce by 57% I don’t think that was the figure I came up with when I did it. So photo above is the close shave nearly building it to small!

Below soldering two frame blanks 0.5mm together.

So confined to barracks not allowed out snow just gone can’t use the pillar drill in the shed. I have to use my multi drill heath robinson style to do any drilling.

4mm hornblock guides to big! But I have a plan.

Axle holes


Awful drilling below as I struggled to magnify what I’m looking at and drill control.

I decided to open up the holes to get them nicer rather than try to fill them.


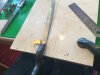
Filing the footplate side flat after cutting the frames from the sheet.

That’s it only 15 photos allowed so it will be many posts yet.
Cheers
I will start by saying this is pretty ambitious as a first build. I’ve not built anything other than a Parkside wagon a card station kit free with a mag, and a scratch over bridge before that’s it, 20 years ago.
Quick background I made a layout for my son now 26, expanding on a TTE set 19 years ago maybe. After a year or so it was mothballed and the stock and bits boxed. Last autumn I got pretty ill just an escalation of reactive arthritis I’ve had all my adult life. So getting out and about was becoming difficult. With an interest in model railways rekindled, I think due to something that came up on my timeline on FB, I started browsing eBay as my main interest is S&D I eventually won a West Country loco. Then I started browsing RMweb when I found that, Jack my son got the baseboards out the loft for me, said he wouldn’t want them in his house.
So I put it together after being allocated the spare room. Next I got double pneumonia and had a stay in intensive care etc. On returning home to further recover I thought all this spare time I’ll commence the No.5 build I dreamt of 19 years earlier.
I had bought many items then from Challis Models in Shepton Mallet for the build. I couldn’t find all my MRJ articles on the 7mm build but putting out a call on RMweb Dave Sutton came to my rescue.
I always had the notion I would reduce the drawings by photocopier and so it proved.
Now first off Dave Sutton wanted to build one himself so set about a plastikard mock up ready for some etch drawings he was producing. He mentioned the axle centres at 24mm I measured my photo copy I had 19mm what I should of done is mark 7mm on the sheet and made sure it measured 4mm coming off the photocopier. I’ve now read I should reduce by 57% I don’t think that was the figure I came up with when I did it. So photo above is the close shave nearly building it to small!
Below soldering two frame blanks 0.5mm together.
So confined to barracks not allowed out snow just gone can’t use the pillar drill in the shed. I have to use my multi drill heath robinson style to do any drilling.
4mm hornblock guides to big! But I have a plan.
Axle holes
Awful drilling below as I struggled to magnify what I’m looking at and drill control.
I decided to open up the holes to get them nicer rather than try to fill them.
Filing the footplate side flat after cutting the frames from the sheet.
That’s it only 15 photos allowed so it will be many posts yet.
Cheers