Antipodal in the UK: a brake with a past

Overseer

Western Thunderer
I don't suppose they have a colour chart for weathering effects, do they?
S'pose not, they all go grey.

They start out nice colours though.
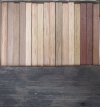
hardwood.jpg

From the right - Southern Mahogany, River Red Gum, Red Ironbark, Blue Gum, Candlebark (not on NZR list), Red Stringybark, Grey Box, etc. Interesting that NZR used a lot of timber types which were not considered durable in Victoria.

The old timber is a 150 year old split shingle made from Mountain Ash, a sleeper would usually be a paler grey. Australian sleepers were not treated or creosoted, presumably NZ was the same with the imported timber.
 

Lyndhurstman

Western Thunderer
Pivotal
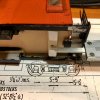
The ongoing search for fidelity has found culprits. The bosses for the bogies are not in the right place. They’re approximately 2mm (5” full-size) forward of where they’re supposed to be. No wonder there’s interference issues… Sad that the drawing isn’t reduced to the correct scale, either…
E146D9CF-C2EB-4DCF-B830-F016EC289E61.jpeg
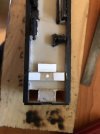
It was ‘fun’ removing the epoxied screws from the holes; fragile stuff, this resin.

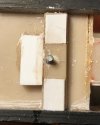
The holes were drilled out to be a tight fit on some Plastruct tube (I had no rod of size). This was held in place with Roket Glue and then drilled out to take a smaller rod, again glued in place. Then - once the glue had dried - the new hole was marked, and drilled (2mm). Before drilling, I glued a couple of blocks hard against the bosses, to ensure there was no splitting of the resin as I drilled.

F26257C2-E08C-4898-89F8-508A39ED33CE.jpeg
743B8D64-D341-4A28-88B2-6FD9790FA958.jpeg
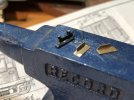
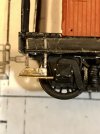
Next up we’re the steps; the horrible bulk of the whitemetal casting is being replaced by a some finer examples, sourced from 5mm strip, and bent up in my Hold & Fold. All good stuff (if you discount the panicked removal of a spillage of glue on the inside earlier today!).
5F1399F2-B15E-4BD9-8E89-03DEE8468D70.jpeg
Cheers

Jan
 
Last edited:

jonte

Western Thunderer
I really do admire what can be achieved and hurdles overcome with what appears - if you would permit me to be so bold by saying so, Jan ;) - only the most basic of tools.
But then, we need to throw ingenuity, tenacity and inherent skill into the mix.

Never mind, at least I have most of the basic tools, so I suppose that’s a start :(

jonte
 

Lyndhurstman

Western Thunderer
I really do admire what can be achieved and hurdles overcome with what appears - if you would permit me to be so bold by saying so, Jan ;) - only the most basic of tools.
But then, we need to throw ingenuity, tenacity and inherent skill into the mix.

Never mind, at least I have most of the basic tools, so I suppose that’s a start :(

jonte
Hello @jonte
Ah… thanks… I don’t have the space or free cash (especially now) to accommodate a paradigm shift in my arsenal. And I take pleasure in using skills and techniques that others have granted me; either through direct interaction, or via the printed page. It’s not just my journey, this confused wandering..

I’ve no clue if any of this is going to make any difference (obviously, to the world beyond it is as inconsequential as a swallow’s fart..) to the final outcome, but these moments bring me something. Not peace of mind (if you’d seen me dashing into the kitchen with a leaky vessel awash with Roket Glue this morning, you’d have visualised peak panic!). I just wish I didn’t feel so guilty about the monastic nature of it!

Thanks again

Cheers

Jan
 
Last edited:

Lyndhurstman

Western Thunderer
Rockin in the Free World

The tinkering has paid off.
Back and forth, and back and forth…
What was once a Straight Lines Only job has now morphed into something more accommodative. The moving of the bogie pivot point, and the relocation and remaking of the steps, combine to bring new life to a once-dormant kit.
7CE9A835-906B-42CD-9F62-04AAEBFD24E6.jpeg
Next, the roof need shortening. That might be a bit tricky, as it’s a big slab of cast resin.

Cheers

Jan
 

Lyndhurstman

Western Thunderer
Curves in all the wrong places
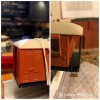
As intimated prior to, the roof - that wonderful shape that provides the ‘turtleback’ moniker- was found to be overlong. The body (supposed to be 30ft over headstocks) scales to around 28.87 ft. (28’ 10 7/16”). So the roof is (was) overlong by a couple of millimetres...

So, much marking and checking and marking and checking later, with the roof held tightly in the X-acto saw box, a cut was made in the flat underside with a new razor saw blade. Extreme care was taken, with frequent stops to check progress. Once the cut was made, the end was checked for square, and dressed.

After that, it was a trepidatious trial by file. The roof is a beautiful concoction of curves and angles. Frequent comparisons with the other end (eyeball only) we’re made.
43C5384F-65FD-4CB6-840A-1AEEB517E3E1.jpeg
It looks OK. For now :)

Cheers

Jan
 

Lyndhurstman

Western Thunderer
Railing Against
I can’t reconcile my eyes with the kit verandah railings. They appear over-heavy. And are almost impossible to get straight. So I’m on a journey to see if I can improve them.

First up is cheap and quick.
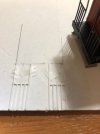
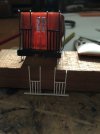
Using the blueprint as a basis. I drew of representation of the end on card, and used that as a jig to align Plastruct 0.6 mm rod. A bit flimsy, I think.

84149665-D2CB-4C62-A823-9A1DEB6DCC3E.jpeg
B83FF273-9329-4424-A702-2DA5B8128EC6.jpeg
I’m going to try nickel silver wire next, but I’m a bit concerned about heat spreading making it impossible to solder up.

I’ve just at https://nzfinescale.com/wp-content/uploads/2021/07/KS030-BP3866-30ft-Guards-van-instructions.pdf seen a version done with brass tube and electrical wire…although this one has less uprights than mine, it might be feasible…

Cheers

Jan
 

jonte

Western Thunderer
Railing Against
I can’t reconcile my eyes with the kit verandah railings. They appear over-heavy. And are almost impossible to get straight. So I’m on a journey to see if I can improve them.

First up is cheap and quick.
Using the blueprint as a basis. I drew of representation of the end on card, and used that as a jig to align Plastruct 0.6 mm rod. A bit flimsy, I think.

View attachment 168178
View attachment 168179
I’m going to try nickel silver wire next, but I’m a bit concerned about heat spreading making it impossible to solder up.

I’ve just at https://nzfinescale.com/wp-content/uploads/2021/07/KS030-BP3866-30ft-Guards-van-instructions.pdf seen a version done with brass tube and electrical wire…although this one has less uprights than mine, it might be feasible…

Cheers

Jan
Good luck, Jan; keep us posted :thumbs:

Jon
 

Lyndhurstman

Western Thunderer
Thank you @jonte
Eyes Down
So this is the basic method used by Lawrence Boul in his BP3866 3D print kit (something that’s a universe removed from this South Dock version of a 30 footer).

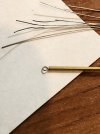
I’m using 0.75 mm brass tube from Albion Alloys (I don’t have any 0.6, and current fiscal considerations make it a luxury). And some 0.2 mm wire from the electrics from the old Watkins Wharf wiring loom.
26E51F53-0469-4EBF-A342-D2430FCF36AA.jpeg
The wire is bent around the outside of the tube, and then gripped with some parallel-jawed pliers. The tube is then spun, winding the wire tightly around it. Once done, it can be popped into the bore of the tube. Reasonably straightforward. The tube can be cut by rolling it under a sharp scalpel blade. I’ve done that before, for the buffer shanks on the VANWIDEs.

Cheers

Jan
 

Lyndhurstman

Western Thunderer
Stanchion Deliver #misheardlyrics :)
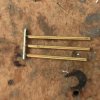
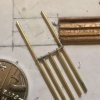
The feasibility study is over. The system works. A jig cut from some ply veneer helped. Dabs of solder paint on the ends of the eyelets for the three inside uprights and then the gentlest of kisses with the 25w iron while they were held in the jig.
FA307392-8AF4-4EDF-A4F7-E492A3F1AAE4.jpeg
The longer verticals were then added to the ends.
1E0CEB50-3BD2-482A-9F3B-1ED292E95545.jpeg
No real issues so far; other than eyesight!
The ‘feet’ are overlong as I intend to plant them in a then brass strip for strength. Once they’re soldered in to that, I’ll file them back flush.

Cheers

Jan
 

Lyndhurstman

Western Thunderer
End Game
So this is the finished result.
I’ve tied it together with a bit of nickel silver fret.

FD0FD312-C5F8-4F71-A763-BAB8D5BBA5D2.jpeg
There’s a slight bottom to top taper on the outside ends (creep in the calculation/marking/drilling phase; mea culpa.)

I posted my efforts on the Railways of NZ Modellers FB group Railways of NZ Modellers | Facebook last night, and got some very useful feedback from Lawrence Boul and others.

It seems that the three inside stanchions were a lot lighter than the outside ones: only 0.5” rather than the 1.5” that they kit has (and which I copied). So now I have to either look with one eye closed, and fit this version, or undo the assembly and rework with some finer wire. Sadly, my unforgiving self-critical mind is pushing for the latter….

Cheers

Jan
 
Top